
Overview
A Declaration for the application of the non-taxable part of the tax base and tax bonus – NCZD (we will use only “Declaration” or “Form” in this manual) is a document that you can fill in and send electronically via TULIP platform to your employer for further processing.
Please note a TULIP setup you see always depends on custom requirements and access settings of TULIP for your company. Not all companies use this functionality.
Workflow in TULIP

All workflow steps in TULIP
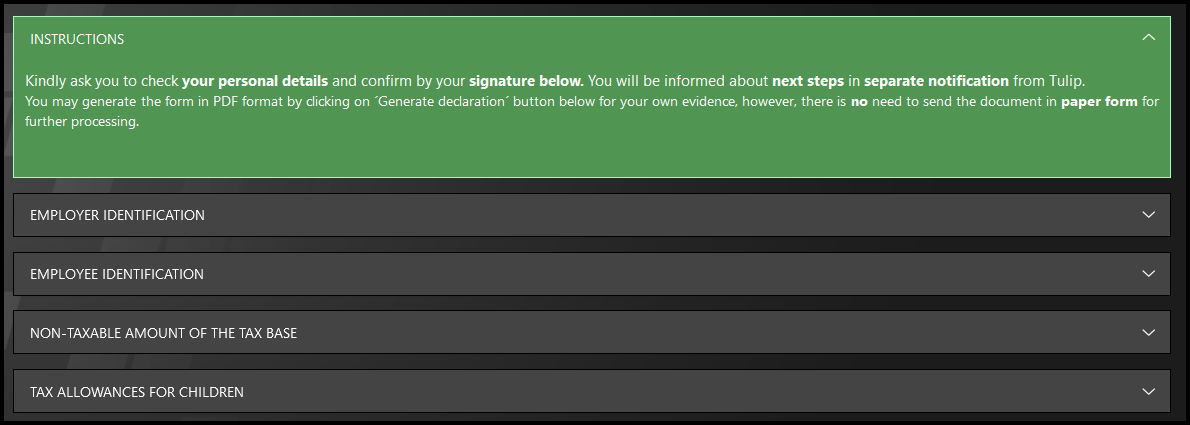
NEW DECLARATION – Employee fills in the Declaration form – Add your personal data & answer a few questions. You can save the form anytime, and continue editing the data later. Or, you can sign it immediately.
SIGNATURE – Employee signs the Declaration electronically – This step confirms all your data and sends it to payroll. You can no longer edit the data.
PAYROLL PROCESSING – Payroll/HR processes the employee´s data – If everything is OK, your request will be processed. If there is any issue, the form can be returned to you and you will receive an e-mail notification about that.
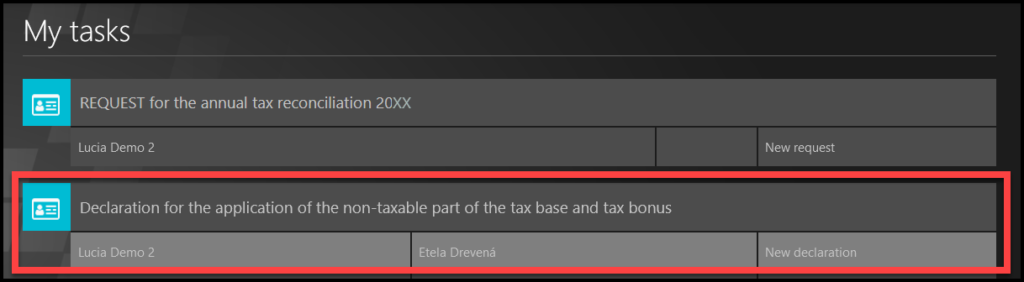
New declaration

The 1st workflow step in TULIP
Step 1 – Tile

Go to HR processes tile.
Step 2 – New declaration

Click on the New declaration button.
Step 3 – Personal data
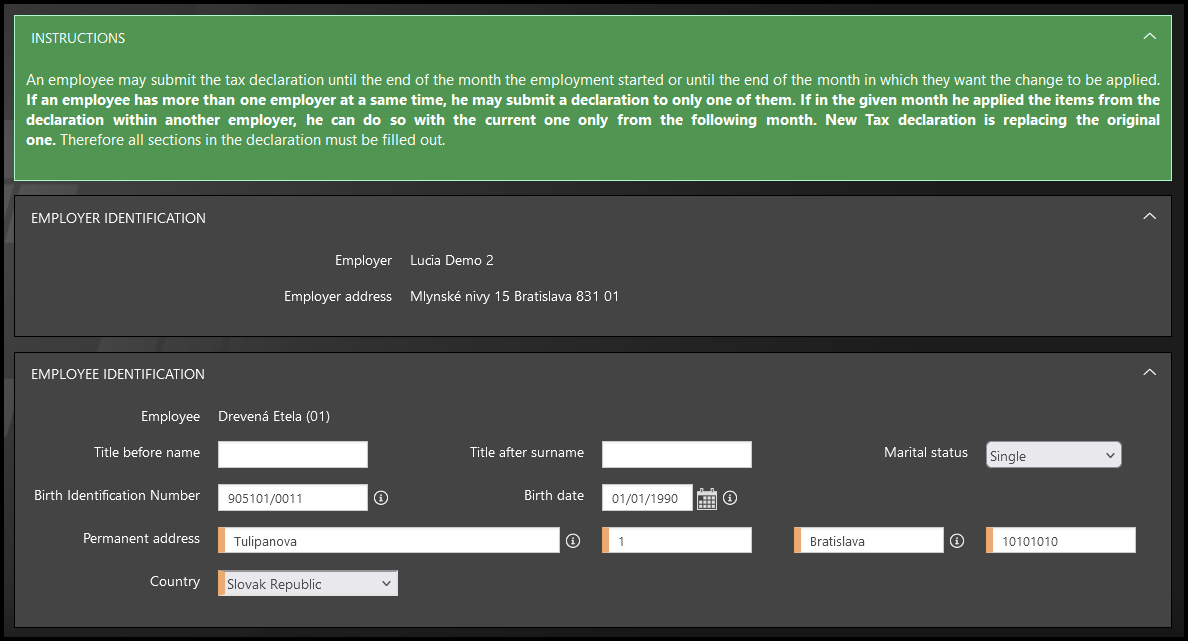
Fill in the Employee identification part.
You must fill in the fields with an orange stripe.
Step 4 – Questions
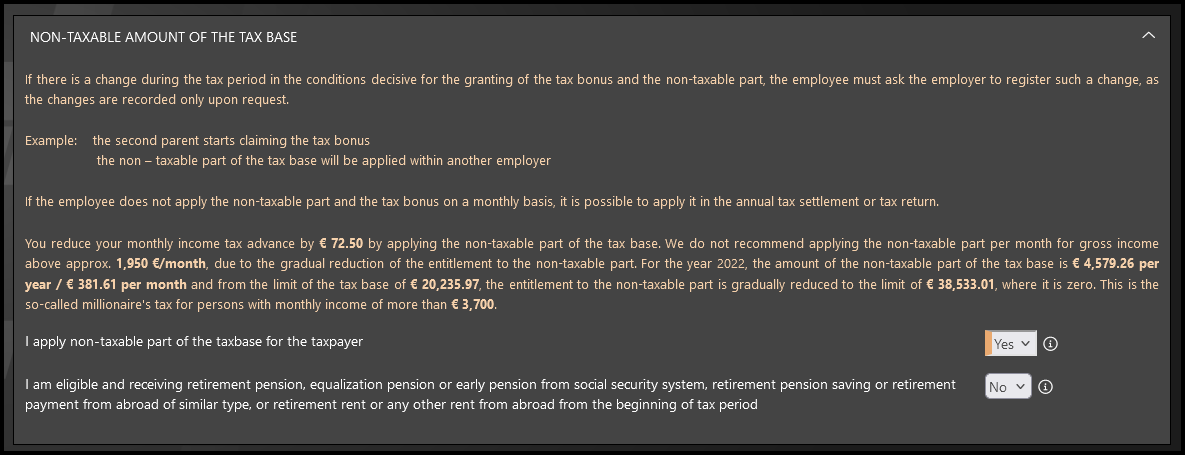
Answer the questions regarding Non-taxable amount of the tax base.

If you answer “YES” to both questions, the answer regarding the non-taxable part (the first question) will automatically change to “NO” and TULIP will also alert you with a pop-up message:
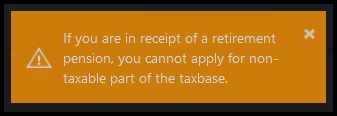
Pop-up message “If you are in receipt of a retirement pension, you cannot apply for the non-taxable part of the taxbase.”
Step 5 – Tax allowances for children
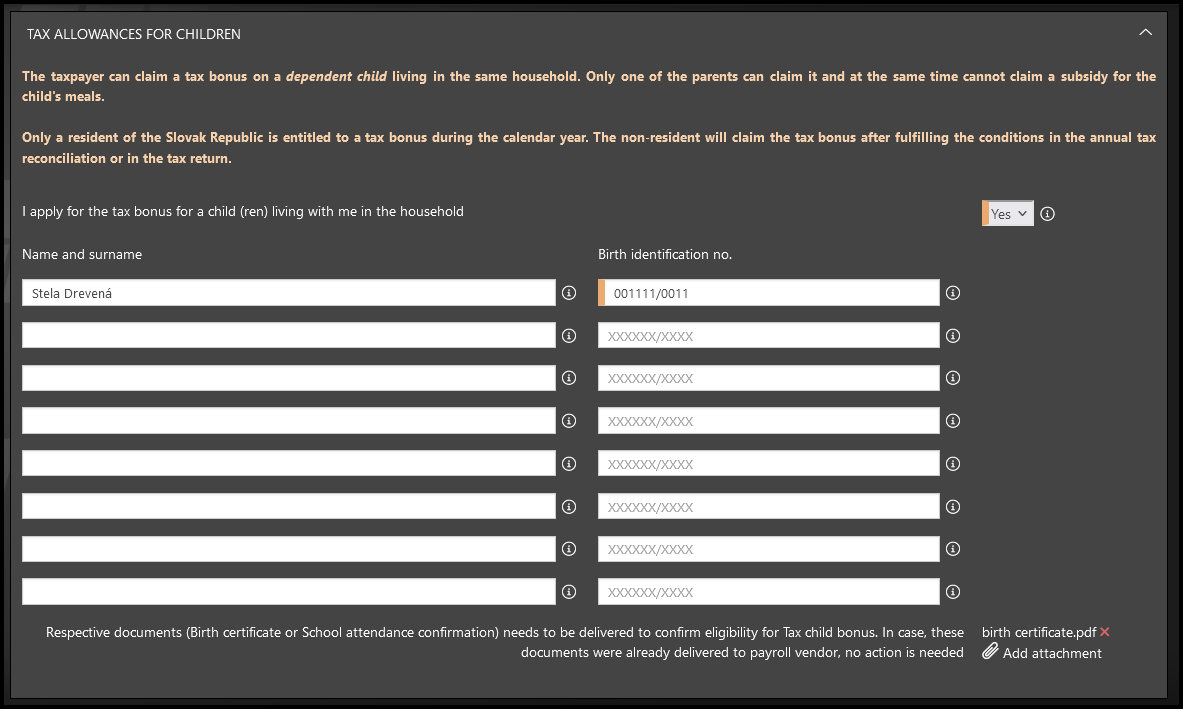
Answer the question about the tax allowances for children.
If you are applying for the tax bonus for a child living with you in one household, please fill in the child’s first and last name and the child’s birth number. If the child has not been allocated a birth number, fill in the child’s date of birth in the form YYYYMMDD/0000 instead.
Attachments (e.g. a copy of the child’s birth certificate, school attendance certificate, etc.) are not required, but in some cases they need to be uploaded to TULIP at this point for processing your Declaration.
If you have any questions regarding the Declaration, please contact your Human Resources Department / Payroll Department directly.
Step 6 – Save/Close/Sign buttons

Anytime while filling in the form, you can:
- Close the form – The changes you made will not be saved and will be deleted.
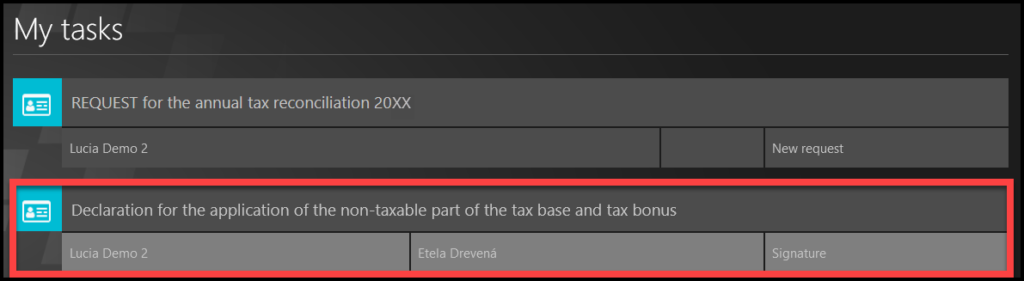
- Save the form – This button will save the information in your Declaration, and you can return to editing later. Find it in “My Tasks” tile.
Signature

The 2nd workflow step in TULIP
Step 7 – Sign
Click on the Continue for signing button.
- All mandatory fields with an orange stripe must be filled in – otherwise signing is not possible.
- Check if you attached all required attachments – it may be necessary for processing.
- Once you sign the form, you can no longer edit the data.
After clicking the button, a new part of the form will display.
Step 8 – Check the data
You can check your data here before the confirmation.
Step 9 – Sign the Confirmation
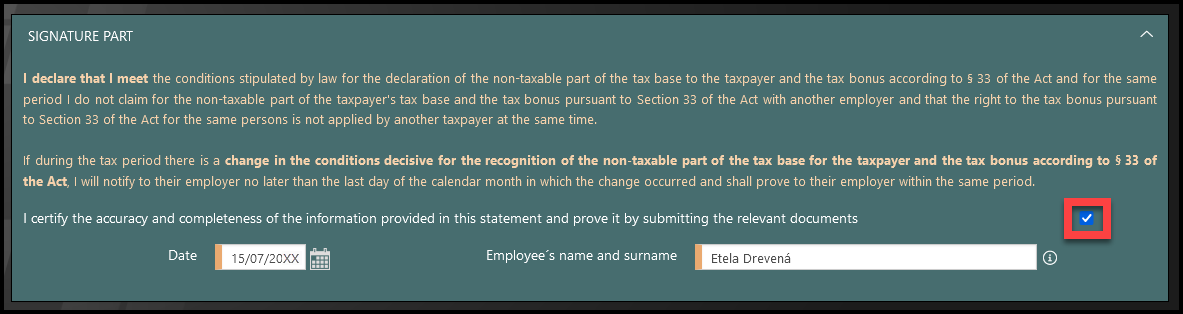
Read the Signature Part.
Tick the checkbox to confirm.
Fill in the Date, your Name and Surname.
Step 10 – Official form in PDF

The Declaration is available in a PDF format and contains all the information you have filled in the form in TULIP. You can download the file here. There is no need to send it anywhere.
Step 11 – Sign the Electronic Delivery Agreement and Disclosure
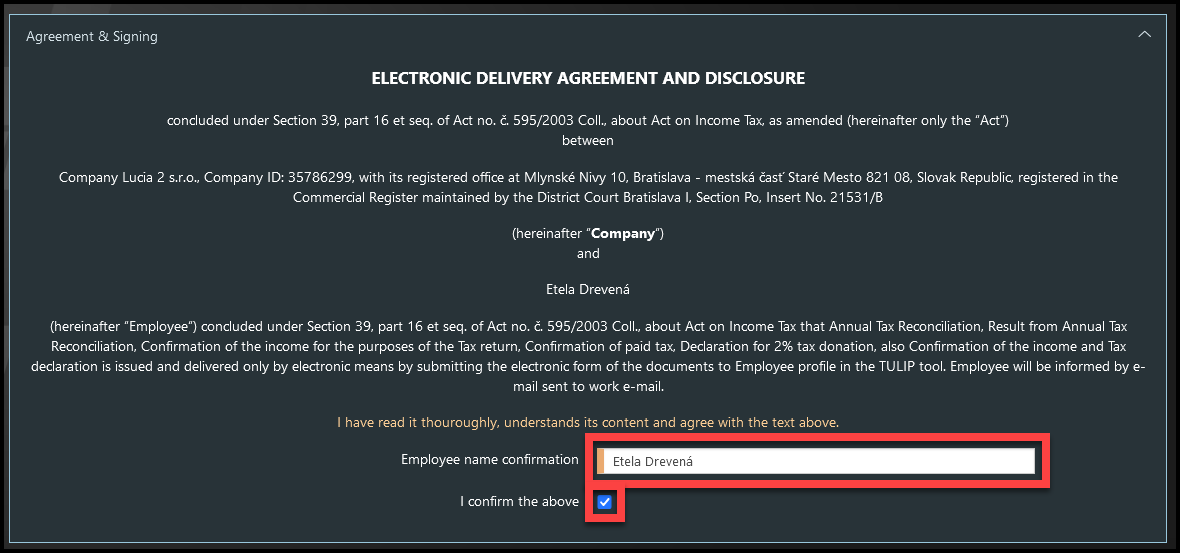
Read the contents of the Agreement.
Fill in your Name & Surname.
Tick the checkbox to confirm your consent.
Step 12 – Sign

- Sign – You can click on this button only if you completed the whole form, signed it (filled in the date and your name in the signature part & agreement part and ticked the checkboxes). It saves and sends all the data to HR/Payroll for processing. You cannot edit the data after clicking on this button.
- Back – If you want to go back to editing and change some data.
- Discard – Deletes the whole form.
- Save – You can click this button anytime to save the information you inserted. Go to “My tasks” tile to continue editing.
- Close – Leave the form without saving changes.
Step 13 – Confirmation
Once you click “Sign”, a green pop-up window with a short confirmation note will show up.
You will also receive an e-mail notification as a confirmation.
Payroll processing

The 3rd workflow step in TULIP
Step 14 – Next steps
HR / Payroll department makes the final check of request and approves or rejects it.
- Rejected: If you must change / add something, the Declaration is returned back to you for correction.
- You will receive an e-mail notification.
- Find the form in “My Tasks” tile.
- There is always a comment with the reason for the rejection from HR/Payroll – follow the comment and edit the data in your form again.
- Then, sign the form in TULIP again to submit it to HR/Payroll.
- Approved: If the Declaration is correct and can be successfully processed, there are no other steps from your side.
Step 15 – Access the form again
You can check the data or download a PDF of your Declaration even after signing (sending the form to Payroll/HR in TULIP). However, you cannot edit the data anymore.
Go to HR processes tile.

Click on the Waiting for payroll processing button.

You can now check the data in TULIP or even download the document in PDF format.
If you have any questions regarding the Declaration, please contact your Human Resources Department / Payroll Department directly.