
Introduction
Hotline allows employees to communicate with various departments and contact persons (Operators e.g. payroll, HR, IT, accounting or tax department within the company, contact persons from other companies). The request is usually created by an employee and sent to an Operator. In Reverse Hotline, the Operator creates a request that is sent to the employee. It is used, for example, to request missing documents from an employee, such as birth certificates, receipts, doctor’s notes, etc.
Please note a TULIP setup you see always depends on custom requirements and access settings of TULIP for your company. Not all companies use the Hotline functionality.
Frequently asked questions
How can I contact TULIP support?
Companies that use Hotline may also allow employees to contact TULIP support directly via a certain request type (IT-TULIP). Select this type if you have a technical problem with the system itself.
If you are not using Hotline, you can contact us via e-mail.
I need help with creating access rights tickets.
There are a few details we will need in order to assign access – find more information here.
Does Hotline work in Delegation mode?
User with Delegation from another user is not allowed to see their requests. In some cases, it is possible to set up delegation for support requests in Hotline, but the users must be aware that some sensitive personal data (from Hotline requests) can be displayed to the other user.
If a person who is currently in Delegation mode creates a Hotline ticket from the delegated account, he/she will not be able to see that ticket in his/her own account.
Please note a TULIP setup you see always depends on custom requirements and access settings of TULIP for your company. Not all companies use the Reverse Hotline functionality.
Operator creates a request
Step 1 – Tile
Go to Hotline tile.
Step 2 – New support request
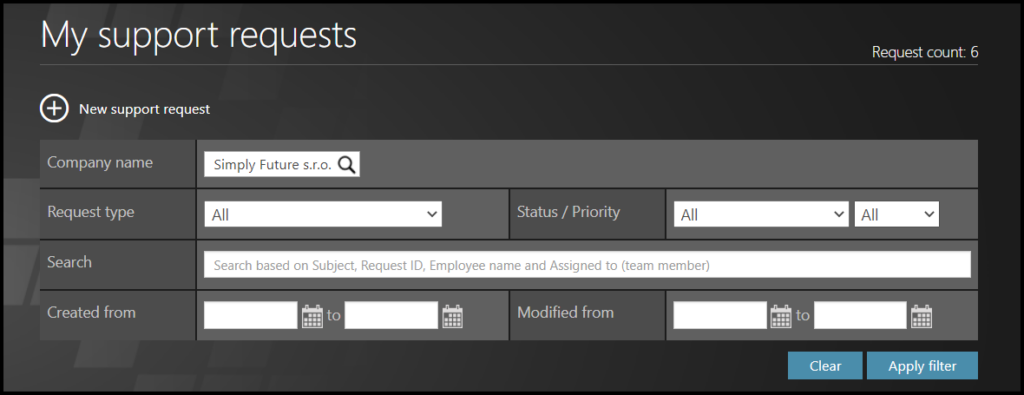
Click on a New support request button.
Step 3 – Details
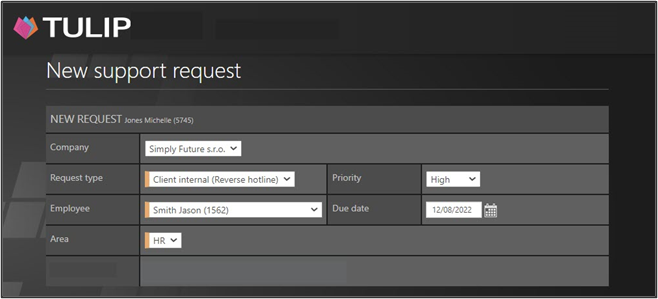
Select the Company.
Request type – Click at an option that has a “Reverse hotline” note inside the name of the request, for example “Payroll (Reverse Hotline)” instead of just “Payroll”.
Employee – to whom you are sending the request. Only active users and non-technical accounts are included.
Area – Area always includes client-specific subcategories, for example categories of HR issues.
Priority Status: Requests with high priority are highlighted with a red mark in the list of requests. The default priority status for all requests is Medium. In all priorities, a regular notification is sent to the employee.
Due date – Click on a calendar and choose date. This is a deadline.
Step 4 – Subject & Description
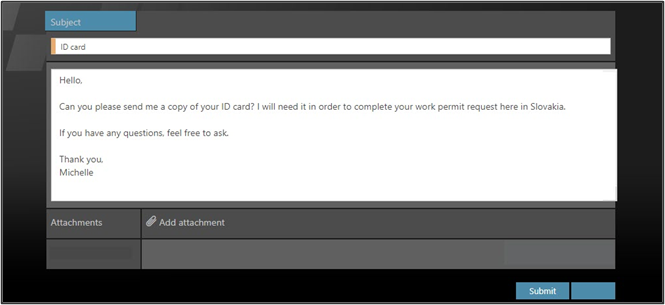
Fill in the Subject – a few keywords that summarize your request.
Type in the Message. Describe your question, what do you need from the employee.
Click on Add attachment to include documents, pictures, and other attachments. This is not a necessary step.
Click Submit.