
Introduction

File Manager functionality is used to access files and folders.
Tiles:
- Various client-specific tiles – customized tiles with custom name, design, function, storage, accesses, with custom workflow and approval procedures. These tiles may also have other features set up other than those described in this manual.
- File Manager – general access to the company’s master folder
- My Documents – access to the employee’s own folder, this tile is used to share documents between HR and employees
- Help – this tile is usually where your company’s internal manuals are stored
- Payroll Uploads – used to upload documents for payroll processing
Please note a TULIP setup you see always depends on custom requirements and access settings of TULIP for your company. Not all companies use the File Manager functionality that allows you to work with files and folders.
Actions
- Create
- Move
- Sort
- Download
- Delete
- Rename
- See History
- Add an additional Personal data icon
- Participate in Workflow (upload, approve or decline Payroll files, Payslips or Tax files)
Create
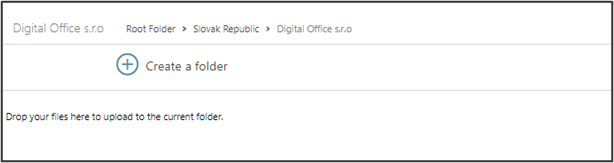
Click on a + Create a folder button.
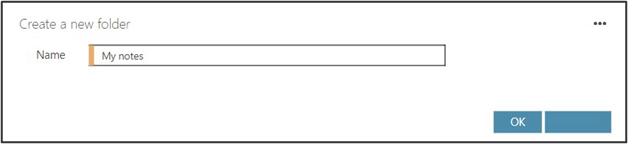
Insert a name of the folder.
Click OK.
Move
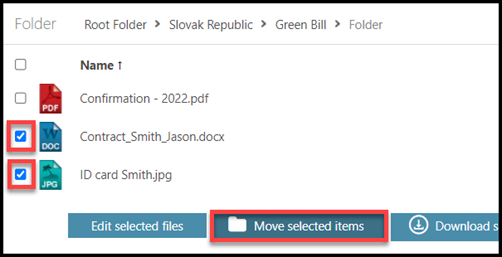
Check multiple checkboxes on the left to select files or folders.
Click on a Move selected items button.
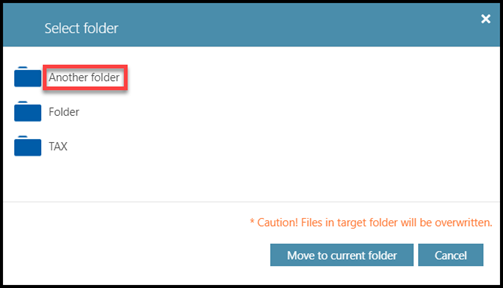
Find a new location.
Click on the folder name to go inside the folder (folder to subfolder).
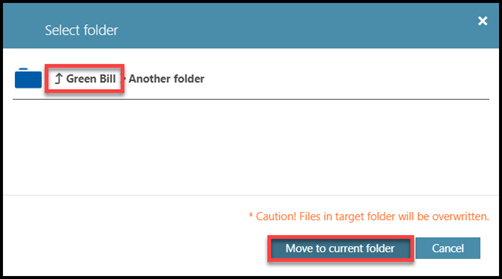
To move one folder above it (from subfolder to folder), click on the folder name on top of the screen (the name with an arrow).
Once you are inside the desired folder, click on a Move to current folder button.
Sort

Click on the header name – either Name or Uploaded or Size. It will change the order of the folders and files based on that parameter:
- Name: A>Z or Z>A
- Upload: Oldest>Newest date of modification, Newest>Oldest date of modification
- Size: Small>Large size, Large>Small size
The setup is automatically remembered for your account. All files will be sorted in the same order.
Download
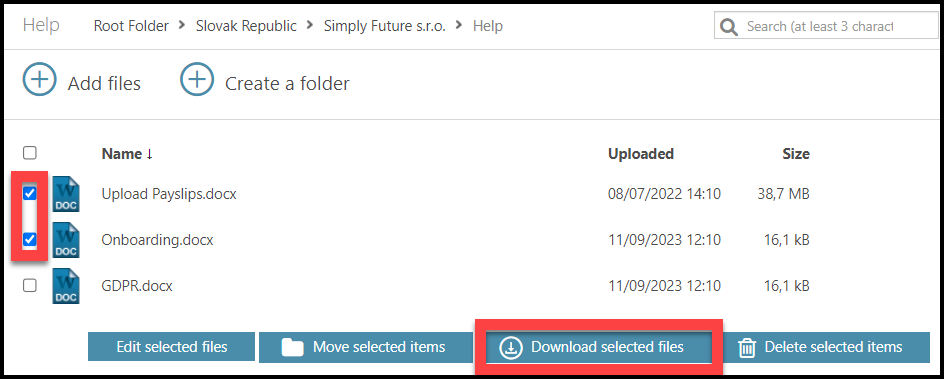
Choose an option:
A) Download one file
- Click on the name of a file. This downloads it into your PC.
- Cick on the downloaded document in the left corner of a screen.
B) Download more than one files
- Check multiple checkboxes next to files´ names on the left side of the screen.
- Click on a Download selected files button.
- Click on the ZIP file at the left bottom corner of your PC.
Delete
Choose an option:
Delete single files and folders
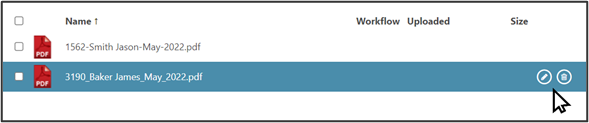
- Move your mouse over the right corner of the row.
- One or two small icons will display. Click on dustbin icon to delete the folder or file.
Delete more files and folders
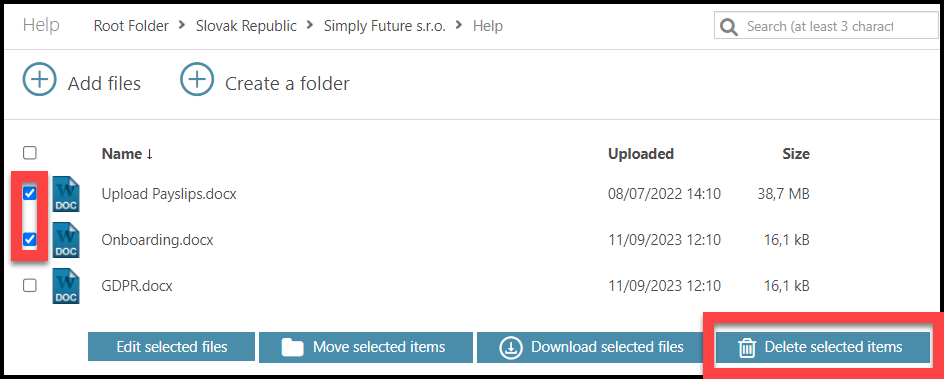
- Check multiple checkboxes on the left side to choose some files or folders.
- Click on a Delete selected items button.
History

Click on the last icon on the left side.

See the history:
- Date
- Operation (Create, Download, Rename etc.)
- Item (name of the File/Folder)
- Completed by (name of the User)
Edit name & icons
Move your mouse over the right corner of the row.
Click on pencil icon to edit the name of a folder or file.

See this pop-up window:
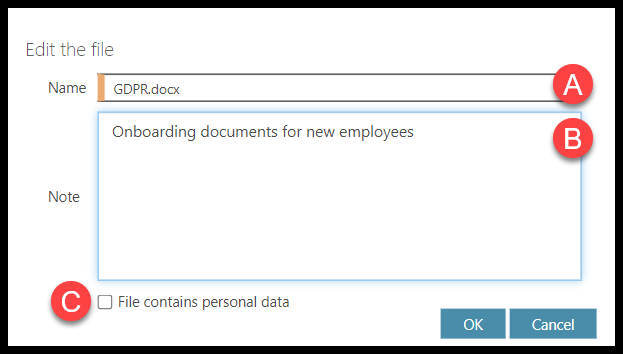
A) Change the name. Click OK.
B) You can also add a note – describe the file in few words. Click OK.
C) Check the checkbox (File contains personal data) down in the left corner. Click OK.
D) To add the Personal information icon to a folder, click on three dots in the right corner.
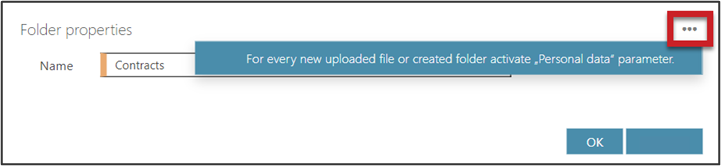
A new pop-up window displays.
- Click on small three dots in the right corner.
- Click on the blue button For every new uploaded file or created folder activate “Personal data” parameter.
- Click OK.
Documents already present in this folder will not change – the icon is NOT added automatically to old documents.
Every NEW file or folder that you add into this folder will have the same icon.
Please note that this icon does not restrict access to the file/folder!