
Introduction
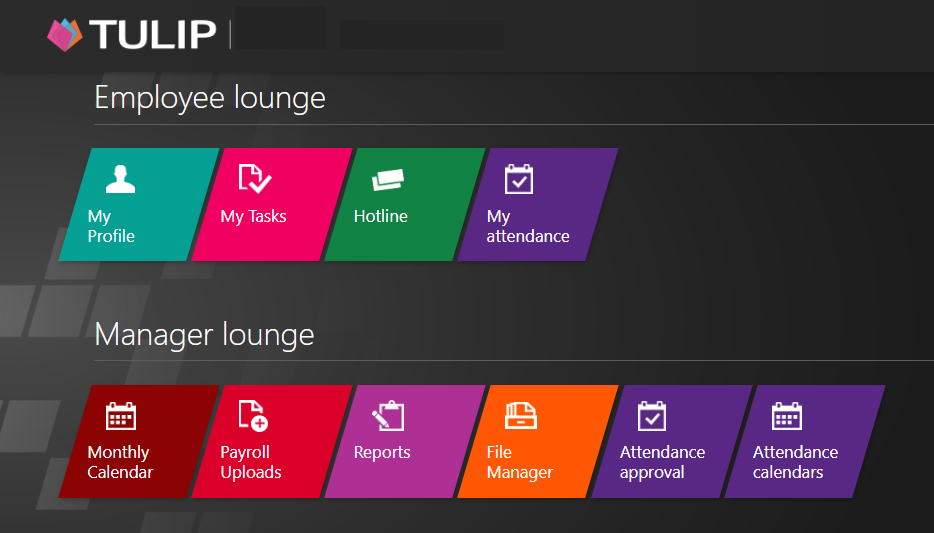
Tiles in TULIP work as a shortcut to access parts of functionalities. Users can see different amount and types of tiles, depending on your own role in the company and the access rights they have.
- Administrator can see and be able to change names and location of all tiles for everyone in the company.
- Users can be also able to change homepage, but only their own view of TULIP.
Please note a TULIP setup you see always depends on custom requirements and access settings of TULIP for your company. Not all companies use the Homepage Settings functionality.
Move tiles
Step 1 -Tile

Go to My profile tile.
Step 2 – Change homepage settings
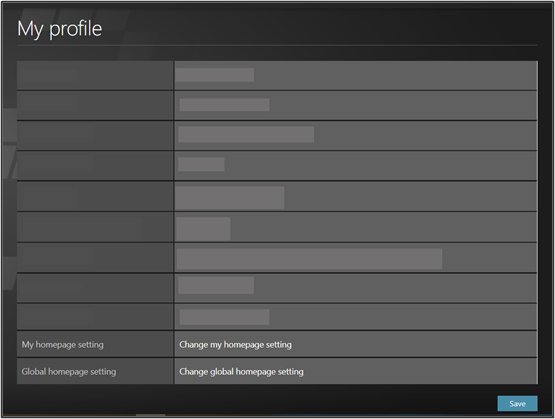
Click at Change my homepage setting button.
Step 3 – Move tiles
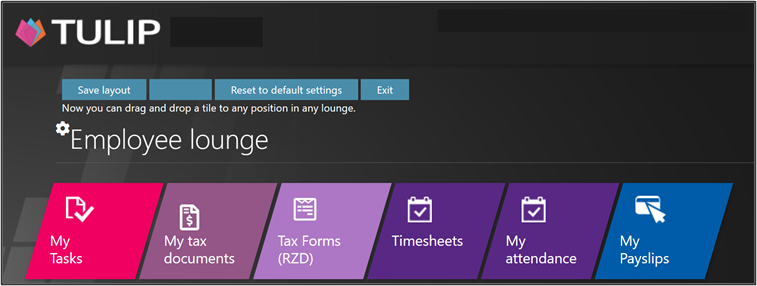
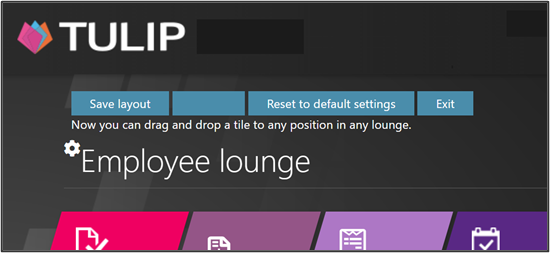
Click on Move tiles button on the top of the page.
Click on a selected tile and move it wherever you want.
Save the changes:
- Click Save layout. If you do not click on this button, your changes will be lost!
- Togo back to default settings, click at Reset to default settings.
- To leave without saving any changes, click Exit.
Rename tiles
Step 1 – Tile
Go to My profile tile.
Step 2 – Change homepage settings
Click at Change my homepage setting button.
Step 3 – Icons
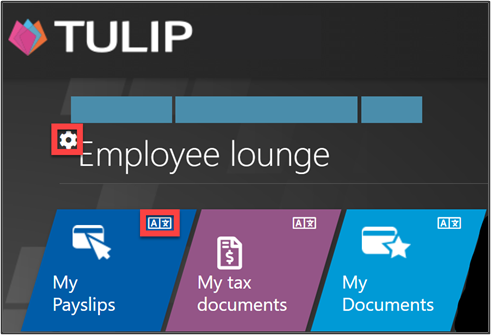
Click on a small icon named “A*” in the corner of each tile to rename the tile.
Click on a wheel icon to rename whole section names.
Step 4 – Rename
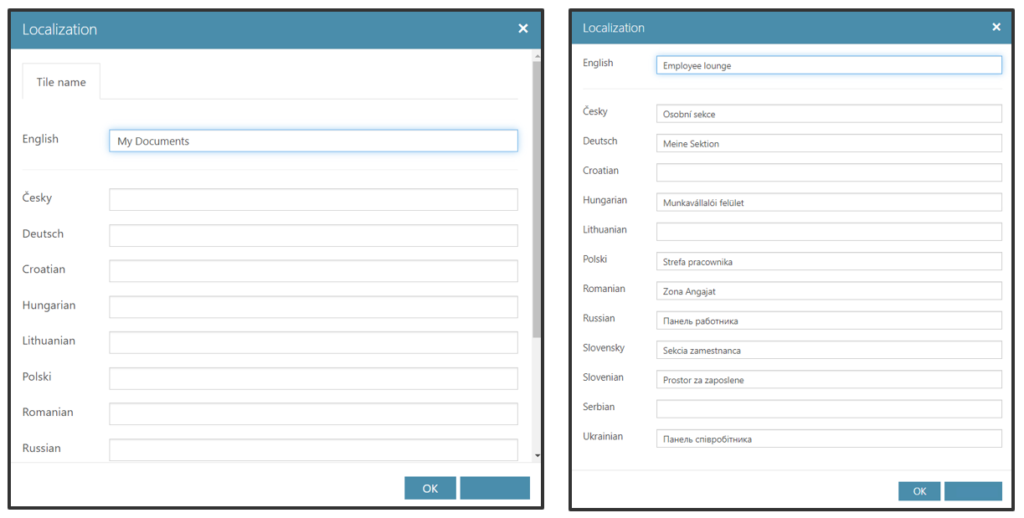
Change the name.
Click OK.
Step 5 – Save
Save the changes:
- Click Save layout. If you do not click on this button, your changes will be lost!
- Togo back to default settings, click at Reset to default settings.
- To leave without saving any changes, click Exit.