
Introduction
Users with special HR access can create, edit, end and delete employees´ profiles, to prolong access or renew an access of a former employee. Former/future employees are not on the default employee’s list or in the attendance view by default. Here is how you can find employees who are currently not active:
- in Admin tile – Employee – Employee detail – (in this manual)
- in Attendance view via Timeline
- in Attendance view via Timesheet
Please note a TULIP setup you see always depends on custom requirements and access settings of TULIP for your company. Not all companies use this functionality.
Frequently asked questions
How long does the employee have access to TULIP after employment end?
The account is usually available for 30 days. It can be more or less depending on your own company settings. The reason for that is usually downloading payslips.
If the employee cannot access their account during this period, they can reset their password. Once this period is over (and also all SSO users) contact the HR Administrator (TULIP administrators cannot renew an account based on the employee’s request nor send personal documents like payslips).
Find inactive employees
Step 1 – Location

Go to Admin tile.
Select Employees.
You can choose the Company and filters if needed. There are advanced filters hidden – click on the small arrow to display them.
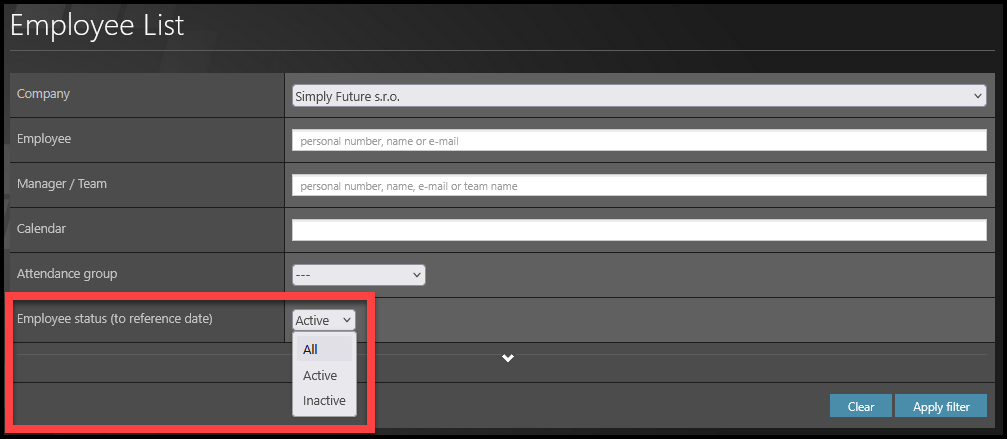
Type in the name of an employee, his/her e-mail address or personal number.
If the employee´s access is not “Active” (a former employee, a newcomer etc.) go to Employee status and select Inactive status. This will allow you to display only employees that are currently before or after their contract/employment.
OOE employees do not count as inactive employees, they are included in the default search with Active employees.
Click Apply filter.
Now you can see the employee on the list.
Renew ended account
Step 2 – Wheel – Employee settings

Now you can see the employee on the list.
Click on the wheel icon.
Step 3 – Prolong or delete end date
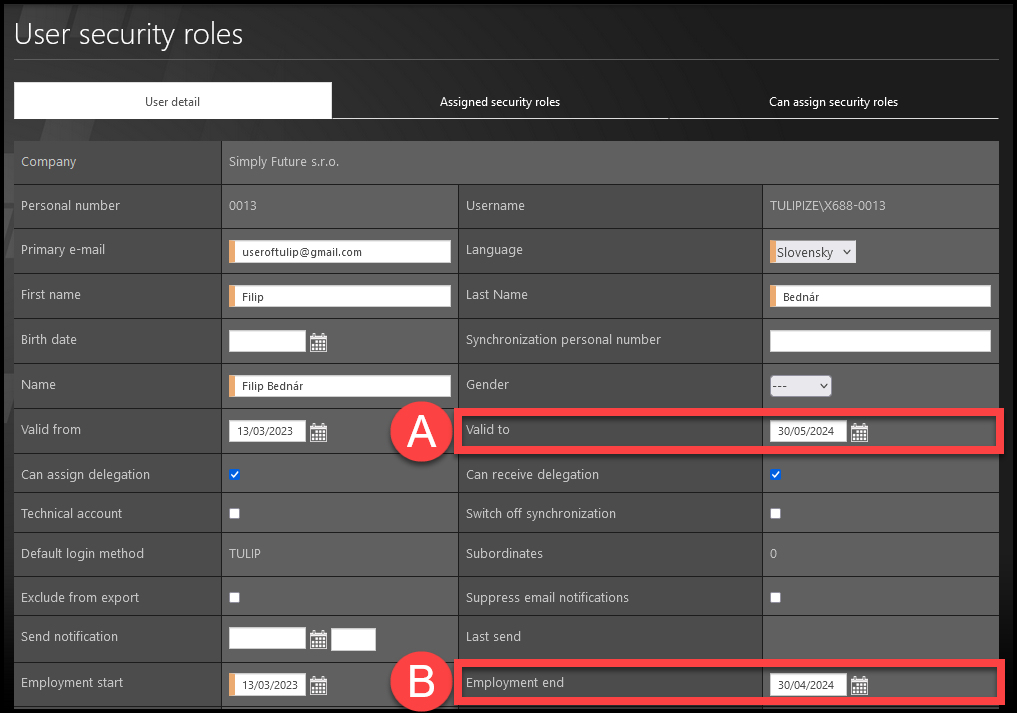
If you want to prolong or renew the account, go to:
A) Valid to – and delete (or rewrite) the date.
- This date is a fixed deadline for any access of the employee.
- However, most administrators use the “Employment end” instead.
- The reason is that once the “Employment end” date is filled in, and the “Valid to” date is blank, the “Valid to” date will be filled in by TULIP automatically. This way, the employee can access his/her profile even after “Employment end” date to display&download payslips. He/she does not have any other access than this one. The period of how long an employee can display&download payslips is defined in company settings, and usually lasts 30 to 90 days.
B) Employment end – and delete (or rewrite) the date.
- This date does not take the employee the option to access his/her TULIP profile.
- It cancels any access other than the option to view or download own payslips.
Step 4 – Security roles
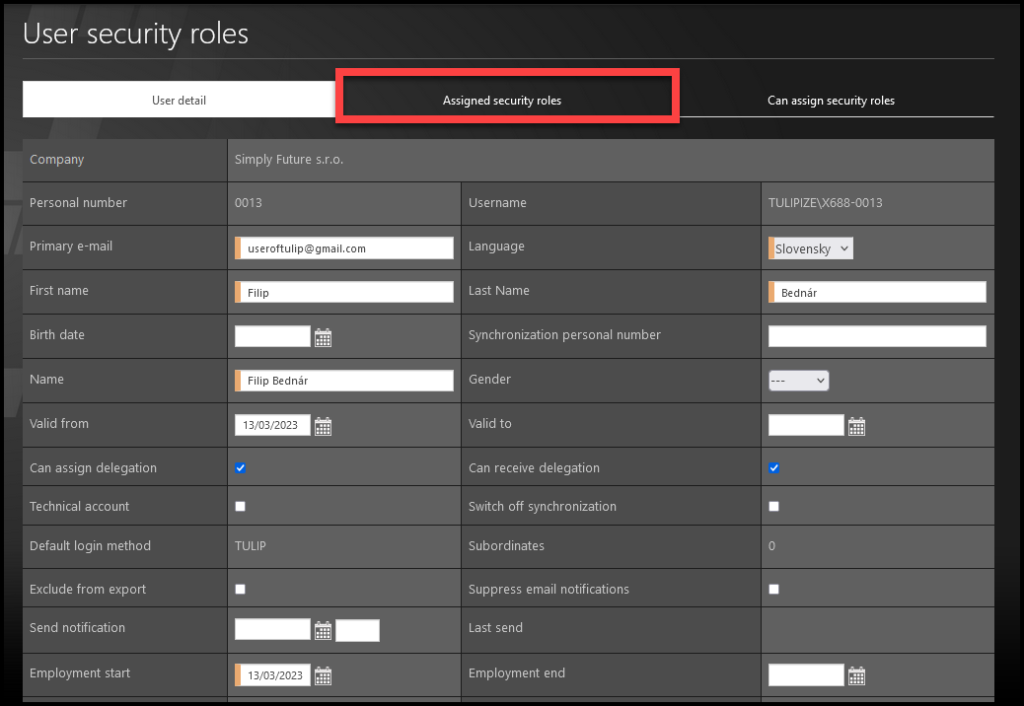
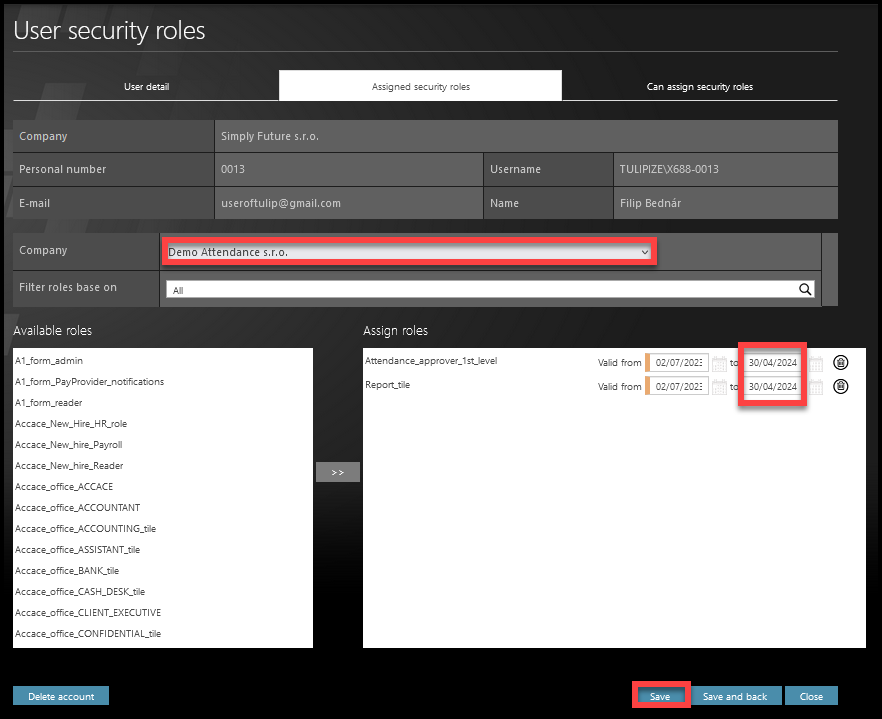
Select the second tab named Assigned security roles. Here you can edit access of the employee.
Step 5 – Renew / prolong roles
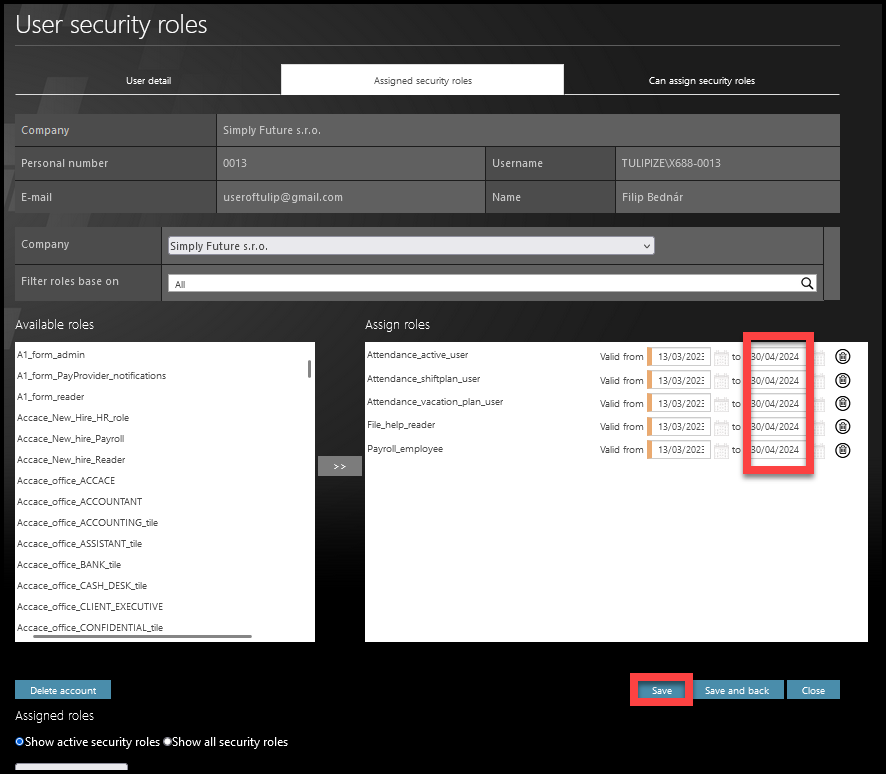
Check the right list of roles:
- Delete “To” dates (if you want to renew the former access of the employee).
- If you want to edit the duration of access, change “To” dates.
- If you want to add extra roles – add new roles from the left list of roles: double-click on a role which moves it to the right list.
Click Save.
Step 6 – Cross-company access
This step is optional: some employees can have access to more companies and you might need to renew all of their canceled access rights.
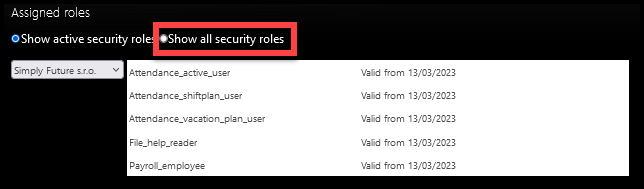
Scroll down to the bottom of a page. Select Show all security roles.
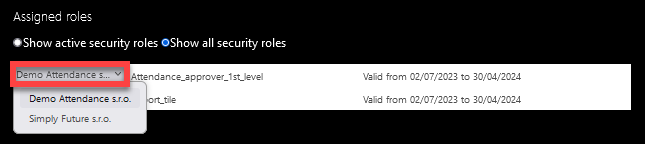
Select a company from the list to display access roles in this company (including canceled ones).
Then, you can decide which access you want to renew. Scroll up the page and select a Company from the list.
Check the right list of roles:
- Delete “To” dates (if you want to renew the former access of the employee).
- If you want to edit the duration of access, change “To” dates.
- If you want to add extra roles – add new roles from the left list of roles: double-click on a role which moves it to the right list.
Click Save.
Step 7 – Active employees
If the employee was inactive before, and you renewed his/her access, you will no longer see him via “Inactive” filter.
Click on the choose “Active” or “All” and then click Apply filter.