
Introduction
Groups (groups of attendance activities & settings) assign allowed types of attendance requests to employees. The administrator first sets up the group rules: for example, an employee with an “Office” group may not be allowed to create a “Home office” request. Also, groups can change the employee’s timesheet view and display or hide some columns: either their default worktime, the total amount of hours worked or other custom & client-specific settings. Then, once the groups are created, administrators can assign them to employees. There are 4 ways of how to add a group to an employee:
- individually – add or change employee’s group (in this manual)
- by import of new employees (using import codes)
- by import of changes for existing employees (using import codes)
- in ADMIN – Attendance configuration – Attendance groups settings (a special ADMIN access is required)
Steps
Step 1 – Location

Go to Admin tile.
Select Employees.
You can choose the Company and filters if needed. There are advanced filters hidden – click on the small arrow to display them. Then, click Apply filter.
Step 2 – Pencil icon
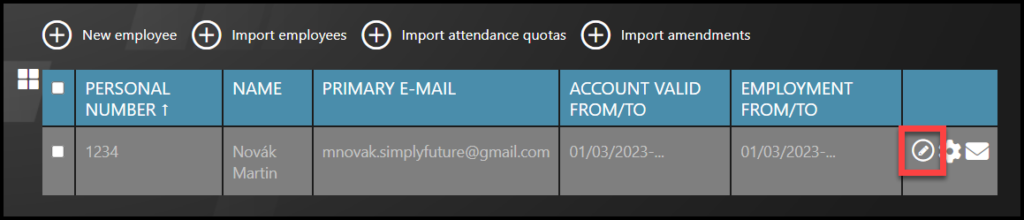
Select the employee – Click on the pencil icon.
If you cannot find an employee/s, follow this manual.
Step 3 – Settings
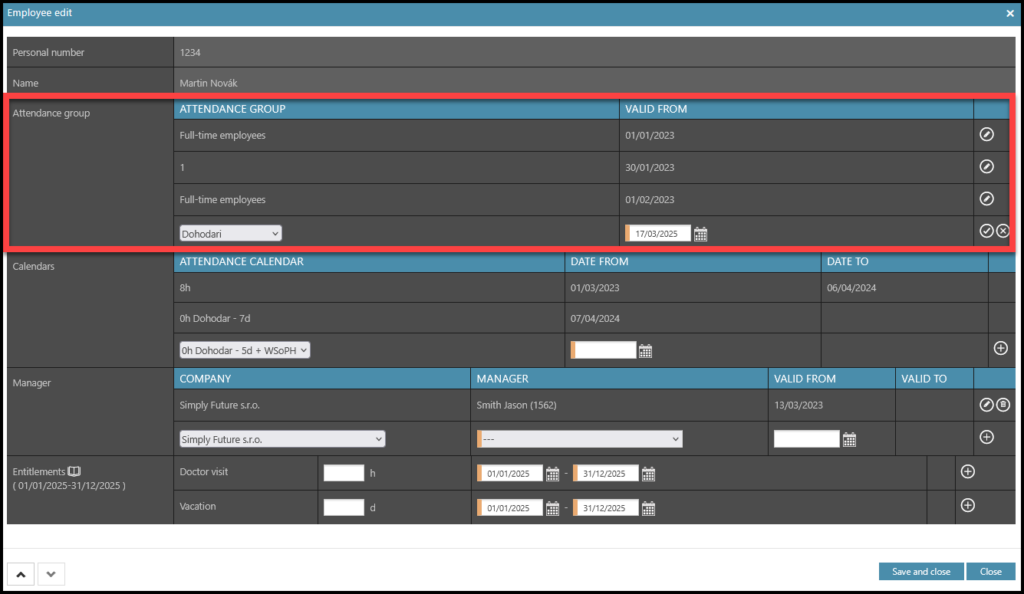
- Select the Attendance group.
- Set up the date – Date from.
- Click on the plus button (you can also edit the last group – click on the pencil icon and then the tick icon). This confirms your input.
- Once you are done with editing, click Save and close.