
Introduction
The HR administrator is responsible for updating monthly and yearly quota (like Vacation, Transfer vacation from a previous year, Bonus vacation, Sick Day, Doctor visit, Family member doctor visit and many other custom types of absence). Quotas can be uploaded into TULIP via a bulk import excel sheet (using personal numbers) or individually for each employee (in this manual).
Please note a TULIP setup you see always depends on custom requirements and access settings of TULIP for your company. Not all companies use this Administrator functionality.
Frequently asked questions
How to upload vacation for next year?
The numbers that an HR Administrator uploads into TULIP are valid. TULIP does not know which employee has more or less quota available (we do not track the length of a contract, employee´s age, number of children, extra leave allowance, individual and additional allowance per contract etc.).
- in December / during the end of a year – Select the correct FILER – NEXT YEAR. Upload basic quota for the selected year (for example 20 days of vacation). This way, the employee will be able to create requests in next year.
- in January / at the beginning of the new year – upload remaining quota (e.g.transferred vacation) from the last year. Upload that number into “transfer of entitlements” in entitlements section. This way, the transferred quota will be deducted from employee´s allowance first, and the basic quota after that.
Can I delete quotas?
In order to delete the current data, type in zero (0) into the correct cell. Find more information here.
Should I import quota in hours or days?
The format depends on the legislative of the country and the settings for your company.
There is always H (hours) or D (days) next to the blank field – see more information here.
Edit
Step 1 – Location

Go to Admin tile.
Select Employees.
You can choose the Company and filters if needed. There are advanced filters hidden – click on the small arrow to display them.
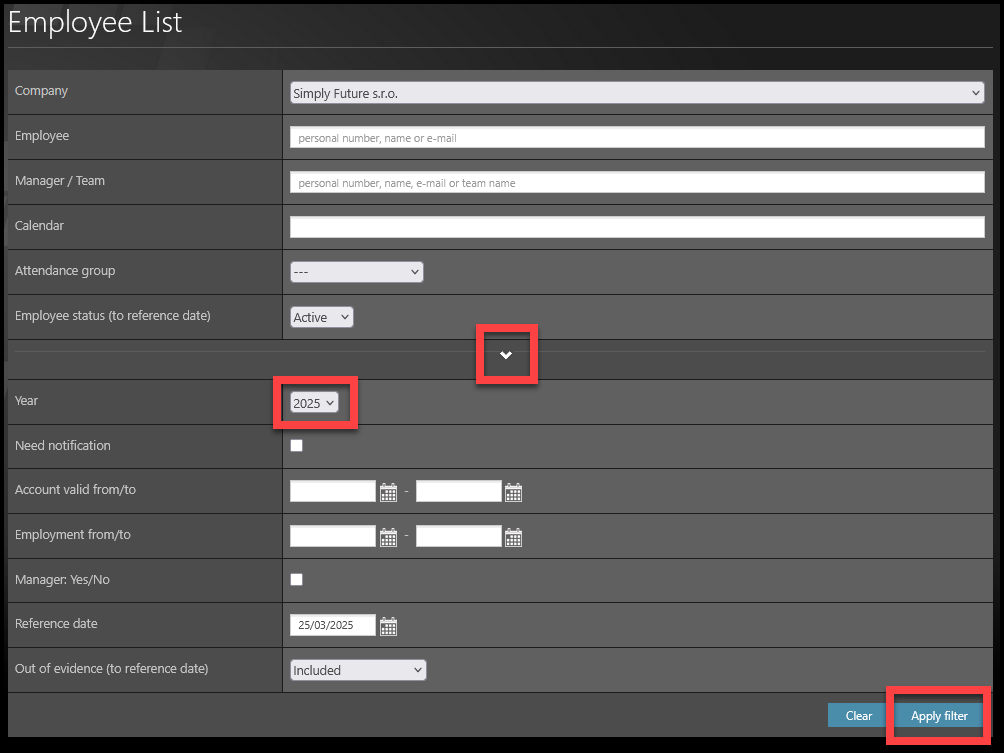
If you want to upload quota for other than current year / years too, click on the arrow to display other filters.
Select Year – for example the next year.
Click Apply filter.
Step 2 – Pencil – Employee settings
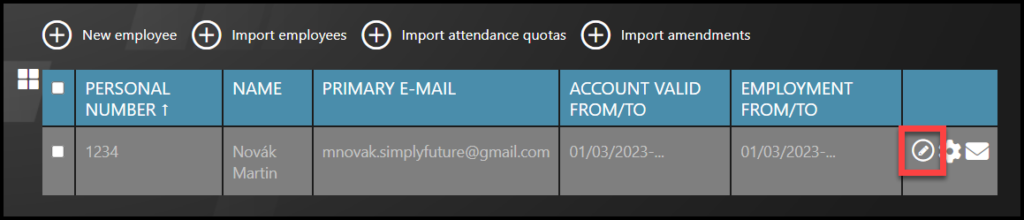
Select the employee – Click on the pencil icon.
If you cannot find an employee/s, follow this manual.
Step 3 – Employee edit
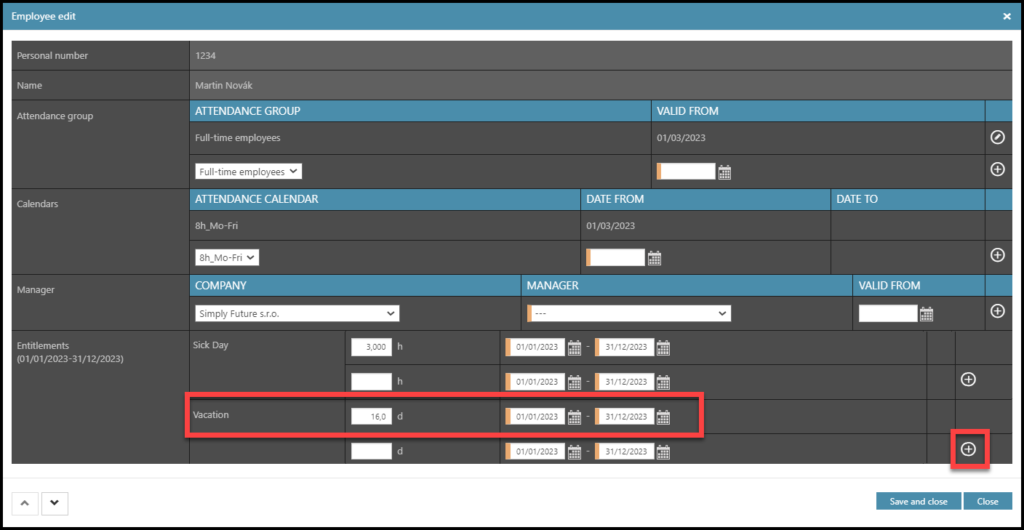
Fill in the data for entitlements. There is always H (hours) or D (days) next to the blank field.
- Days (for example, 25 days of vacation) or Halfdays (e.g., 10,5 days of transfer vacation)
- Hours (for example, 56 hours for a doctor´s visit)
Click on the plus button. This confirms your inputs.
You can use dates to separate certain periods and allowances.
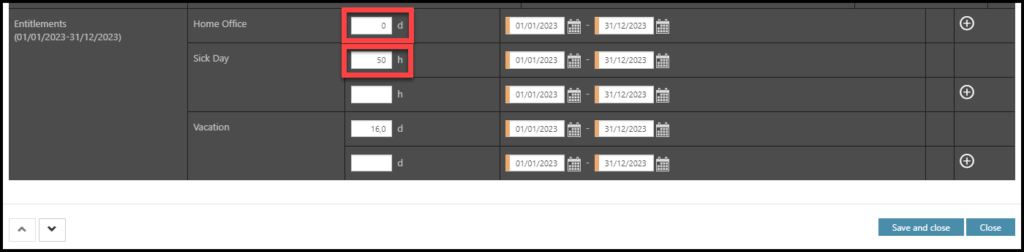
For example, if an employee is allowed to take 3 days of home office per month, you can upload each month´s entitlements separately.
If you want to upload quota for previous or next year, follow the instructions in filters in Step 3.
Step 4 – Rules
There are three rules:
- Change data – type in any numbers or words – it will overwrite the old data.
- Delete the old data – type in zero (0), the current quotas will be deleted.
- Keep the old data – leave the cell as it is, no changes will be made.
Once you are done with editing, click Save and close.