
Introduction
Some employees might have exceptions to their company’s standard TULIP setup. These exceptions are tailored to fit specific needs of the company —such as unique contract terms, applicable legislation, or internal guidelines, policies and collective agreements. Amendments usually influence reports, entitlements, or payroll calculations. HR Administrators have the access to edit amendments individually for each employee or in bulk through import of amendments.
Types of Amendments (examples) :
- home office (may be allowed or not allowed for certain employees)
- overtime (for example, allow different limits for overtimes per year for certain employees)
- stand-by (for example, allow different limits for standby per week for certain employees)
- meal allowance (allow the choice for meal tickets, financial contribution or meal card – SK clients)
Please note a TULIP setup you see always depends on custom requirements and access settings of TULIP for your company. Not all companies use this functionality. The setting also depends on the legislation in your country.
Assign amendments – individually
Step 1 – Location

Go to Admin tile.
Select Employees.
You can choose the Company and filters if needed. There are advanced filters hidden – click on the small arrow to display them. Then, click Apply filter.
Step 2 – Wheel – Employee settings

Click on a wheel icon next to employee´s name.
If you cannot find an employee/s, follow this manual.
Step 3 – Amendments
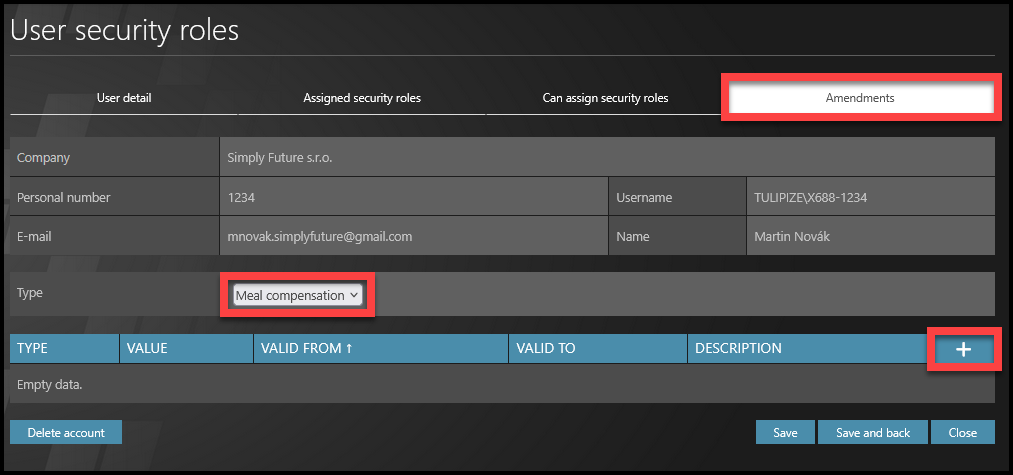
Select the Amendments section.
If you want to filter only a certain type of amendment, select the amendment type (in this case, Meal compensation).
Click on the plus button to add new.
Step 4 – Amendment detail
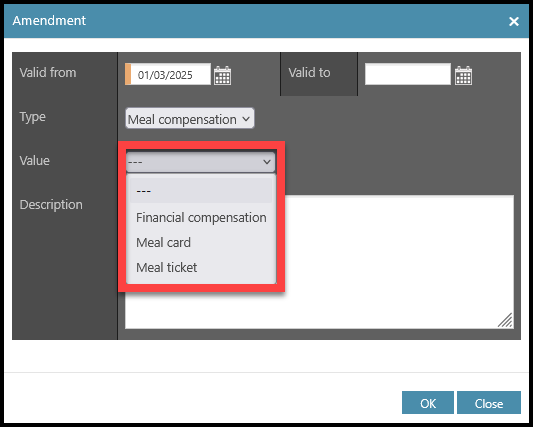
Select the dates. You can leave the “Valid to” blank and update it later (even after the valid date).
Select the value.
You can also fill in some additional information into the description.
Click OK to save the information.
Step 5 – Save changes
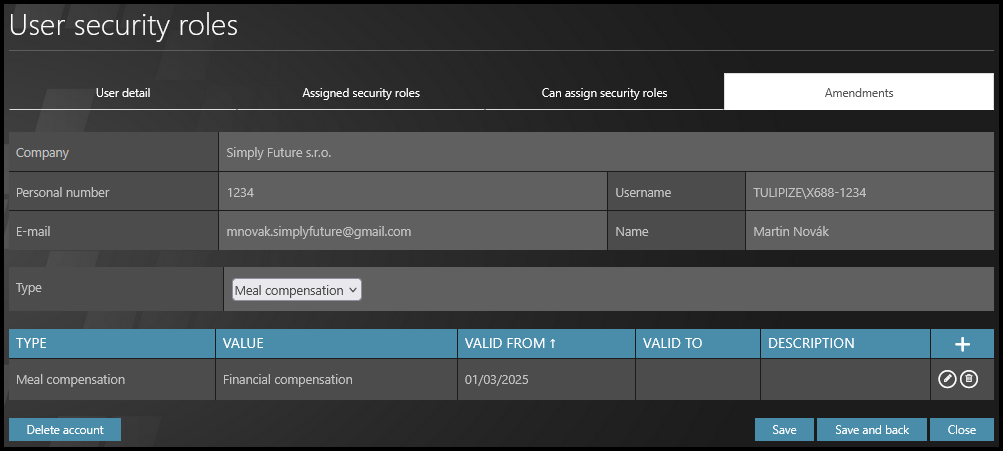
Now the information visible in their profile.
Click Save and back to save changes and return back to the list of employees.
Import Amendments
Step 1 – Location
Go to Admin tile.
Select Employees.
You can choose the Company and filters if needed. There are advanced filters hidden – click on the small arrow to display them. Then, click Apply filter.
Step 2 – Employee List
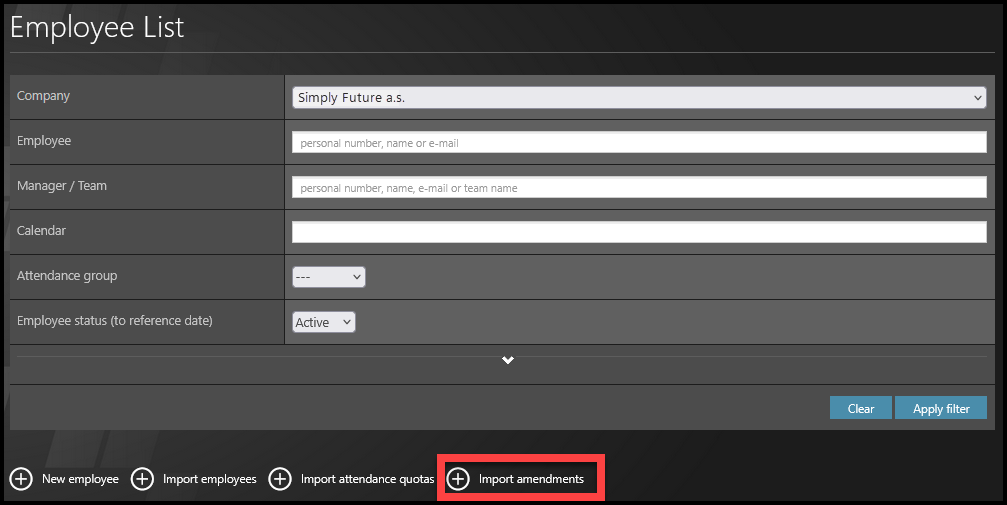
Select Import amendments.
Step 3 – Download
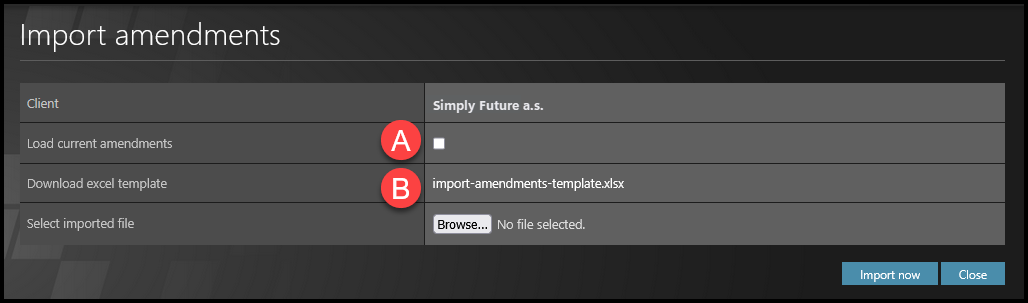
A) If you want to load current amendments (in order to change them, for example), tick the checkbox and then click on the template name (import-amendments-template.xlsx).
B) If you want to download a blank template (in order to upload new amendments), just click on the template name (import-amendments-template.xlsx).
Step 4 – Template

New amendments: Click on the “import-amedments-template.xlsx” to download the blank template.
- Insert the Personal number of the employee and fill in the “Amendment type”, “Valid from” and “Value”. You can insert multiple amendments at once for one employee or for multiple employees in that way.
Change amendments: Tick “Load current amendments” checkbox & then click “import-amedments-template.xlsx”.
- In those rows where data are changed, it will change the employee’s amendment details.
- Amendments that you want to keep the same (do not want tho change the type / date / value) – those cells keep untouched. Do not delete them. The system will ignore rows with the same (unchanged) value in data during import.
Delete amendments: Tick “Load current amendments” checkbox & then click “import-amedments-template.xlsx”.
- Insert “Valid to” date into the employee’s existing amendment. It will deactivate after that date.
- If you just delete the content of the cells (for example delete all data except “Personal number”, no data will change, nor be deleted in the system).

A) Personal number – If you insert a personal number that does not exist, it will not be imported. If you insert an already existing personal number, the system will add the amendment to the exact employee. It is not possible to edit personal numbers with this import table.
B) Amendment type – If you insert an already existing amendment, the system will rewrite this amendment for the exact employee. If you insert an amendment type that does not exist, it will trigger an error. Uppercase and Lowercase letters matter.
C) Valid from – Date from which the amendment is applied.
D) Valid to – Use this if you want to set up a specific date of validity or delete/deactivate the current amendment. To delete an amendment, keep the “Personal number”, “Amendment type”, “Valid from” date and “Value” cells the same, only change the “Valid to” date.
E) Value – Uppercase and Lowercase letters matter. They represent different values when importing the data (the value “Overtime” and “overtime” may be a different amendment type, for example).
Step 5 – Import
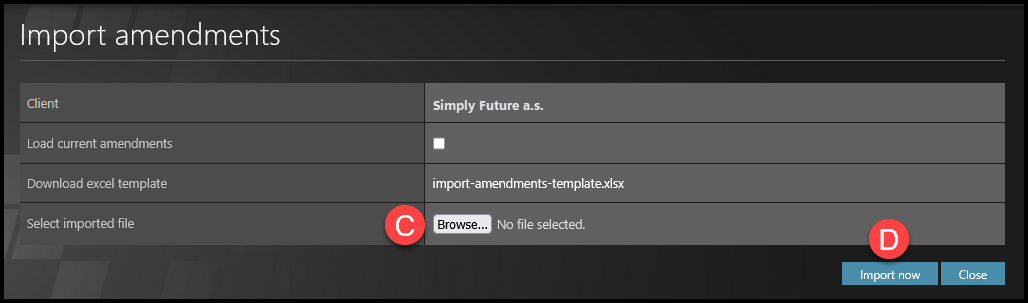
C) Click on the “Browse” button and upload the file from your PC.
Click Import now.