
Introduction
Users with administrative access to the settings have access to add and edit employee accounts, or even terminate, delete accounts and their access rights. After creating a profile, users (only those without single sign-on – SSO) activate their account via the link in the welcome notification sent to their e-mail.
Please note a TULIP setup you see always depends on custom requirements and access settings of TULIP for your company. Not all companies use this Administrator functionality.
Frequently asked questions
Why should I send the notification to a new user?
The users without SSO login cannot activate their accounts in TULIP and access the data without the first notification. Make sure to send it immediately, schedule the date and time or directly via import sheet.
Can employees also be deleted?
Yes, allowed persons can terminate employment, or even delete the account permanently.
Add new employee
Step 1 – Location

Go to Admin tile.
Select Employees.
You can choose the Company and filters if needed. There are advanced filters hidden – click on the small arrow to display them. Then, click Apply filter.
Step 2 – Employees
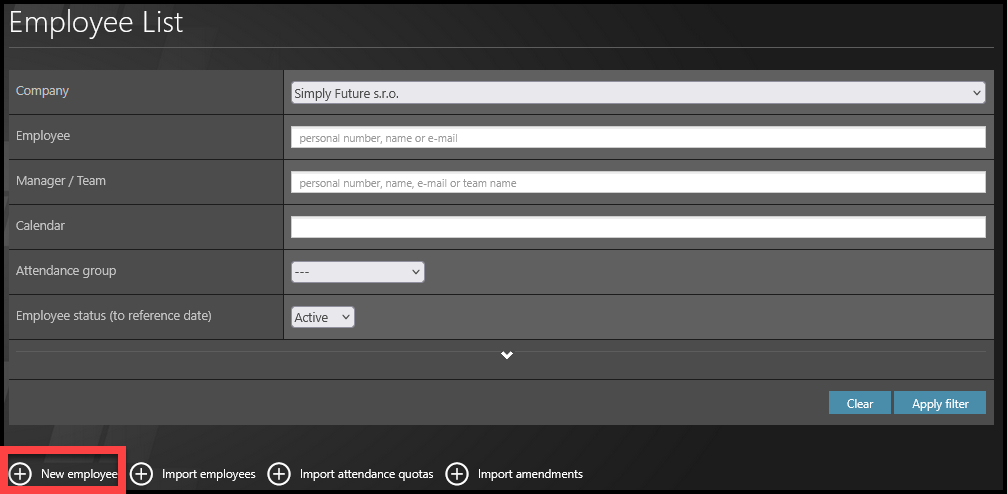
Click on + New employee.
Step 3 – Personal information
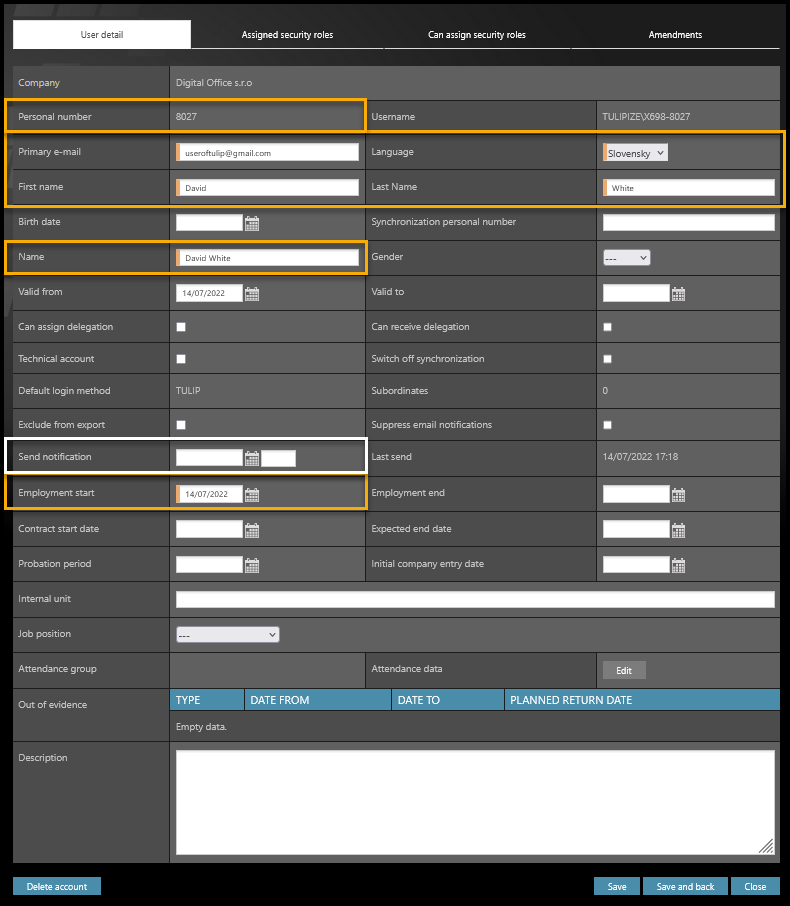
You must fill in the fields with an orange stripe:
- Personal number– Personal number is a key information for clients who use or will use payslips distribution. Based on this unique personal number, all uploaded payslips are matched with employees.
- Primary e-mail – The e-mail that receives notifications.
- Language
- First name
- Last name
- Name – this is the displayed name (see the far-right corner of your screen). Click on the field and it will create a name consisting of name and surname automatically. You can also change, delete, or add some information to it, for example add “HR” in front of the name and surname.
- Employment start – usually, it means the beginning of a month. It can be any date depending on the contract.
Send notifications: You can schedule date and time of sending it here or use other ways of sending the welcome notification.
If an employee uses an SSO, a single sign-on, no welcome notification is necessary to activate his/her account. However, if you send the notification, TULIP automatically recognizes it based on the login method of the company and sends a special kind of notification. Employee receives the informative e-mail and then, he/she can log in with a company e-mail/username and password.
Step 4 – Access roles
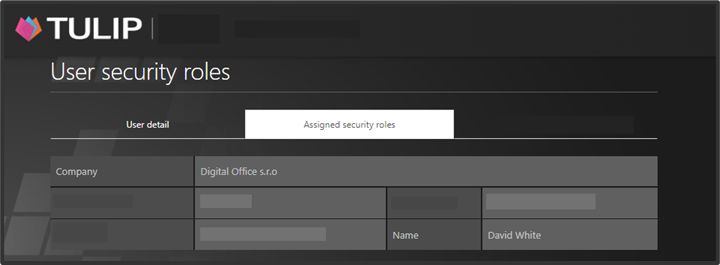
Scroll up the page. Select the second tab named Assigned security roles.
Step 5 – Select roles

Add roles to employees as described here, or click on the link to see how to import multiple roles for more users at once.
Search in the left list of roles. Double-click on the role to add it to the right list.
Only roles on the right will be added to the user. For example, you can add those:
- Attendance_active_user – gives access to „My attendance“ tile
- File_reader_help – gives access to the „Help“ tile
- Payroll_employee – gives access to „My payslips“ tile
Click Save.
Step 6 – Send notification

Send a welcome notification to the employee: Scroll down to his/her name.
If you cannot find an employee/s, follow this manual.
Click on an envelope icon to send the notification. Click OK. The notification is sent immediately.
If an employee uses an SSO, a single sign-on, no welcome notification is necessary to activate his/her account. However, if you send the notification, TULIP automatically recognizes it based on the login method of the company and sends a special kind of notification. Employee receives the informative e-mail and then, he/she can log in with a company e-mail/username and password.