
Introduction
Users with HR Admin role may be able to add, edit or delete employees and their access rights in TULIP. Some default roles can be added with a new account automatically. Roles can be added to the account manually as mentioned in this manual.
Please note a TULIP setup you see always depends on custom requirements and access settings of TULIP for your company. Not all companies use this Administrator functionality.
Frequently asked questions
I cannot add access rights to employees myself.
1. An HR Administrator in your company may be able to add roles, without sending a request to TULIP – contact your HR.
2. You or your HR Administrator may need to request adding the roles from TULIP operators – create requests to add access rights via TULIP Hotline tile.
Individual access rights
Step 1 – Location

Go to Admin tile.
Select Employees.
You can choose the Company and filters if needed. There are advanced filters hidden – click on the small arrow to display them. Then, click Apply filter.
Step 2 – Wheel – Employee settings
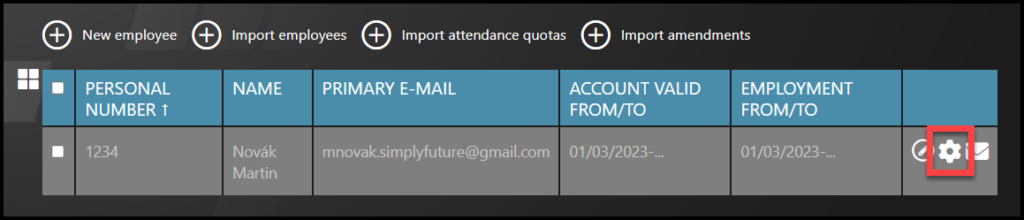
Select the employee – Click on the wheel icon.
If you cannot find an employee/s, follow this manual.
Step 3 – Access rights settings
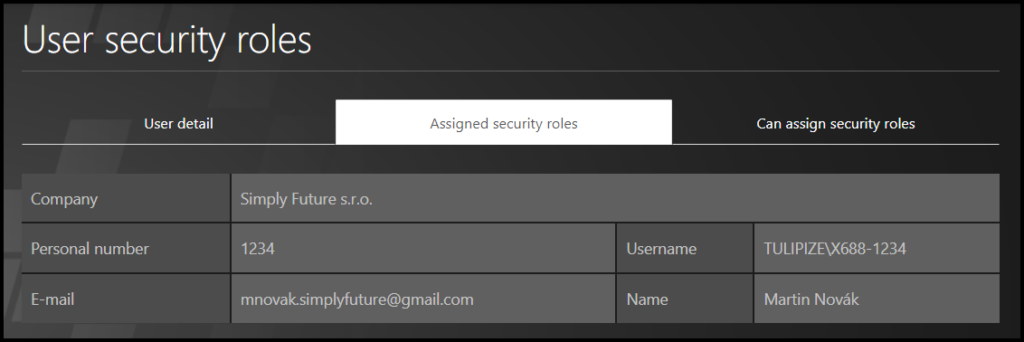
Select the second tab named Assigned security roles. Here you can add roles and access rights to employee.
Step 4 – Assign roles
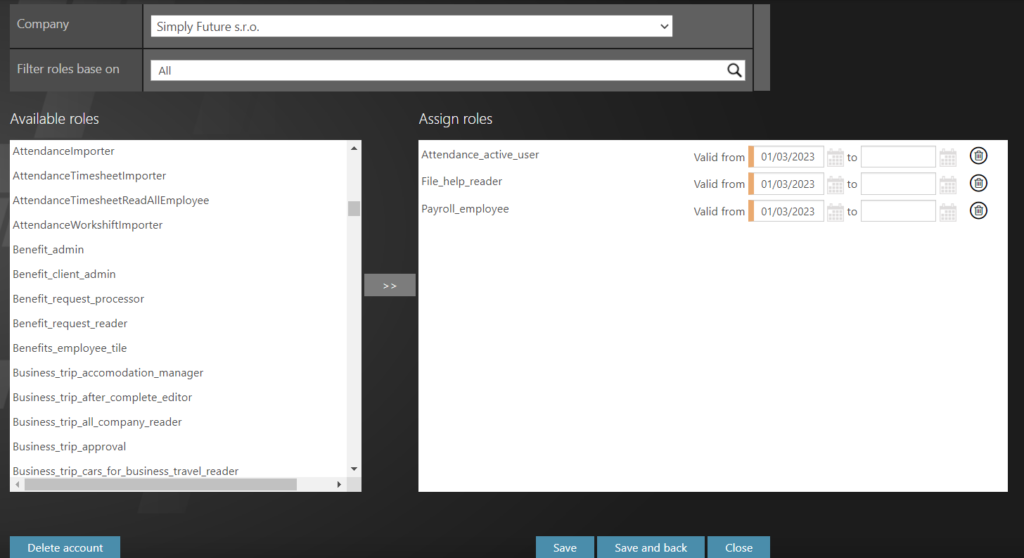
Search in the left list of roles. Double-click on some roles. It will move the role from the left to the right list. Only the roles on the right list will be added to the employee. For example those in the picture.
Click Save and back. This saves all changes and returns you back to the Employees list.
Add roles in bulk
Step 1 – Location
Go to Admin tile.
Select Employees.
You can choose the Company and filters if needed. There are advanced filters hidden – click on the small arrow to display them. Then, click Appply filter.
Step 2 – Import employees
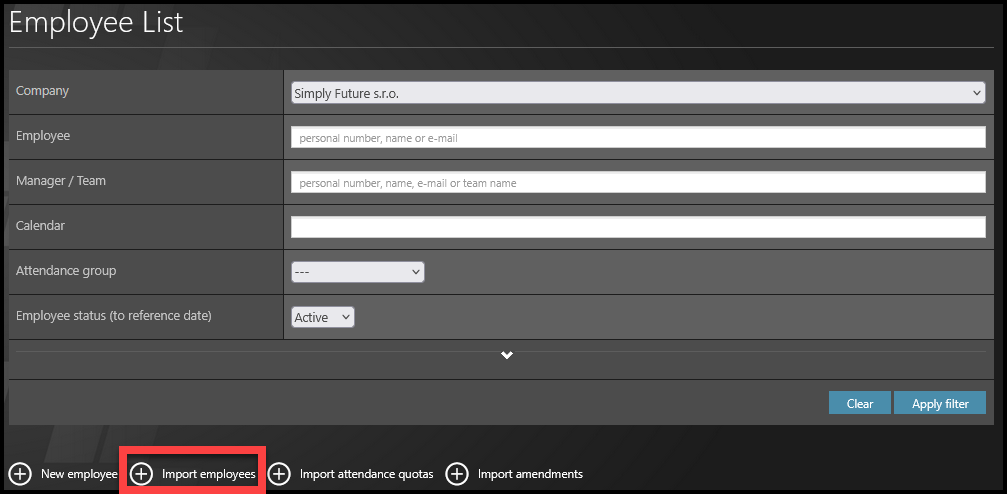
Click on Import employees button.
Step 3 – Download Template
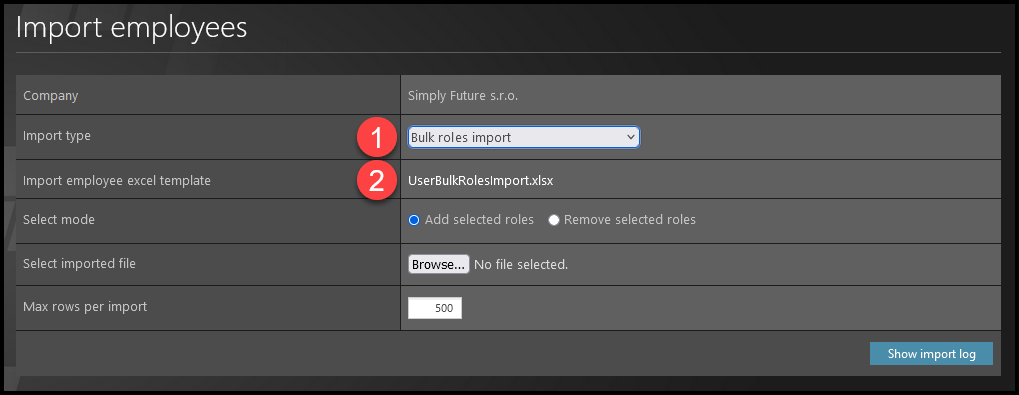
- Select bulk roles import.
- Click on the name to download the template.
Step 4 – Excel Template
Open the downloaded file in your computer. Click on the Enable Editing button.
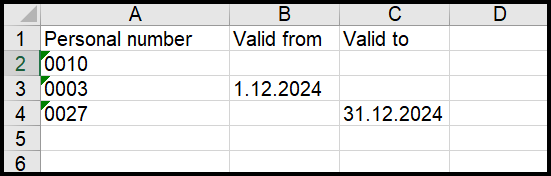
Fill in:
- Employee ID – a unique code that represents an employee within the company
- Valid from – access will be valid from – if you leave this field empty, the change is automatically valid from today
- Valid to – access will be valid until – if you leave this field empty, it will mean unlimited validity. Only the termination of the employee’s account ends the accesses. Several accesses, such as to download and see one´s own payslips, usually remain available to the employee for another 1-6 months.
If the role is already assigned to the user:
- Change validity “from” – not possible in import.
- Change validity “to” – it is possible to change the set validity “to” to unlimited validity – leave the field empty.
- Delete accesses – when bulk removing roles, it is necessary to select this option in the next step.
Save the file to your computer.
Step 5 – Upload the filled template
Open TULIP.
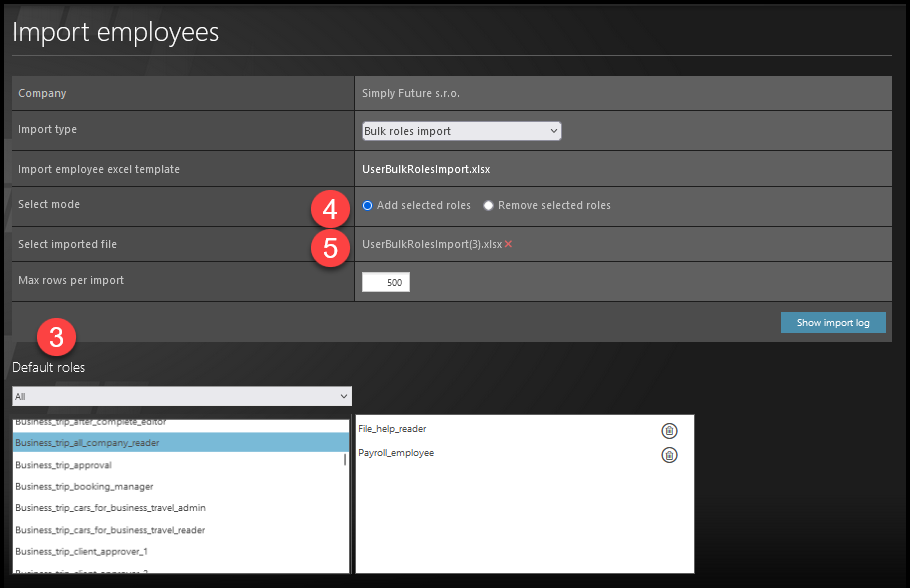
3. First select roles – click with the left mouse button on a role, it will move to the right list, which will be added (or removed) to employees.
4. Select mode – add or remove roles.
5. Click the Choose file – Select file button. Select the file from your computer.
Please note that you cannot upload files of zero size. If the file is empty, the system will alert you to the error.
Step 6 – Blue and Orange Rows
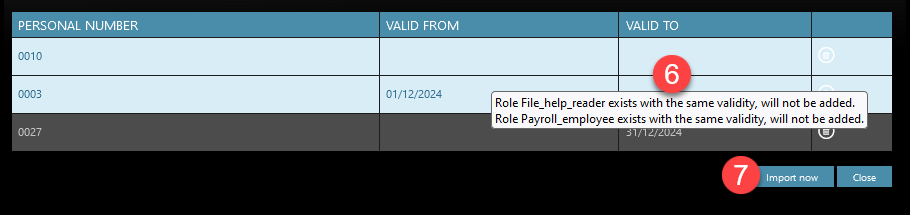
6) Hover the mouse over the highlighted rows (blue or orange). You will receive information specifying why the data are incorrect.
Blue rows inform you – for example, that the user already has the access – but you can still upload it.
Orange row alerts you to an error. You cannot import employees in orange rows. First, check for typos. Ensure there are no extra spaces at the beginning or end of words. For orange rows, you have two options:
Delete the row and add the change for this employee with the error later:
- First, click on the small trash icon on the right to delete the row.
- Upload the rest of the employees in the table to the system – click on the Import Now button.
- Add the employee with the error individually – import this employee separately.
Correct the data in the template – in the Excel sheet:
- Open the filled Excel sheet on your computer.
- Correct the data causing the error.
- Re-upload the file to TULIP.
- Check all data and click on the Import Now button.
7) Click on Import Now.