
Introduction
When an employee goes for a business trip (firstly creates a plan, after your approval of the business trip plan goes for a business trip), he/she fills in a Business trip settlement form. According to the current legislation, the employee is obliged to fill in the settlement form within 10 business days after the end of the trip. You receive the settlement form for approval – you can approve them individually or in bulk. If this process is finally completed by the 25th of the month, the employee receives the money in the salary for the given month.
Please note a TULIP setup you see always depends on custom requirements and access settings of TULIP for your company. Not all companies use the Business Trips functionality or the Bulk Approval for settlements.
Frequently asked questions
The employee cannot create a Business trip settlement.
If they requested an advance payment, the system will check if it was paid or not. If it was not confirmed by a treasurer, the system will not allow the employee to send the settlement for approval. Contact the treasurer – if possible, create a Hotline request.
Is a Business trip during weekend / bank holiday / other days without working shift possible?
Usually, employees can create a business trip plan only for days where there is already a planned working shift. In some cases, it can be enabled to create a business trip for other days (for example, weekends) and they also must create an attendance request for overtime work on that day. The request might require your approval, too.
The Business trip lasts over the month end, how to close/approve the attendance period?
If the business trip overlaps two or more months (It means that the trip starts in one month and finishes in another), the employee should close their attendance period for the finishing month while the business trip settlement form is still open for editing & you should approve/close the month too.
Individual approval
Step 1 – Tile
Open the e-mail notification about a new business trip settlement.
Or, go to My tasks tile
Step 2 – My tasks
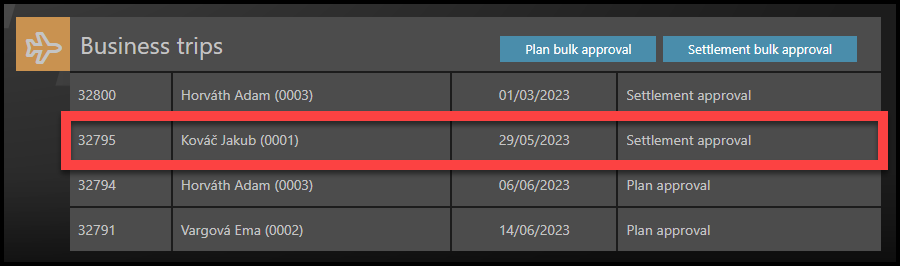
Find section Business trips.
Click on the settlement to see the details.
Step 3 – Details & Approval
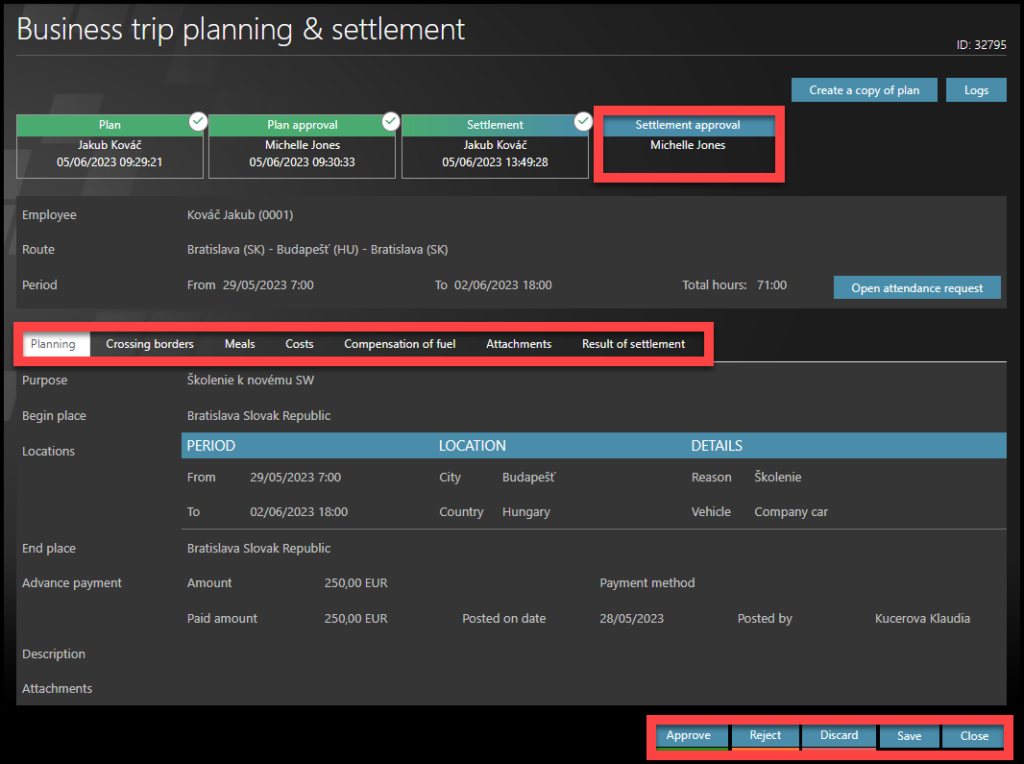
Go through each tab – Planning, Crossing borders, Meals, Costs, Compensation of fuel, Attachments, Result of settlement.
Select the action:
- To approve this single request, click Approve
- To return the settlement back to the employee, click Reject.
- Discard is the same as deleting a plan.
- If you want to leave without any action, click Close.
- Save – save changes and return back to filling in the form later – Go to My Tasks tile.
Bulk approval
Step 1 – Tile
Open the e-mail notification about a new business trip settlement.
Or, go to My tasks tile
Step 2 – My Tasks
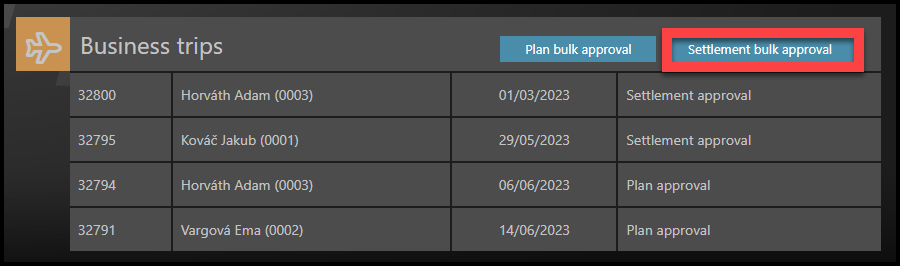
Find section Business trips.
To approve settlements in bulk, click on Settlement bulk approval.
Step 3 – Filters
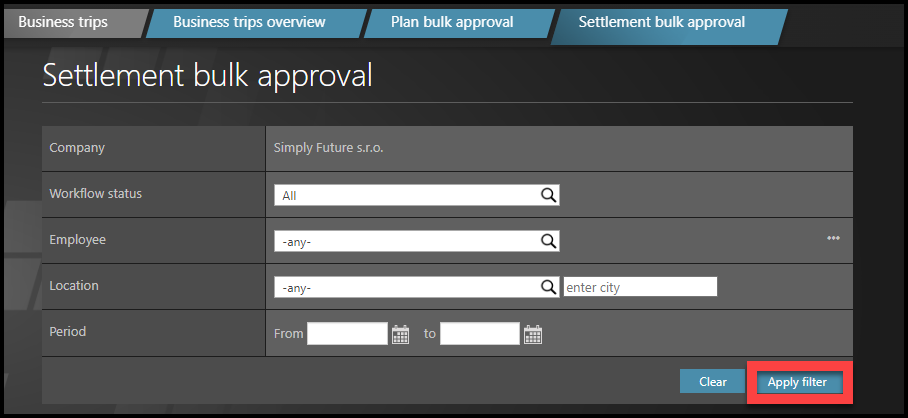
Use filters, if needed: Workflow status, Employee, Location, Period from/to.
Click Apply filter.
Step 4 – Single plans
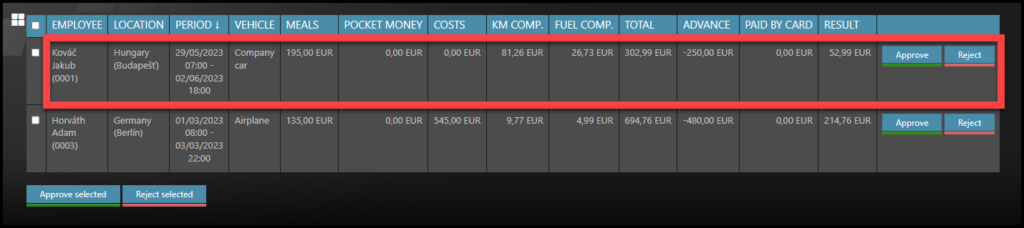
If you wish to check & approve or reject one plan, click on the row of a single business trip to see its deails.
Step 5 – Details & Approval
Go through each tab – Planning, Crossing borders, Meals, Costs, Compensation of fuel, Attachments, Result of settlement.
Select the action:
- To approve this single request, click Approve
- To return the settlement back to the employee, click Reject.
- Discard is the same as deleting a plan.
- If you want to leave without any action, click Close.
- Save – save changes and return back to filling in the form later – Go to My Tasks tile.
Step 6 – Select multiple plans
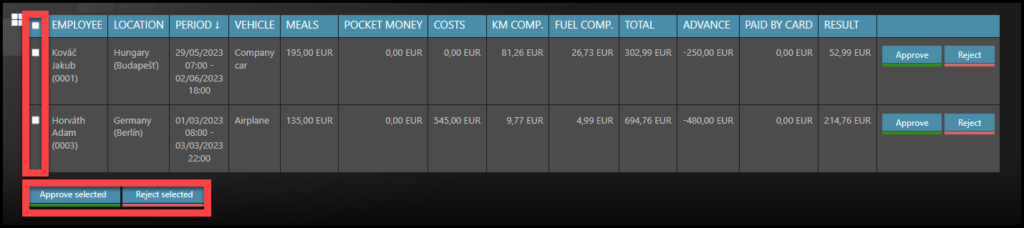
Click on checkboxes to select multiple requests.
Click on the Approve selected button to approve all chosen requests.
Click Reject selected and those settlements will return to employees for correction.
Selected employees will receive an e-mail notification.
The payroll and the employee receive an e-mail notification about the approval.
Once payroll processes the settlement, it becomes closed, the amount will be paid to the employee with his/her next salary.
If payroll rejects the request, it is sent directly to the employee to correct it.