
Introduction
The HR administrator is responsible for updating monthly and yearly quota (like Vacation, Transfer vacation from a previous year, Bonus vacation, Sick Day, Doctor visit, Family member doctor visit and many other custom types of absence). Quotas can be uploaded into TULIP individually or using an excel sheet import template, using personal numbers – in this manual.
Please note a TULIP setup you see always depends on custom requirements and access settings of TULIP for your company. Not all companies use this Administrator functionality.
Frequently asked questions
How to allow employees planning vacation for next year?
The numbers that an HR Administrator imports into TULIP are valid. TULIP does not know which employee has more or less quota available (we do not track the length of a contract, employee´s age, number of children, extra leave allowance, individual and additional allowance per contract etc.).
- in December / during the end of a year – import basic quota for the next year (for example 20 days of vacation). This way, employees can create requests.
- in January / at the beginning of the new year – import remaining quota (e.g.transferred vacation) from the last year. Use “transfer of entitlements” column in import table. This way, the transferred quota will be deducted from employee´s allowance first, and the basic quota after that.
Can I delete quotas?
In order to delete the current data, in the import file type in zero (0) into the correct cell. Find more information here.
Should I import quota in hours or days?
The format depends on the legislative of the country and the import settings for your company.
If you are unsure about the format of quotas (hours, days, date format etc.), download a file with current quotas to check.
Import quotas
Step 1 – Location

Go to Admin tile.
Select Employees.
You can choose the Company and filters if needed. There are advanced filters hidden – click on the small arrow to display them. Then, click Apply filter.
Step 2 – Import attendance quotas
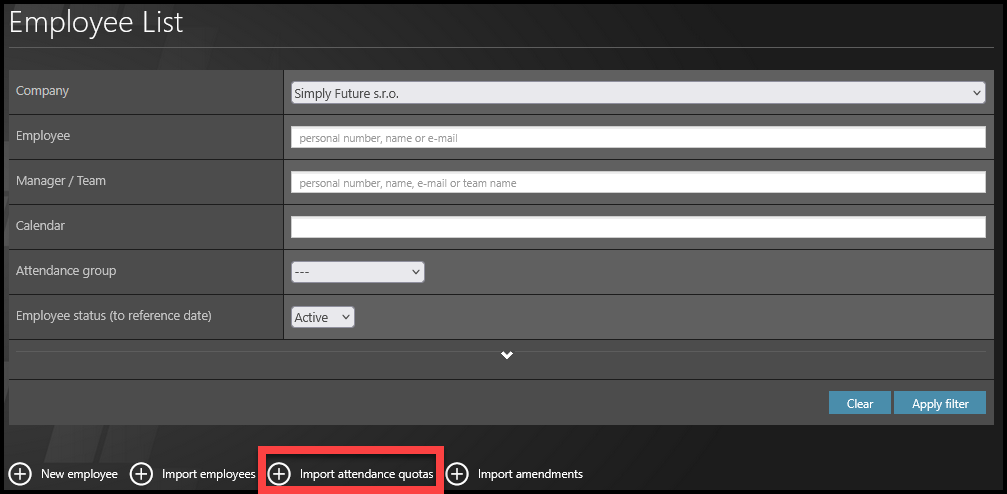
Click Import attendance quotas.
Step 3 – Download template
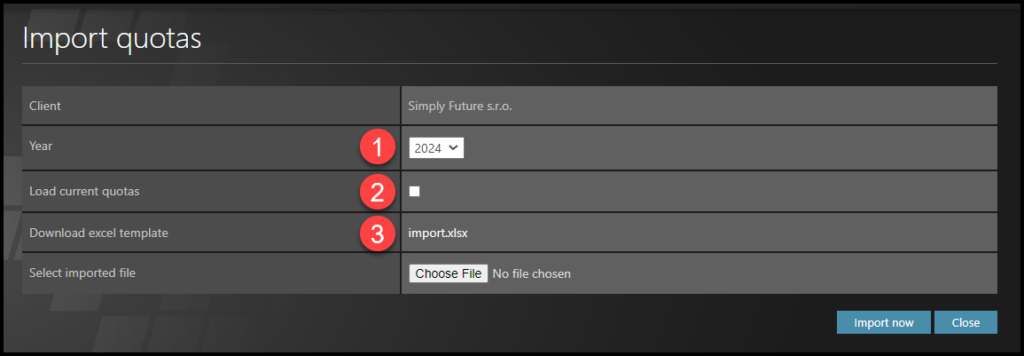
- Select Year.
- This step is optional: If you want to load current quotas into the excel sheet, tick the checkbox. Loading current quotas is helpful especially if you are unsure about the numbers/amounts uploaded in the system or if you want to check the correct format of quotas (hours, days, date format etc.) for uploading.
- Click on import.xls to download the template.
Step 4 – Excel sheet
Open the file in your PC.
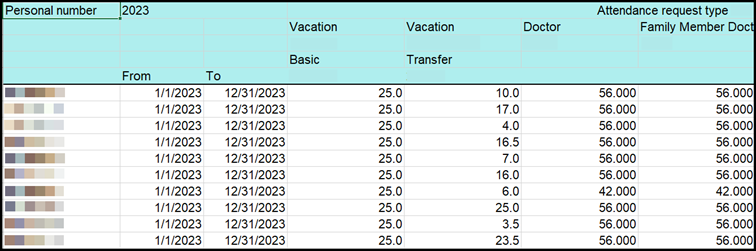
Click Allow changes. There are two possible formats of data:
A) Days (for example, 25 days of vacation) or Halfdays (e.g., 10,5 days of transfer vacation)
B) Hours (for example, 56 hours for a doctor´s visit)
If you are unsure about the format of quotas (hours, days, date format etc.), LOAD current quotas to see the formats.
Columns description:
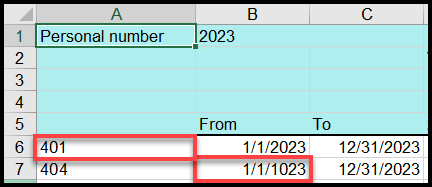
- Personal number – you must fill in the employee’s personal number. For example, “11000210”.
- Date from – enter the start date when the employee can actually use the request for the attendance activity. For example, FROM “7/3/2023”. The default setting (if you leave the field blank) is the first day of a calendar year, for example 1/1/2023.
- Date to – enter the end date – the last day when the employee can actually use the request for the attendance activity. For example, TO “11/4/2023”. The default setting (if you leave the field blank) is the last day of a calendar year, for example 12/31/2023.
Step 5 – Change, delete or keep data

There are three rules:
- Change data – type in any numbers – it will overwrite the old data.
- Delete the old data – type in zero (0), the current quotas will be deleted.
- Keep the old data – leave the cell blank, no changes will be made.
Step 6 – Import file
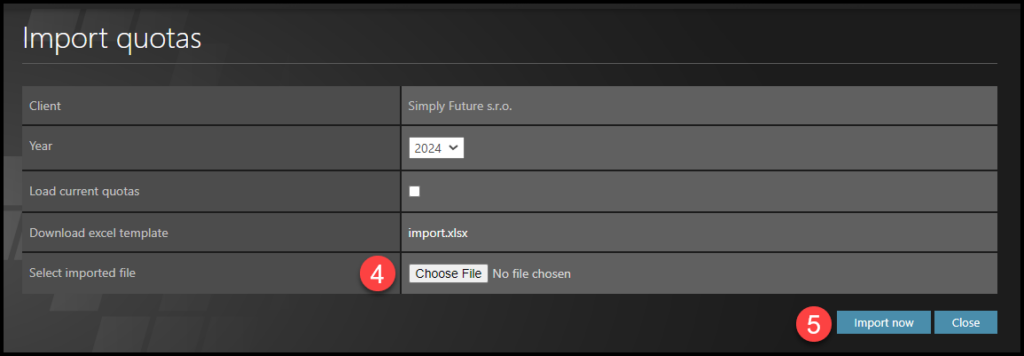
Save the file in your PC. Go to TULIP.
4. Click Choose file. Select the file from your PC.
5. Click Import now. If all is OK, quotas are imported!
Step 7 – Errors

If there are any typos, errors, overlapping dates or incorrect formats of data, please be aware the data cannot be imported only partially. Either the whole file is uploaded, or none of it.
If there is an issue, you will see an error warning. It describes what exactly and where must be corrected in order to be uploaded into the system.
Go back to the import sheet and correct it. Then, import it into TULIP again.
Check current quotas
Step 1 – Location
Go to Admin tile.
Select Employees.
You can choose the Company and filters if needed. There are advanced filters hidden – click on the small arrow to display them. Then, click Apply filter.
Step 2 – Import attendance quotas
Click Import attendance quotas.
Step 3 – Download file
in order to load current quotas into the excel file:
- Select Year.
- Tick the checkbox “Load current quotas”.
- Click on import.xls to download the excel sheet.
Or you can check the quota in individual attendance settings of employees.