
Introduction
Shift plan allows employees and team leaders to manage their working time, approve absences and time-off, record attendance and handle the individual and team work scheduling while staying fully compliant with legislation requirements. This manual includes information on:
- change the employee´s attendance – create a request, approve their attendance or even change their shift distribution (change calendar)
- different types of view, how to use filters
- export of data
- adding notes / tags to certain employees
Please note a TULIP setup you see always depends on custom requirements and access settings of TULIP for your company. Not all companies use the Shift plan functionality.
Frequently asked questions
I cannot edit the shifts / calendar.
If the buttons for days are light-grey and non-clickable – the calendar is not editable.
- it might mean that the calendar has only fixed shifts (this can be changed in calendar settings).
- you do not have access to edit shifts (in the case of an employee on their own, so-called self-editor).
- or that the attendance period for this month is already closed (it can be revoked by an HR Admin).
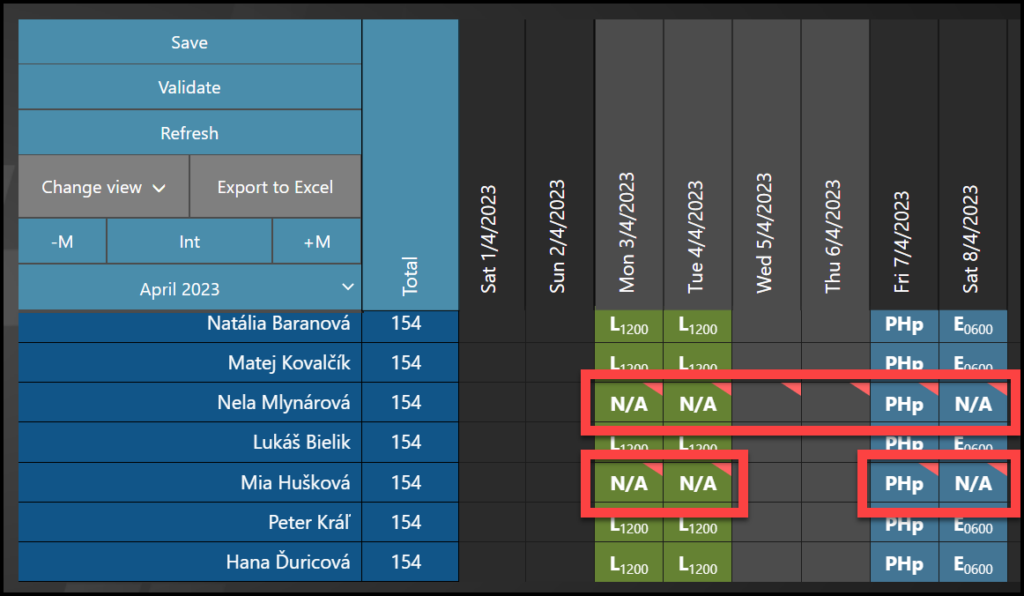
What does the PHP, N/A, PH mean in the plan?
Those labels (especially PH, PHp) depend on your company settings. The default setting for a paid holiday day shift & how those shifts behave in attendance can be customized to your needs.
- N/A – Not Available – There is an attendance request (absence) planned for this day
- PHp – Public Holiday, paid (paid shift, worked, with an extra payment) – It is a short name for working on a public holiday day. The employee has a planned shift for this day. It means there is some sort of extra payment, too.
- PH – Public Holiday (paid as a regular shift, but not worked) – It is a short name for a public holiday day. The employee does not work on this day. It means he receives payment for this shift just as if he/she worked on a regular day.
Will the attendance request be deleted when I change employee’s calendar?
If you change an employee’s calendar, any unapproved or approved Attendance requests planned for the future will be automatically discarded.
What can employees & managers see, access and do in Shift Plan?
- Employees can display own shifts, their team members´ shifts, and create attendance requests – click here to go to manual for employees.
- Manager (teamleader, assistant…) may be allowed to read, plan and change shifts and also approve attendance of subordinates in his/her own team – click here to go to manual for managers.
- An HR Administrator may be allowed to read, plan and change shifts and also approve attendance of all employees in a company.
Shift plan description
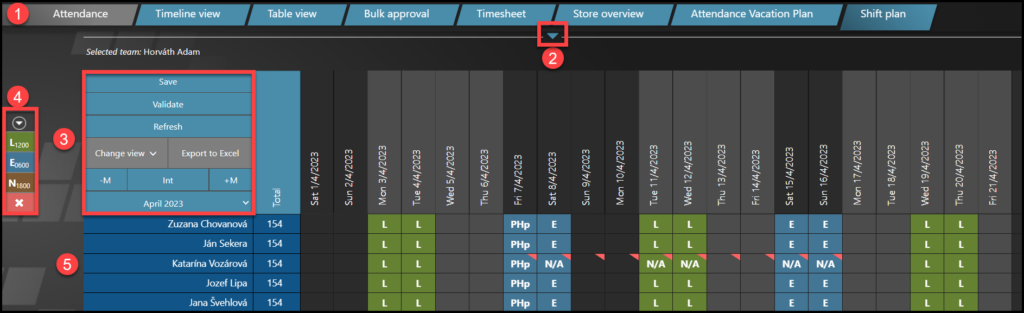
- Attendance functionalities – Browse descriptions of attendance functionalities in this manual: Attendance.
- Filter – Click on the small arrow on top of the page (to select Team, Employees etc.).
- Buttons – Save, Change view, Export, etc.
- Shifts – Favorite Shifts bar for quick adding & removal of shifts.
- Attendance of employees – Details about employee´s attendance, options to change calendar, create attendance requests.
1. Attendance functionalities
2. Filter
The small arrow on top of the page allows you to display selected teams / employees and shifts.
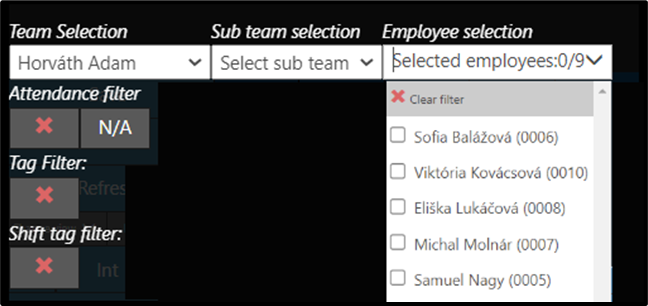
- Team selection – select the name of a manager
- Sub team selection – select the subteam
- Employee selection – you can choose some of the employees or select all. Default view is ALL employees in the team/subteam.
- Attendance filter – those are the attendance request types. In this case, Vacation & Sick Days are both anonymized and displayed as „N/A“.
- Tag filter – you can add custom tags to employees so that you can filter between them easily. For example, add tags to employees who can speak Spanish or Italian if you work in a call center.
- Shift tag filter
3. Buttons
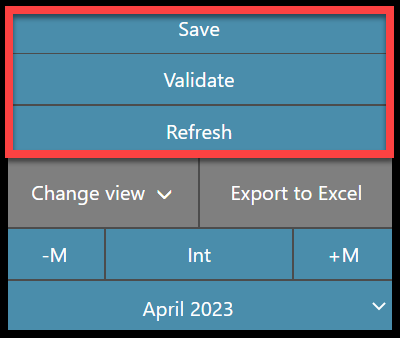
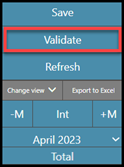
Save / Validate / Refresh
- Save – if you make any changes, click save to keep them.
- Validate – this button does not save the changes, only tests them according to current legislation. Before you click the Save button, you can click Validate.
- Refresh – refresh the page.
Change view
This button allows you to change the displayed screen, view of shifts, colorize selected shifts etc.
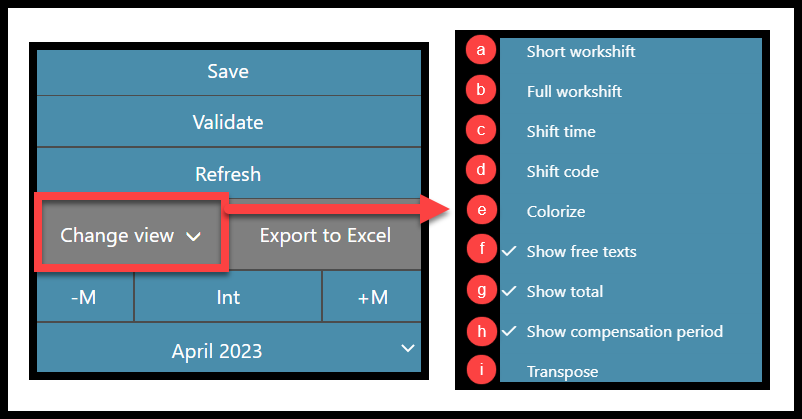
Click on a letter & jump right into the part with more information
If you do not change view, the default view is the type of a shift (Early, Late, Night) + Time when the shift starts. If the shift is manually changed, only a letter „M“ will display.
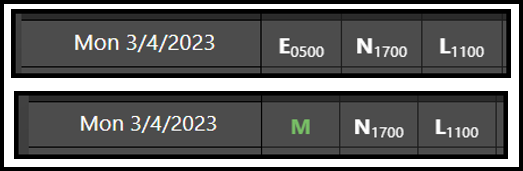
A) Short workshift

- Displays only the type of a shift (the first letter).
- Early – shifts starting in the morning
- Late – shifts starting in the afternoon
- Night – shifts starting in the evening/night
- M – Manually changed shift
B) Full workshift
- Displays the duration of a shift from the default system settings.
- If the shift is manually changed, only a letter „M“ will display.
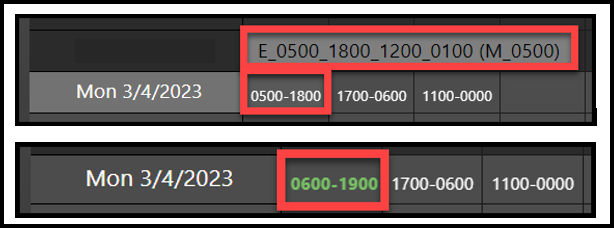
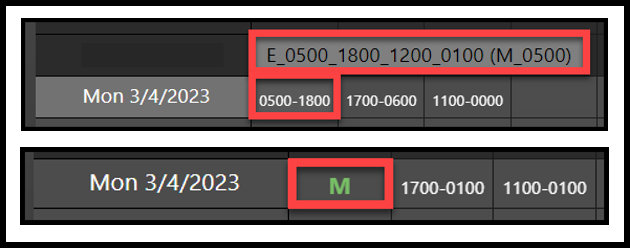
C) Shift time
- Displays the real, submitted duration of a shift.
- If the shift is manually changed, the actual duration of a shift will display.
D) Shift code
- Displays the code of the shift.
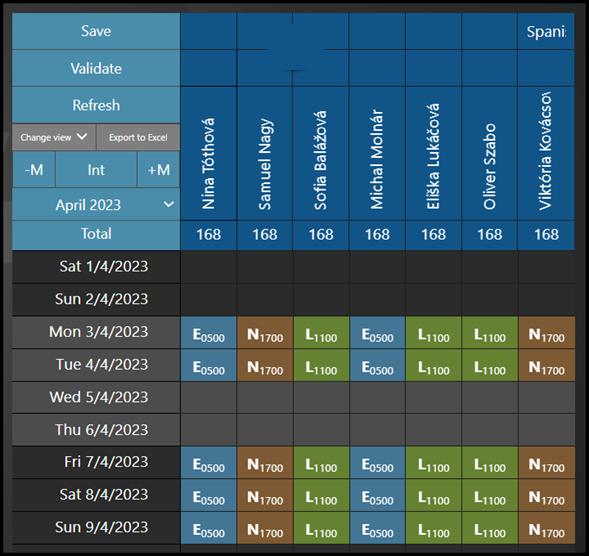
E) Colorize

- The system colorizes shifts based on the type of a shift.
- You can see the distribution of shift types easily.
- Early – by default blue
- Late – by default green
- Night – by default brown
- M – manually changed shifts are black & green before saving and grey & white after saving.
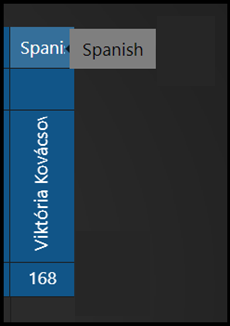
F) Show free texts
- Optional, you can add some personal notes to the employees.
- For example, add notes to employees who can speak Spanish or Italian if you work in a call center.
- You can edit those texts anytime you click on them.
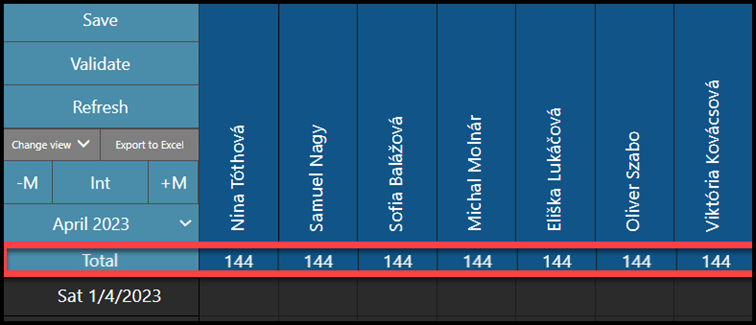
G) Show total
- The summary of shifts – the amount of hours – planned it the time period that is selected.
- For example, in this case it is 1 month (April 2023).
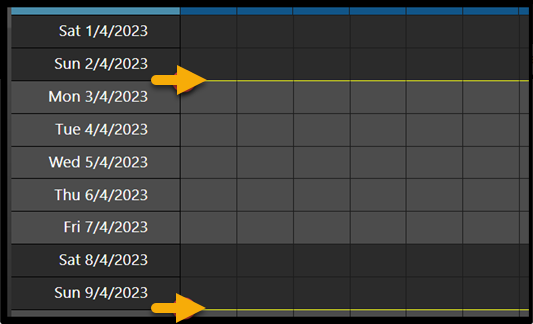
H) Show compensation period
- Compensation period is the period where the amount of hours planned/worked must be a certain number of hours (It cannot be more or less than).
- In shift plan, it is displayed with a yellow line.
- In this case, it is a compensation period for 1 week for a regular 40-hour week.
I) Transpose
- Changes the location of columns and rows.
- Default view:
- Transposed view: In some cases, managers prefer to use the opposite view. It is especially useful if there are many employees in one team.

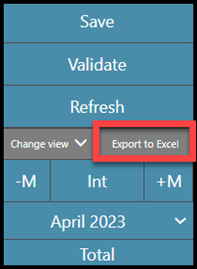
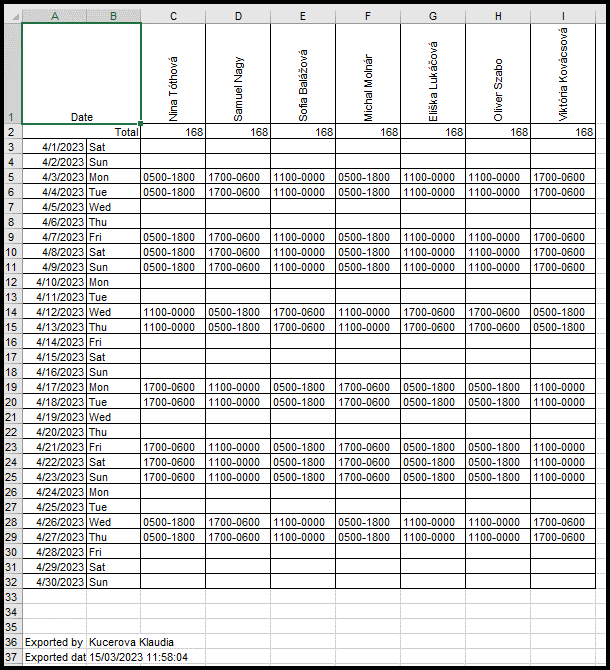
Export to Excel
- Click on the button to export the selected time period and employees into an Excel sheet.
- There is also a timestamp automatically generated by TULIP at the end of the document
Month & Year
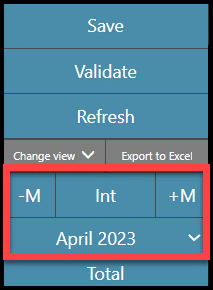
- -M (Month) – adds 1 month before the current view
- +M (1 Month after) – adds 1 month after the current view
- INT (Interval) – allows you to define a period that you want to display in the view.
- April 2023 (or any other month + year) – select a single month.
Total hours
The summary of all displayed shifts – the amount of hours – planned it the time period that is selected. You can show or hide this feature in Change view.
For example, in this case it is 1 month (April 2023).
4. Shifts
Favourite shifts
The bar on the left side of your screen contains favorite shifts. It serves as a shortcut to add or remove shifts more quickly. You can add or remove shifts from this bar anytime.
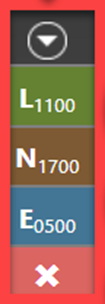
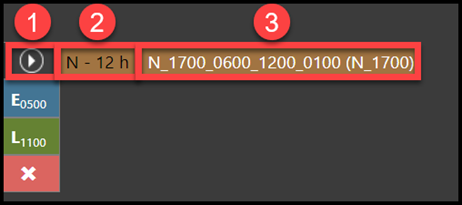
Add a shift to favourite shifts
- Click on the arrow. You will see all available shifts.
- Click on the shift name.
- Click on the full shift name to add a shift to favourite shifts.
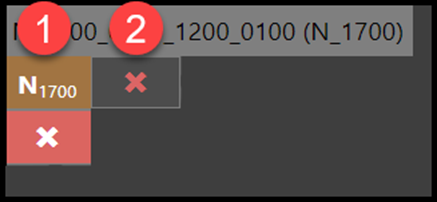
Remove a shift from favourite shifts
- Move your mouse over a selected favourite shift.
- Click on the cross sign next to a favourite shift´s name.
Add shifts in bulk
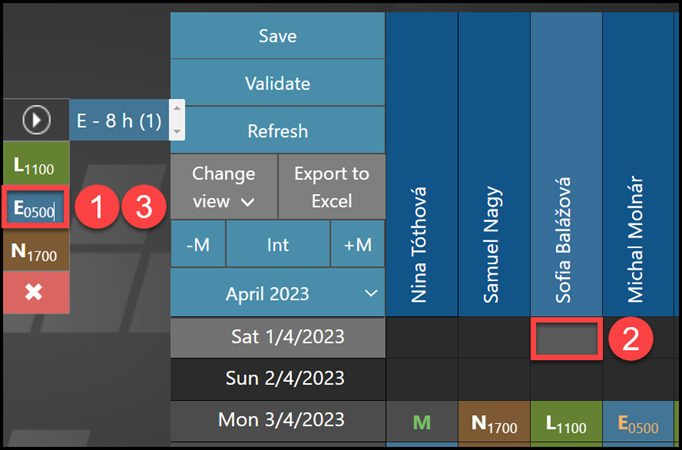
- Click on one of the favorite shifts.
- Click on a day / multiple days in a calendar.
- Click on the favorite shift again to stop the selection.
If the day does not contain a shift, it is added. If the day contains a shift, it is replaced.
Any unapproved or approved Attendance requests for this day are automatically discarded.
Remove shifts in bulk
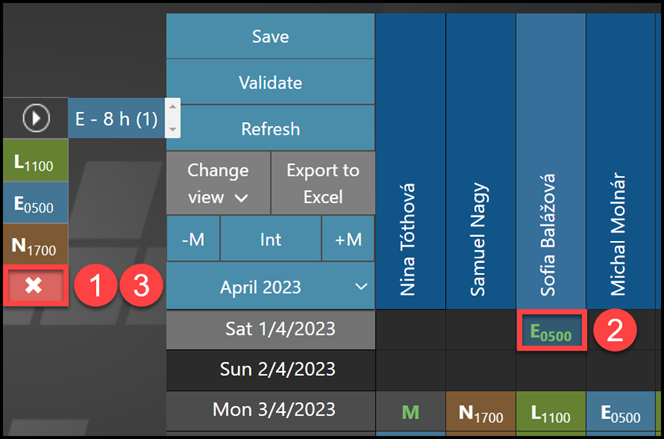
- Click on the cross sign at the bottom.
- Click on a day in a calendar with a shift.
- Click on the cross sign at the bottom again to stop the selection.
Any unapproved or approved Attendance requests for this day are automatically discarded.
Edit shifts individually
You must click Save, otherwise the change will be lost. It is possible to click on individual days and add/remove/change shifts by one.
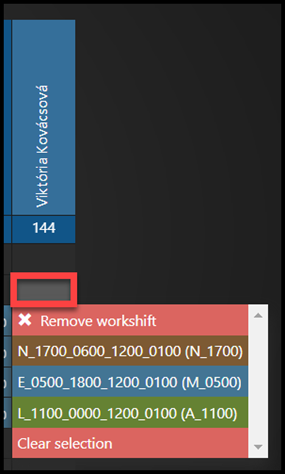
Click 1x on any day, all shifts that are available will display.
If the day does not contain a shift, it is added. If the day contains a shift, it is replaced.
If a shift is added / edited / discarded, any unapproved or approved Attendance requests for this day are automatically discarded.
Edit shift times manually

- Click on any day with a shift with the right button of your mouse.
- Click on the shift that displays.
- Then you can manually edit the dates and times of a shift.
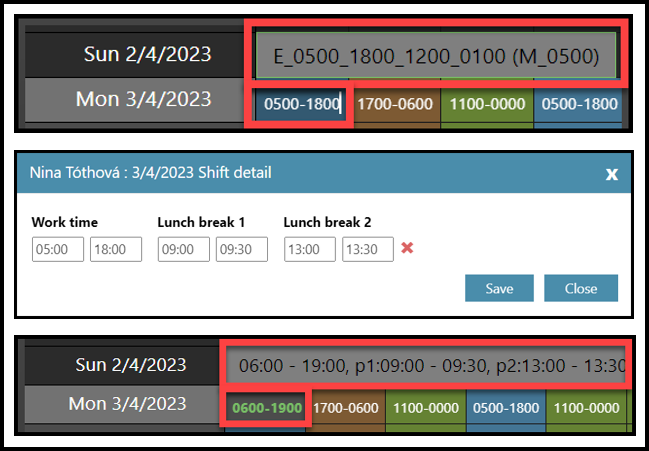
Any unapproved or approved Attendance requests for this day are automatically discarded.
Validate changes & Warnings
Click Validate to check legislative controls.
If RED warnings are triggered, the calendar cannot be saved.

Shift Plan with ORANGE warnings can be saved and even closed at the end of the month.

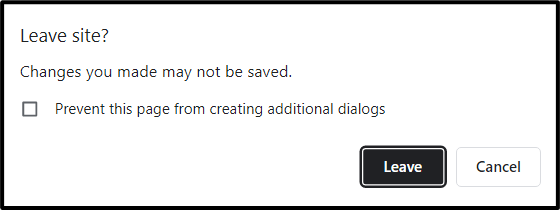
After Validation, you must click Save, otherwise the changes will be lost.
If you try leaving without saving changes, a pop-up window will remind you.
5. Employee’s attendance
Approve attendance period
First, an employee approves (closes) their own attendance.
Then a manager has to approve it. Approving – as a manager – can be done individually or in bulk for multiple employees at once. If an orange triangle icon is displayed, you can click on the icon to see more information.
Lastly, an administrator of the company approves (closes) the attendance.
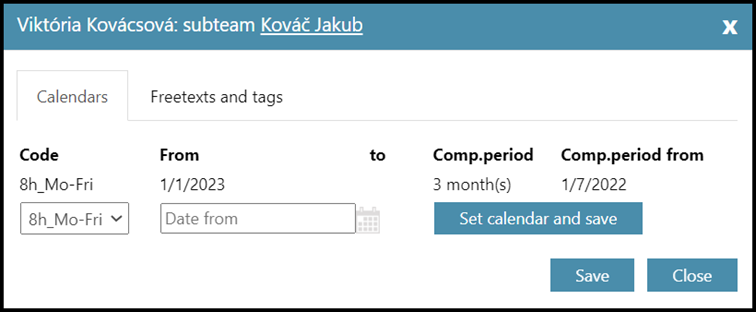
Change calendar
Click on a name, a new window opens.
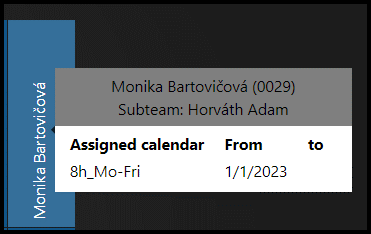
For an employee with an editable calendar you can change calendars right there.
Any unapproved or approved Attendance requests from this day will be automatically discarded.
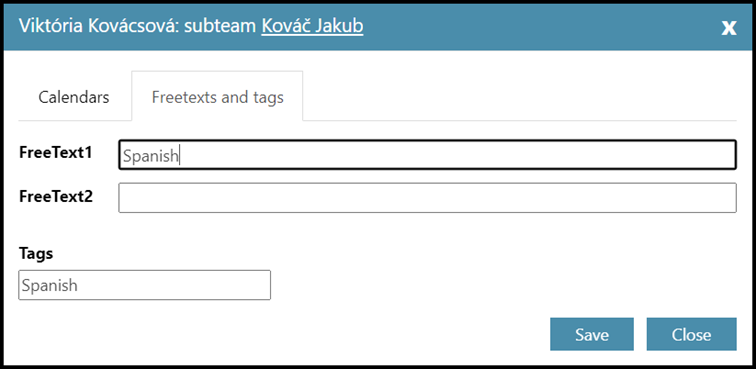
Notes & Tags
Click on a name, a new window opens.
Set up some notes/tags.
Attendance request
- Double-click on any day, you will be able to create an attendance request.

Request for mutliple days
- If there is also a period of non-working days within this request:
- A) Create a full-length request. This will mark also free days in the request as “occupied”. A small colorful triange will appear in each day of the request OR
- B) Create two/more requests only for those days with your shifts. It will show that you are available during the free days.
N/A, PHp, PH
- N/A – Not Available – There is an attendance request (absence) planned for this day
- PHp – Public Holiday, paid (paid shift, worked, with an extra payment) – It is a short name for working on a public holiday day. The employee has a planned shift for this day. It means there is some sort of extra payment, too.
- PH – Public Holiday (paid as a regular shift, but not worked) – It is a short name for a public holiday day. The employee does not work on this day. It means he receives payment for this shift just as if he/she worked on a regular day.
Please be aware that labels (especially PH, PHp) depend on your company settings. The default setting for a paid holiday day shift & how those shifts behave in attendance can be customized to your needs.