
Introduction
The main tool of distributing working time in our Attendance modules are calendars that consist of workshifts.
Workshifts
Workshifts distribute the employee’s working time in one working day – usually one calendar day. Sometimes it is even necessary create new workshifts (in this manual) in order to make a desired calendar.
For example, a workshift for people working in the office from 8:00-16:30, with duration of 8h work + 0,5h break, can be set up for mandatory working time 10:00-15:00, allowed selectable working time 6:00-20:00. This setting allows the employee to have some flexibility in start/end, while also keeping the working time.
Calendars
Calendars allow the distribution of working shifts in a pattern during a short time period e.g. week, month, 90 days. It is necessary to create calendars from workshifts in order to assign it to employees.
For example, a calendar for people working in the office from Monday to Friday, 8:00-16:30, is set up for 1 week and consists of 5 shifts that take 8,5h from 8:00-16:30.
Adding calendars to employees
After creating workshifts (in this manual), create calendars and lastly assign calendars to employees.
Calendars and workshifts are made by administrators, but it must be noted who receives which calendar afterwards (some of the managers also can change employee’s calendars).
Please note that only employees with special access rights can use functionalities to create calendars, shifts, or assign them to employees.
Frequently asked questions
It is my first time of creating a calendar, are there any template calendars?
There are no universal templates in TULIP administration available. Click here to see examples of Calendars.
Also, a few calendars are usually already created for your company. You can use that as a template for a new calendar. Go to ‘Attendance calendars’ tile, click on a calendar’s name to display details and use them as a guide.
How to create a Contractors’ calendar?
Add shifts that can be modified (the duration can be 0 or more hours) – go to this part of the manual to see more.
I cannot add a shift into a calendar.
Is there an issue with selecting a shift? Use the TAB key instead of your mouse to select a shift – go to this part of the manual to see more.
The shift you want to choose is not even displayed? Create a new shift first and then create the calendar using that shift.
Shifts
Step 1 – Tile
Ho to Admin tile.
Step 2 – Attendance configuration
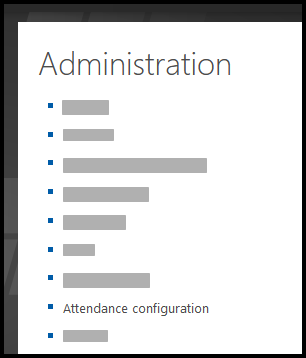
Select Attendance configuration option.
Step 3 – Configuration

If you have access to more than just one company, first select the Company.
If you have access to only one company, you will see only configuration for this one company.
Select Configuration part: Attendance workShift.
Step 4 – Create new / Edit current
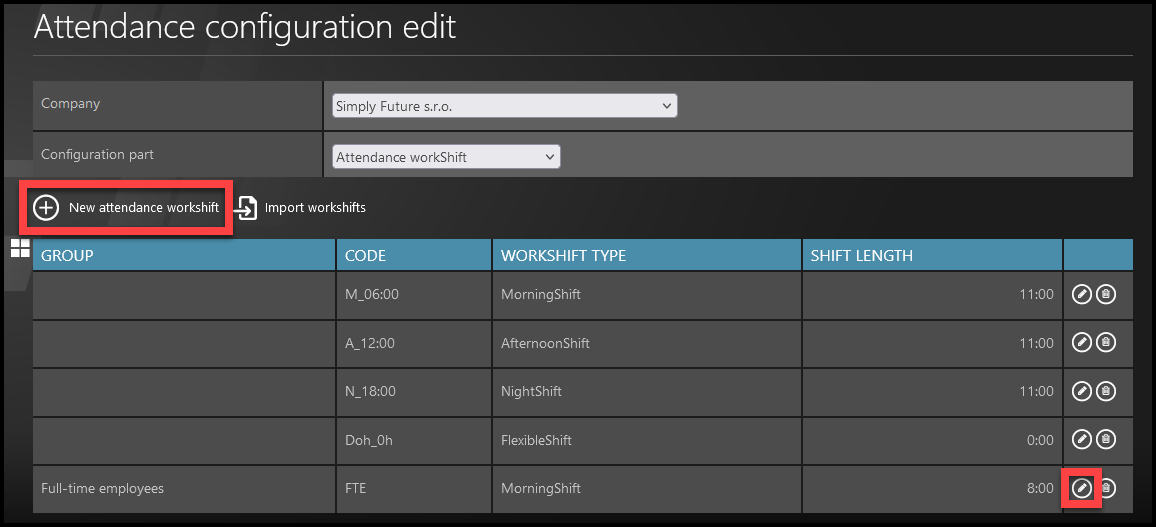
Click on the New attendance workshift button.
If you want to edit an existing one, click on the pencil icon.
– Shift settings (Description) –
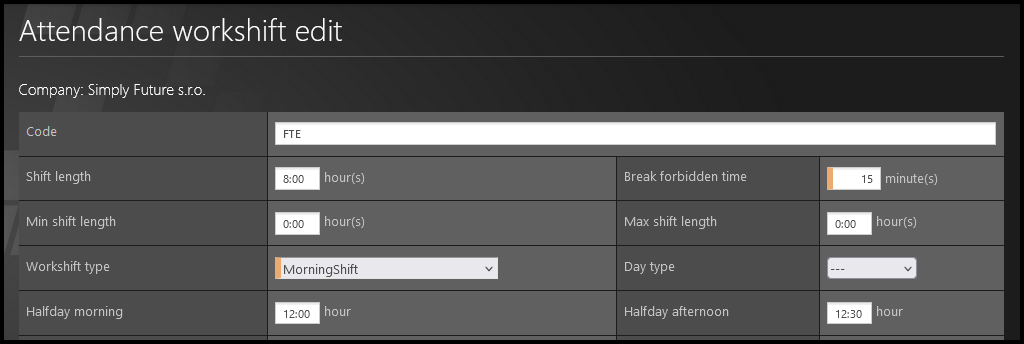
You must fill in the fields with an orange stripe.
- Code – Code is usually short because it is used in import of employees / changes. Here are some tips:
- Name the shift based on the length (8h, 2,5h, 6h etc.).
- For multiple same-length shifts, you can name them based on the start&end time (8:00-16:30, 7:30-11:30 etc).
- Based on the shift type (Morning shift, Mo-Fri Flexible, Contractors 0h etc.)
- Shift length – Type in the length (with or without break time)
- If the break is not a part of paid working time, type here the shift length without break time.
- Break forbidden time – Set up time at the beginning & at the end of a shift when break is not allowed to be taken. For example 15 minutes means the employee cannot take the break 15 minutes after shift start and also 15 minutes before shift end.
- Min shift lenght & Max shift length – use in case of flexible shifts.
- Workshift type – used in ShiftPlan. It assigns colors & shortcuts to shifts based on the type (various extra payments to employees or other specifics can be assigned as a custom setting).
- Day type – do not select. This parameter is used by Administrators for a small amount of Clients with specific Attendance settings.
- Halfday morning & Halfday afternoon – This setting is important if you are using halfday requests for any kind of attendance activity (for example, 0,5 day of vacation) or in combinations of activities. Examples:
- for shifts with no breaks (short shifts) – exactly in the middle of a shift, both halfday times are the same.
- for an 8h long shift (8:00 to 16:30 including a 0,5h break) with a break in the middle of a shift (12:00-12:30), halfday morning is until 12:00, and halfday afternoon is from 12:30 (which is also at the end of the break).
- In an 8h long shift (9:00 to 18:00 including a 1h break) with a break not exactly in the middle of a shift (12:00-13:00) halfday morning can be set up until 14:00, and halfday afternoon starts from 14:00 (because the employee already had a break it the first half).
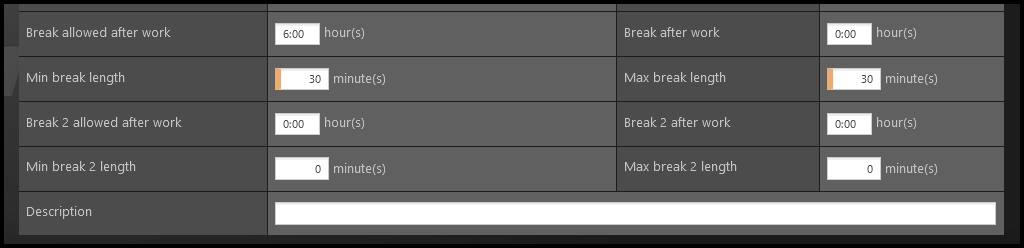
- Break allowed after work – The employee will be allowed to take a break only if he/she worked at least this amount of hours. This parameter does not restrict when exactly during those hours he/she can take a break.
- Break after work – The employee will be allowed to take a break after this amount of hours worked. This parameter does not inform us whether the employee can or cannot take a break (for example if he/she worked only 3 hours, even if break can be taken after 2 hours, it will not be possible if break is allowed only for shifts longer than 6 hours).
- Min break length & Max break length – You can set up the minimal and maximal duration of a break. If the break should be only exact number (not a time range), insert the same number into both of those spaces.
- Break 2 – For some shift lengths, there may be two breaks mandatory.
– Limits (Shift measures) –
You must set up the Basic Period.
Fill in the Expectant Break 1 if you filled in the data for break 1.
For flexible shifts & contractors, additionaly also set up Mandatory Period and Selectable Period.
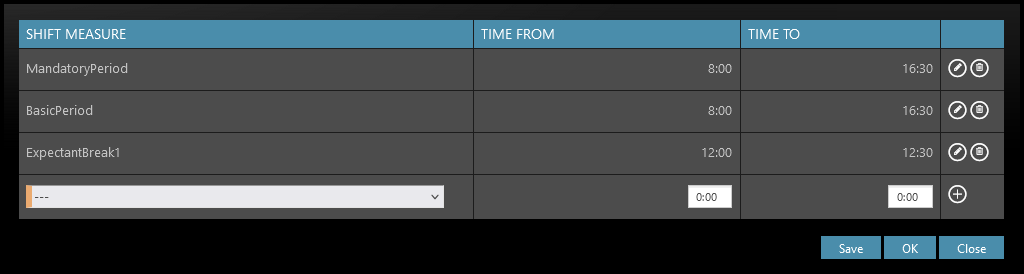
- BasicPeriod: Mandatory
- Select the from&to times.
- The basic period that is pre-filled and displayed in employee´s attendance, and also multiple attendance settings count and include this parameter.
- It usually includes break times – for example, an 8h long-shift with a 0,5h break, Basic Period is going to last 8,5h (8:00 – 16:30).
- ExpectantBreak 1: Mandatory, if you filled in the data for Break 1.
- The time when the (first) break is expected to be taken.
- Please be careful to select “Break 1”, not “Break 2”.
- This time is usually subtracted from Basic Period – for example, in an 8,5h Basic Period, the Expectant Break 1 is going to last 0,5h (12:00 – 12:30).
- Mandatory period: For flexible work and contractors
- This is the period when employee musts be present at work (or have an attendance request for presence/absence).
- For example, for those with a flexible working time, employees are expected to work from 09:00 to 11:00, (the work can start and finish anytime during the day but it musts INCLUDE this time).
- The range they can choose depends on Selectable Period settings.
- Selectable period: For flexible work and contractors
- This is the full range during which an employee can work.
- For example, this setting restricts working at night for those with a flexible working time. Employees can be allowed to work from 6:00 to 20:00 (the work can start anytime from 6:00 and finish anytime until 20:00).
- You can also set up some Mandatory Period to somehow restrict the working time while still allowing some selectable working time.
- Expectant break 2: For shift workers. Mandatory, if you filled in the data for Break 2.
- The time when the second break is expected to be taken.
- Please be careful to select “Break 2”, not “Break 1”.
- This time is usually subtracted from Basic Period – for example, in an 12h Basic Period, the Expectant Break 1 is going to last 0,5h and Expectant Break 2 is also going to last 0,5h.
- AbsenceCalcPeriod: Do not select. This parameter is used by Administrators for a small amount of Clients with specific Attendance settings.
Click Save.