
Introduction
A dedicated person (Manager, Team Leader, HR Administrator etc.) approves / declines employee´s requests that require manager’s approval – for example a vacation requests, home office requests, sick day requests etc. Usually an employee creates, changes or deletes a request and than the approver receives an email notification. Request can also be edited, moved or deleted under certain conditions. In this manual you will find information on how to:
- Approve attendance requests of employees – multiple requests at once via Attendance bulk approval or via My tasks tile.
- Print – Print approved requests
Please note a TULIP setup you see always depends on custom requirements and access settings of TULIP for your company. Not all companies use the Attendance functionality.
Frequently asked questions
Who can create requests?
- Manager / HR Administrator can edit, delete, or create any type of request.
- Only HR Administrator with special access rights can be able to change the attendance of a terminated employee.
- Payroll accountant can make any changes to a closed attendance period & re-open the attendance period for Managers/HR, so they can edit the attendance themselves.
I need to create many requests for more employees, is there a way to do so?
Yes, certain users can have the access to create and also import requests in bulk by uploading an excel sheet into TULIP.
Do I have to receive notifications after each request?
No, you can always unsubscribe.
Managers in certain companies receive ” summary notifications,” a summary of requests for a set period of time, such as once a week.
The option for printing requests is not available.
Please check if the request is approved already – only approved ones can be printed.
Bulk approval in Attendance
Step 1 – Tile
Go to My Attendance tile.
Step 2 – Bulk approval
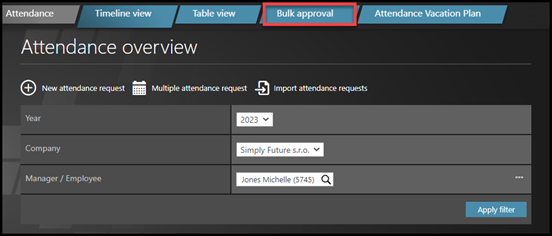
Click Bulk approval.
Step 3 – Filter
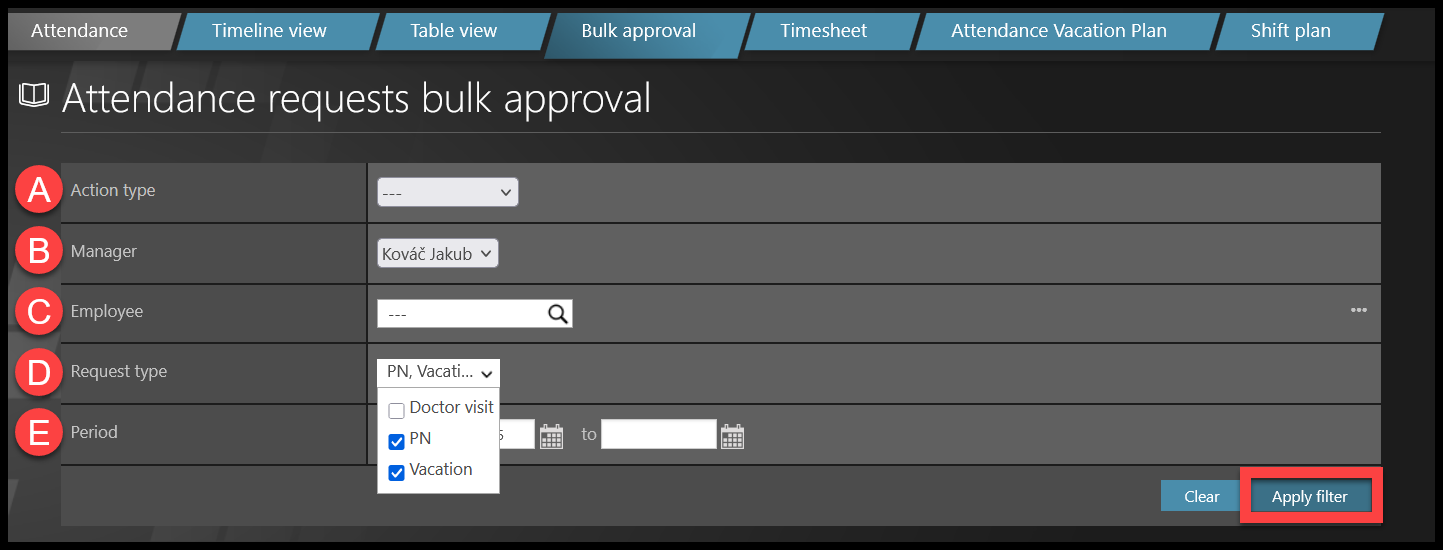
A) Action type – Request, Ask for change, Ask for discard.
B) Manager – The name of the manager.
C) Employee – The employee’s name. Click on the three dots on the right to change view into “Teams” instead of “Employee”
D) Request type – Select and display only one type of request, all request types, or select multiple types of requests.
E) Period – Click on the calendar icons or type the dates.
Click Apply filter.
Step 4 – Approve/Reject requests
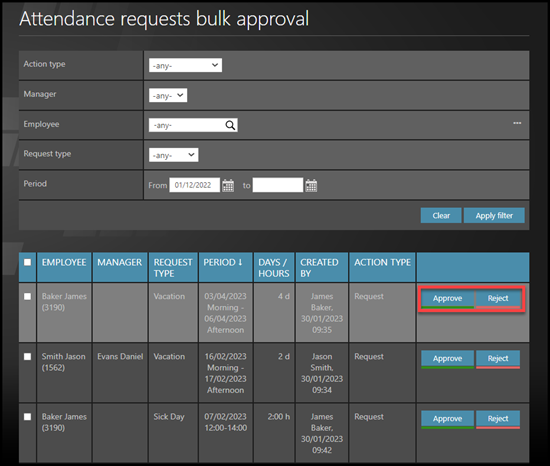
To open request details, click on the name of the employee.
To delete or approve single requests, click on Approve or Reject buttons next to the request.
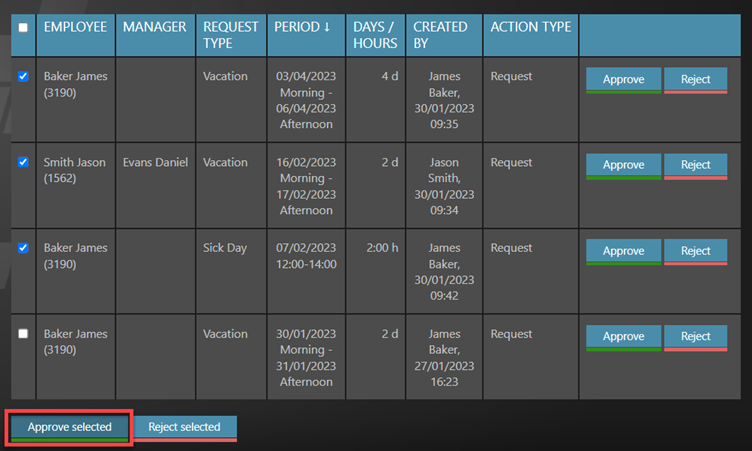
For bulk approval, check multiple checkboxes on the left side. If you tick a box, it means it is selected.
Once you tick some boxes, scroll down to the very bottom of the page.
- Click Approve selected to approve selected requests.
- Click Reject selected button to reject selected requests.
Print requests
You can print or download approved requests.
Open the desired request and click on the Print button at the bottom of the page.
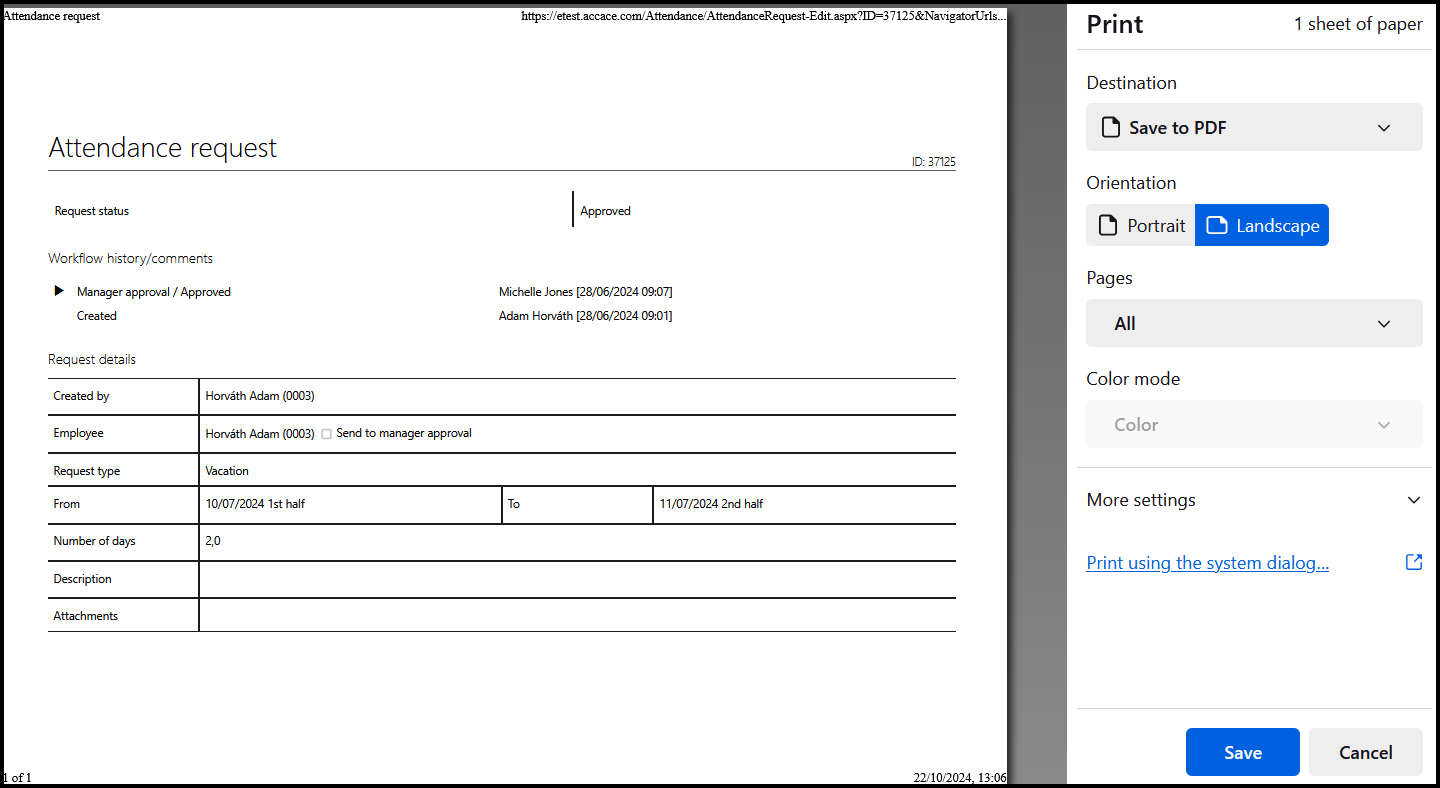
Select the option for printing or downloading.
My tasks
Step 1 – Tile
Go to My Tasks tile.
Step 2 – My tasks
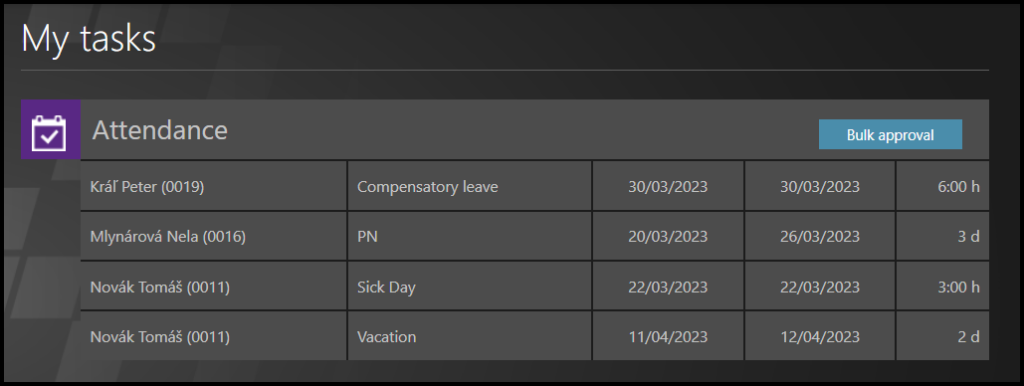
Find Attendance section.
Click on the request you want to see.
For bulk approval, click on the button & you will be redirected to Attendance bulk approval.
Step 3 – Approve or Reject
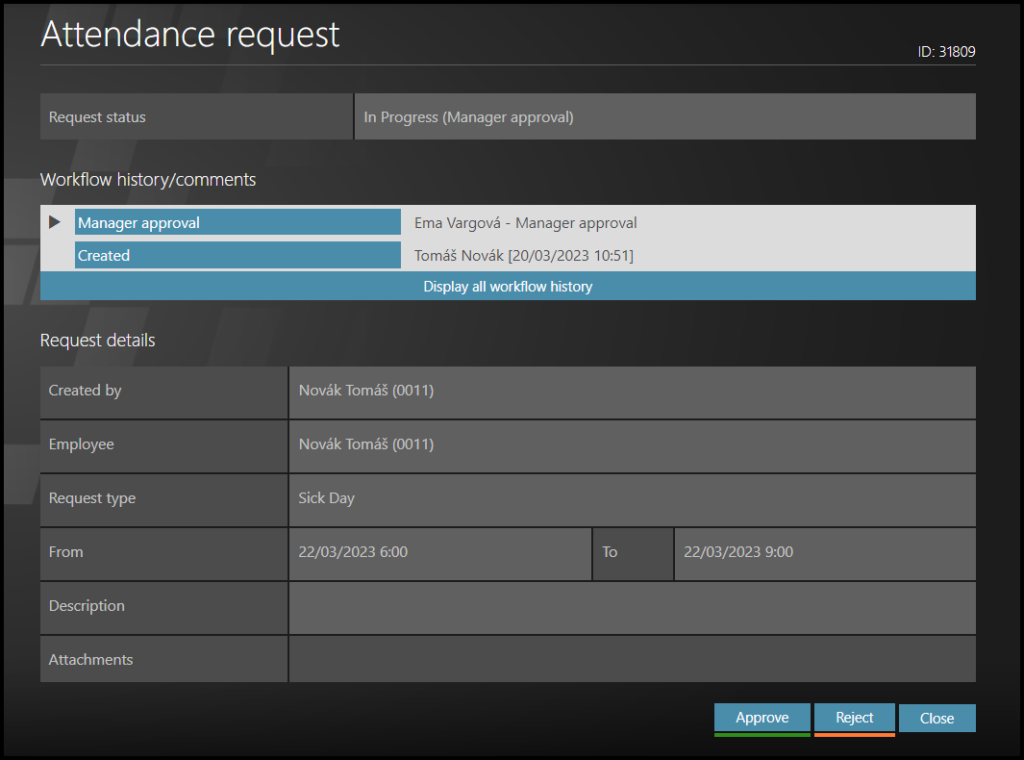
See the details of a request.
Check the Number of days – this is the current balance of remaining days after the request.
- Click on the Approve button to accept.
- Click Reject button to decline the request. If you reject the request, add a comment for the employee. Click OK. In case of a change request, the rejection of change means the previously approved request is valid.
- Close – no changes will be made.