
Introduction
This manual describes the process of making retrospective attendance requests – to edit attendance in a closed month.
Please note a TULIP setup you see always depends on custom requirements and access settings of TULIP for your company. Not all companies use the Attendance functionality.
Frequently asked questions
Who can make changes in a closed period?
- Managers can re-open the attendance period until it is closed/approved by HR.
- HR can re-open the attendance period until the export is sent to Payroll.
- Payroll accountant can make any changes to a closed attendance period & re-open the attendance period for Managers/HR, so they can edit the attendance themselves.
I cannot find some employee/s.
It might be because the employee is not active, is OOE, or in a different team that you are currently viewing. Click on the three dots icon and choose different setup of filters.
Steps
Step 1 – Tile
Go to Attendance Approval tile.
Step 2 – Filter
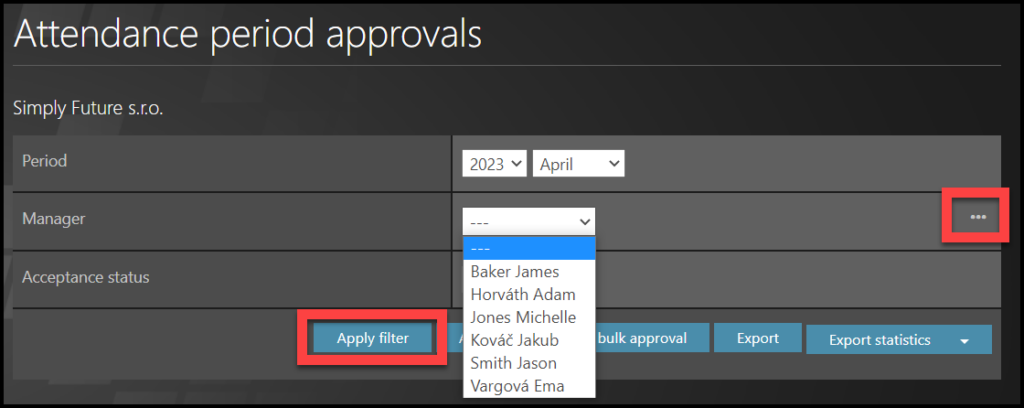
You can use filters:
- Year & Month
- Manager / Team. To change the view, click on small three dots on the right.
- Acceptance status – Approved / Open
Click Apply filter.
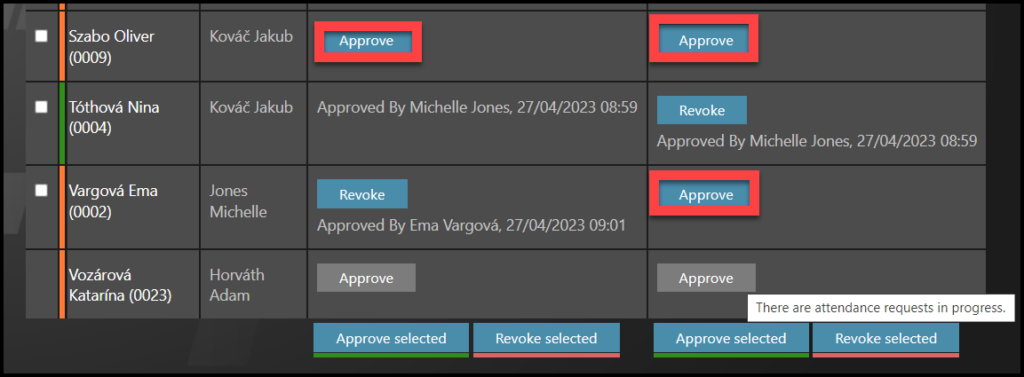
Step 3 – Employees
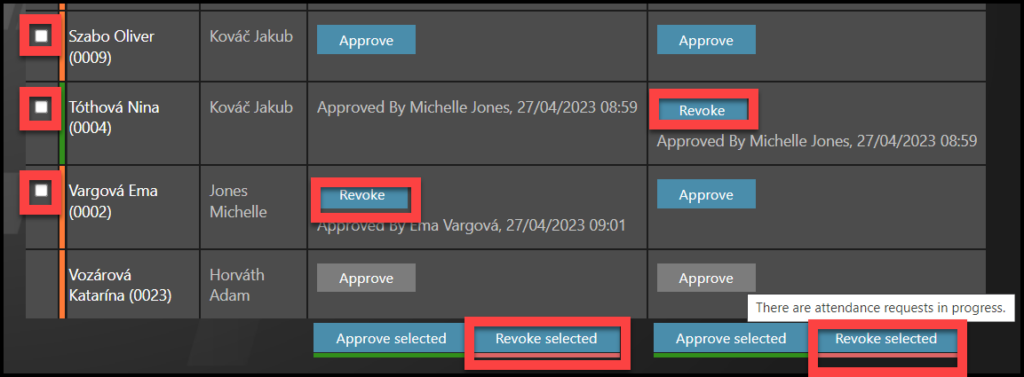
See the list of employees. In case that you are using Timesheets in your company, you can click on the name of an employee and the Timesheet displays to you.
Click Revoke in the row of a selected employee.
You can also select multiple employees – select multiple checkboxes and click Revoke selected at the bottom.
Step 4 – Pop-up window
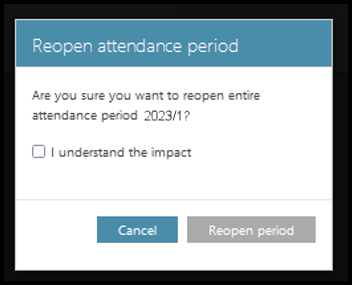
A pop-up window may open.
Check the checkbox next to I understand the impact.
Click Reopen Period.
Step 5 – Approve attendance period
Now you can make changes to attendance in usual way.
After you edit the attendance, do not forget to approve the attendance period again.