
Introduction
This manual includes a general overview for purchase Orders in TULIP. In this document we will go through basic information on the module, the workflow, notifications, viewing order detail/PDF and reports.
Here are links to related manuals for creating, approving and pairing Orders:
- Create a new Order (individually / copy existing Order / import Orders)
- Approve Orders (including export)
- Pair / Unpair Orders

Please be aware that the allowed actions always depend on your individual access rights.
Frequently asked questions
Do all Orders need to be paired with Invoices?
It is not necessary to have an Order paired to every Invoice or pair an Invoice with every created Order. The decision is solely on the approver whether to pair them or not.
Can I create more Orders at once?
Yes, follow this manual to import multiple Orders.
The Order was approved already, is it possible to have related Invoice automatically approved?
Yet, there is a custom setting possible that pairs Invoice that is imported into TULIP immediately with an Order. It skips Invoice workflow and goes from “Draft” status directly into an “Approved” or “Archived” status (if the client has default AREA in setup).
The Invoice & the Order can be automatically paired only if there is just ONE available (unpaired) approved Order with the same Partner (if there are more than one, the pairing must be manual by users).
How do we avoid duplicity of approvers?
If two (or more) different persons must approve an Order, but some users have access to approve more levels of approval – it is possible to set up an automatic process that skips the second time that a user is participating in the same Invoice´s workflow. This way, other users in Invoice workflow approve the document.
The setup is also ideal for clients where there is the same person approving both the Order & the Invoice (but both Order and Invoice must be in the same AREA, otherwise the user will not be skipped from the workflow the second time).
I did not receive any e-mail notification.
If you are not receiving notifications and you also do not see the possibility to restore sending those notifications:
- It might mean that the notification was not agreed to be sent / is blocked for your whole company.
- The notifications are ending up in your Spam (Junk) folder in your e-mail inbox.
- You do not have the access rights to this action (In this case, please reach out to your company´s contact person to request additional access.).
Please contact your HR department.
Description
There are multiple individual tabs available inside the tile (depending on your access rights). Tabs from Accounting module in TULIP used for Orders:
- Orders tab – displays a list of all Orders.
- Orders Approving tab – you can see only Orders waiting for your action.
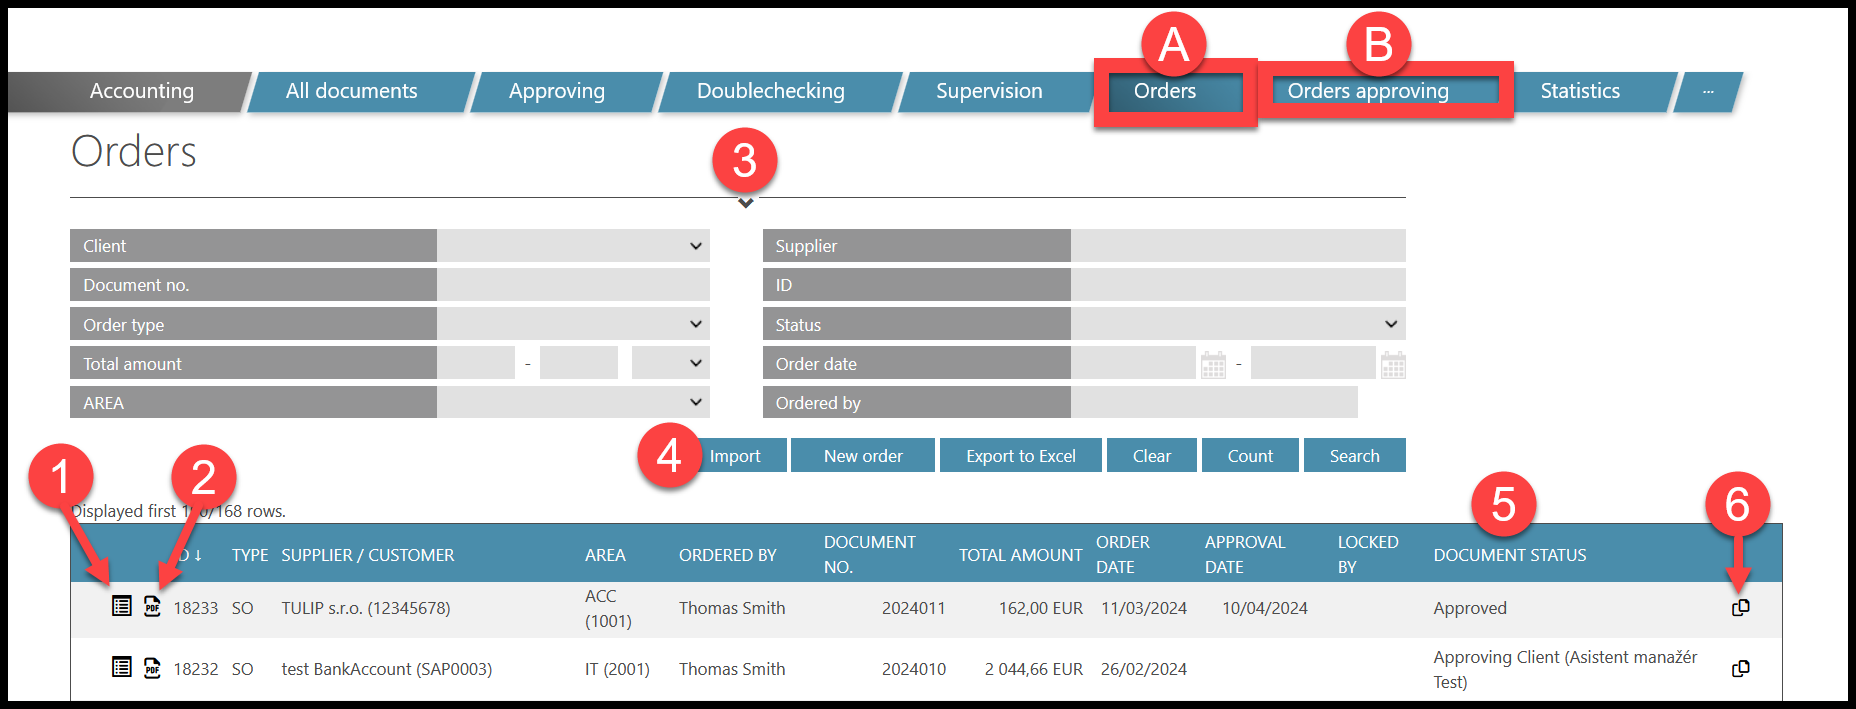
Functions of filters, buttons and both views are generally the same:
- Open the Order detail. Click on the icon and you can do for example those actions:
- Approve Orders – sending document to a next person in the approval process.
- Reject Orders – returning document back to the previous approver / uploader.
- See and edit details of the invoice – items, tax, amounts, notes, history, etc.
- Downloading a PDF – possible in any step of creating/approving the Order.
- Filter – show or hide filters
- Buttons:
- Display the Order statuses (Approved, Cancelled, Client approval etc.).
- Copy Order – copy some of the details to create a similar new Order.
Workflow
The process of creating & approving Orders is called a Workflow. It creates a series of approval steps called Approval matrix, which is set up according to client´s individual needs.
Starting a workflow
Usually, the Order is created by a customer. Then, it is sent to a pre-set number of approval steps (1 to 7) all according to AREA / Approval matrix.
Closing a workflow
There are multiple ways of how the Order can be closed:
- Cancel (Delete) – it is possible to stop the workflow once it is started. Click on the Cancel button in any step of the workflow.
- Approved – after the last person in workflow approves the Order (at the end of the approval process) it gets an “Approved” status.
- Archived – after pairing an Order with an Invoice, it gets an “Archived” status.
- Manually archived – you can assign the Order an “Archived” status without pairing.
- Return the Order back to editing status – We recommend to not Cancel (Delete) any Orders – Instead of clicking on the “Cancel” button, click “Reject”. This returns the Order to the first step (the person can edit and change the document completely).
Notifications
Users that are a part of the approval process of Orders receive e-mail notifications. It informs them about changes or reminds them to make an action. The frequency & the number of recipients is setup by TULIP administrators based on the client ´s preferences. Users can unsubscribe and again restore sending certain notifications types. These are the three most used notifications:
- A last-approval-step notification to the Order creator (customer) – After the last approval step in the approval matrix, a notification is sent to the Order creator. It contains a PDF of the final, fully approved Order in the attachment.
- Order approval – A list of Orders that are approved by individual approvers, which are assigned by AREAS. The notification is sent once a day.
- Order cancellation – A list of Orders that are cancelled by individual approvers, which are usually assigned by AREAS. The notification is sent once a day.
View Orders
There are two main ways to display Orders:
A) In a PDF preview – displays an automatically generated, non-editable PDF document in a compact format that can be downloaded and printed easily.
B) In Order detail users can make action (edit, approve, decline, add a note etc.)
PDF preview
Step 1 – Tile
Go to Orders tile. Scroll down to individual lines.
Step 2 – PDF

At the beginning of a line, click on the PDF icon. It is possible in any step of creating/approving Orders, even if the Order is locked.
Please note if the person in the Order makes changes, you will not see it during the editing, only after they save changes and leave the Order (it becomes unlocked again).
Step 3 – Template example
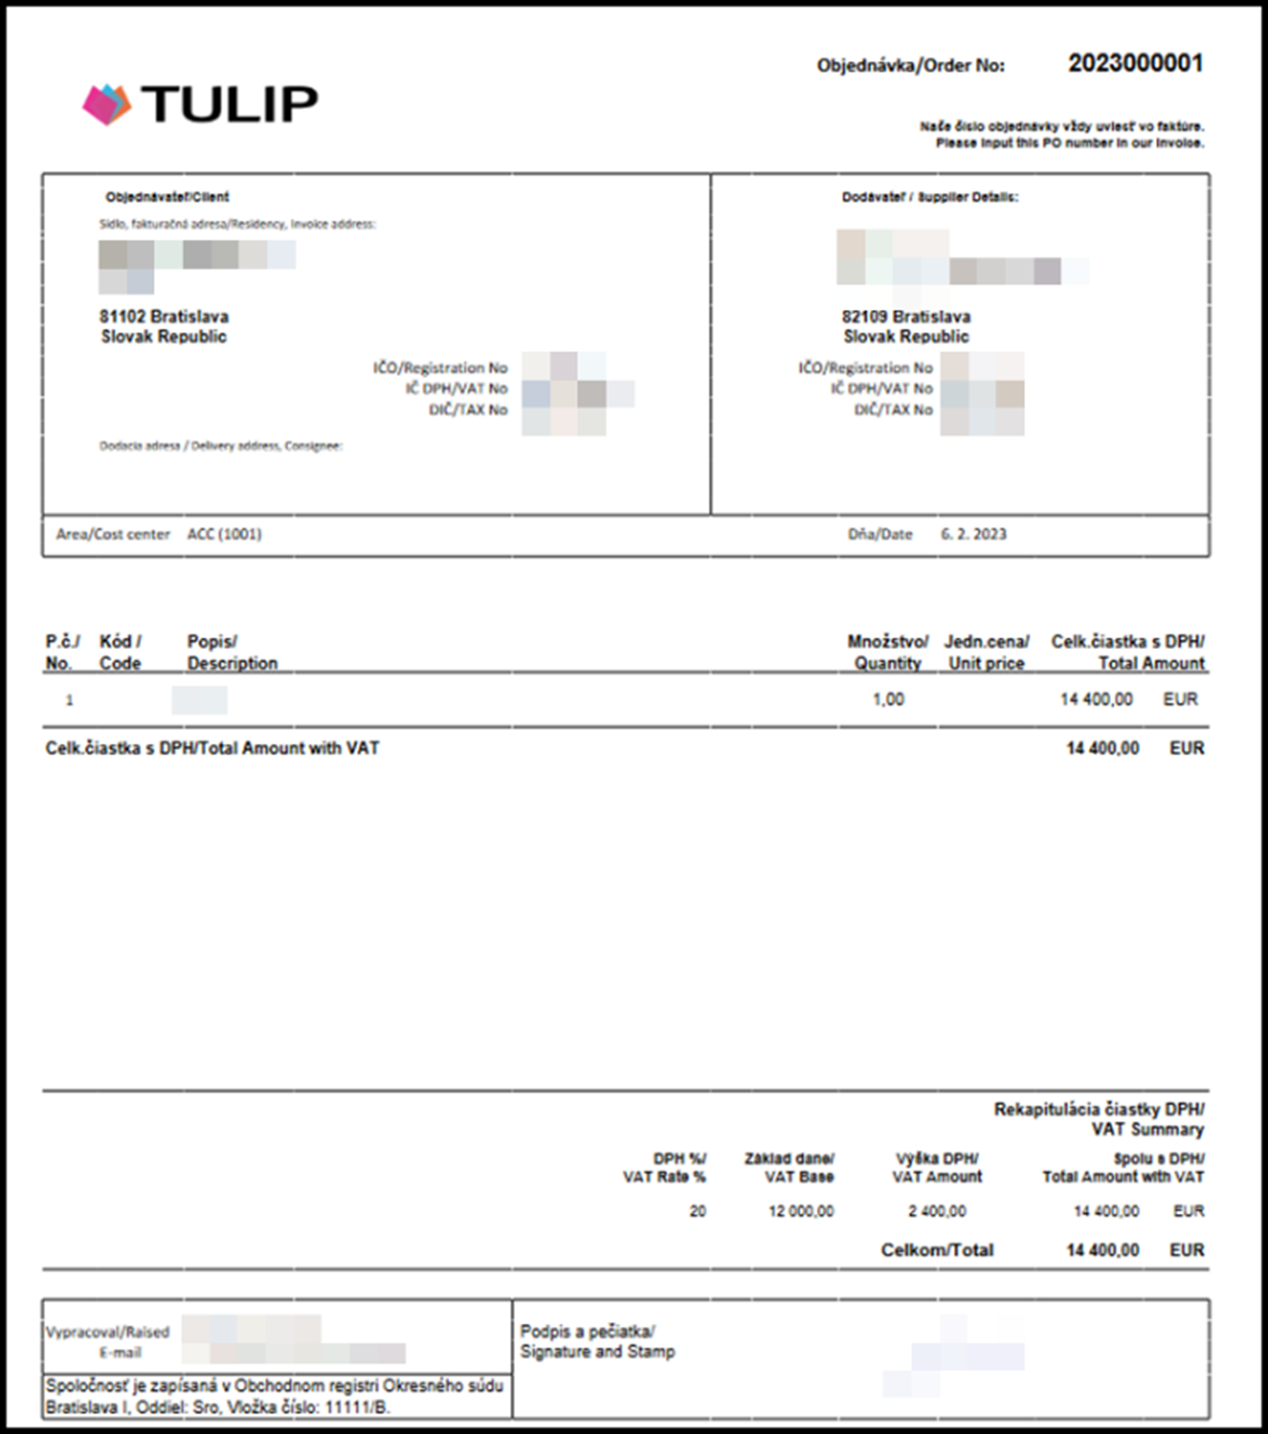
PDFs are created by templates. The template can be adjusted to individual client’s needs. This is the default template.
The document can be automatically signed – either by the creator of the Order, or by the last two approvers. Employees upload their own signatures into My Profile tile.
Order detail view
Step 1 – Tile
Go to Orders tile. Scroll down to individual lines.
Step 2 – PDF
At the beginning of a line, click on the PDF icon. It is possible in any step of creating/approving Orders, even if the Order is locked.
If the Order is currently opened by another user, it is locked, and you cannot access it at the same time. This icon will become invisible. When they leave, it is possible again.
Step 3 – Order detail
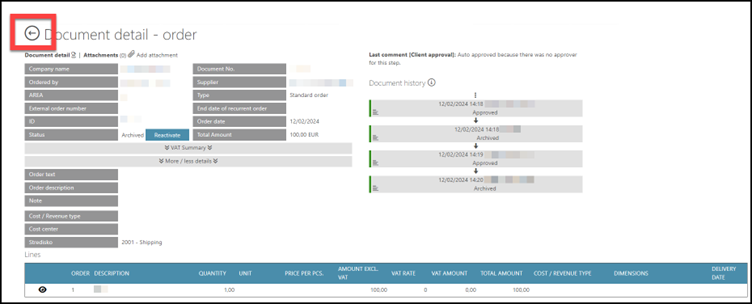
Depending on your access rights, you can now see some data and perform some actions.
It will be described more in individual manuals for Orders.
To unlock (leave) the Order detail for another person, click on the arrow on the left.
Reports
Here you can find multiple types of summaries related to Orders. It allows you to quickly filter certain data, export Orders into an Excel sheet and more.
Please be aware that only users with assigned access rights are allowed to display reports.
Step 1 – Tile

Go to Reports tile.
Step 2 – Select report

Select the desired report:
- All documents with connected Orders – A list of all Invoices, some of them are paired with Orders.
- Pairing Orders – A list of all Orders that are paired with an Invoice.
- Orders – All Orders. This view displays all Orders, even those that are not paired yet.
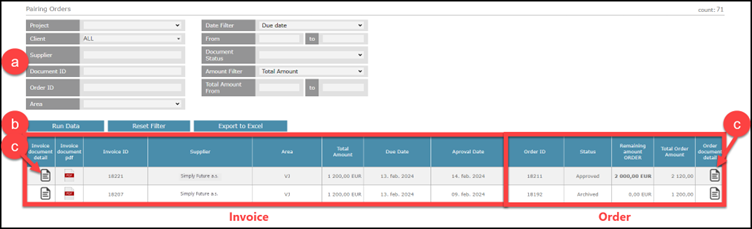
A) All documents with connected Orders
A list of all Invoices – some of them will be paired to Orders (and the remaining amount). Not all Orders are displayed.
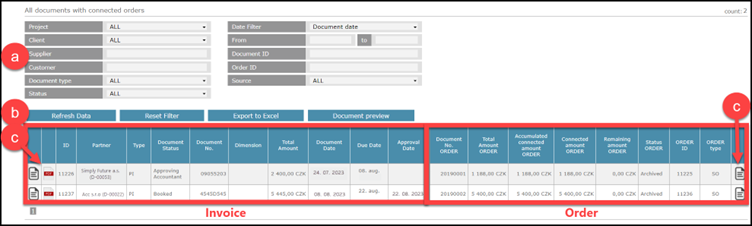
Left: Information about the Invoice Right: Information about the Order
- Filter
- Buttons: Export to Excel includes more columns for a detailed view.
- Icons on the right and left – see details of the individual Invoice / Order.
Please note that if the Invoice is not paired to any Order yet, the right part in its line is empty.
In case of multiple Invoices paired with one Order, there is two or more lines with Invoices, each one having the same Order on the right part of the line.
B) Paired Orders
An overview of all paired Orders with the information what Invoice is paired. Not all Invoices are displayed. The remaining (unpaired) amount is in bold.
- Filter
- Buttons: Apply filter, Reset or Export
- Icons on the right and left – see details of the individual Invoice / Order.
C) Orders Detail
An overview of all Orders. It includes the information on whether an Order is paired or not (yes /no). You display only Orders that are paired / only Orders that are not Paired via Filters.
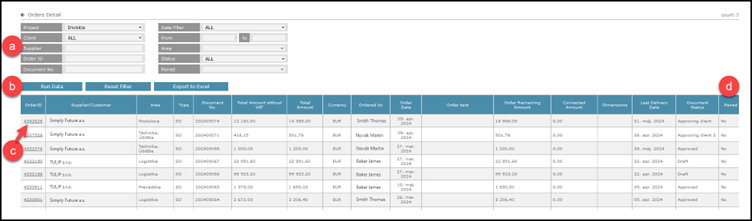
- Filter
- Buttons: Apply filter, Reset or Export
- Order ID – click to see details of the individual Order.
- Paired – information I the Order is already paired or not.