
Introduction
This manual includes information on creating new Orders or copying an existing Orders from Accounting module in TULIP. Usually, the Order is created by a customer. Then, it is sent to a pre-set number of approval steps (1 to 7) all according to AREA / Approval matrix. It is also possible to import Orders, send them for approval, create PDF documents to send in e-mails and pair Orders with Invoices.
Please be aware that the allowed actions always depend on your individual access rights.
Frequently asked questions
Can I create more Orders at once?
Yes, follow this manual to import multiple Orders.
I created an Order but no one approved it.
Please check if you started workflow for the Order.
New blank form
Step 1 – Tile

Go to Orders tile.
Step 2 – New Order
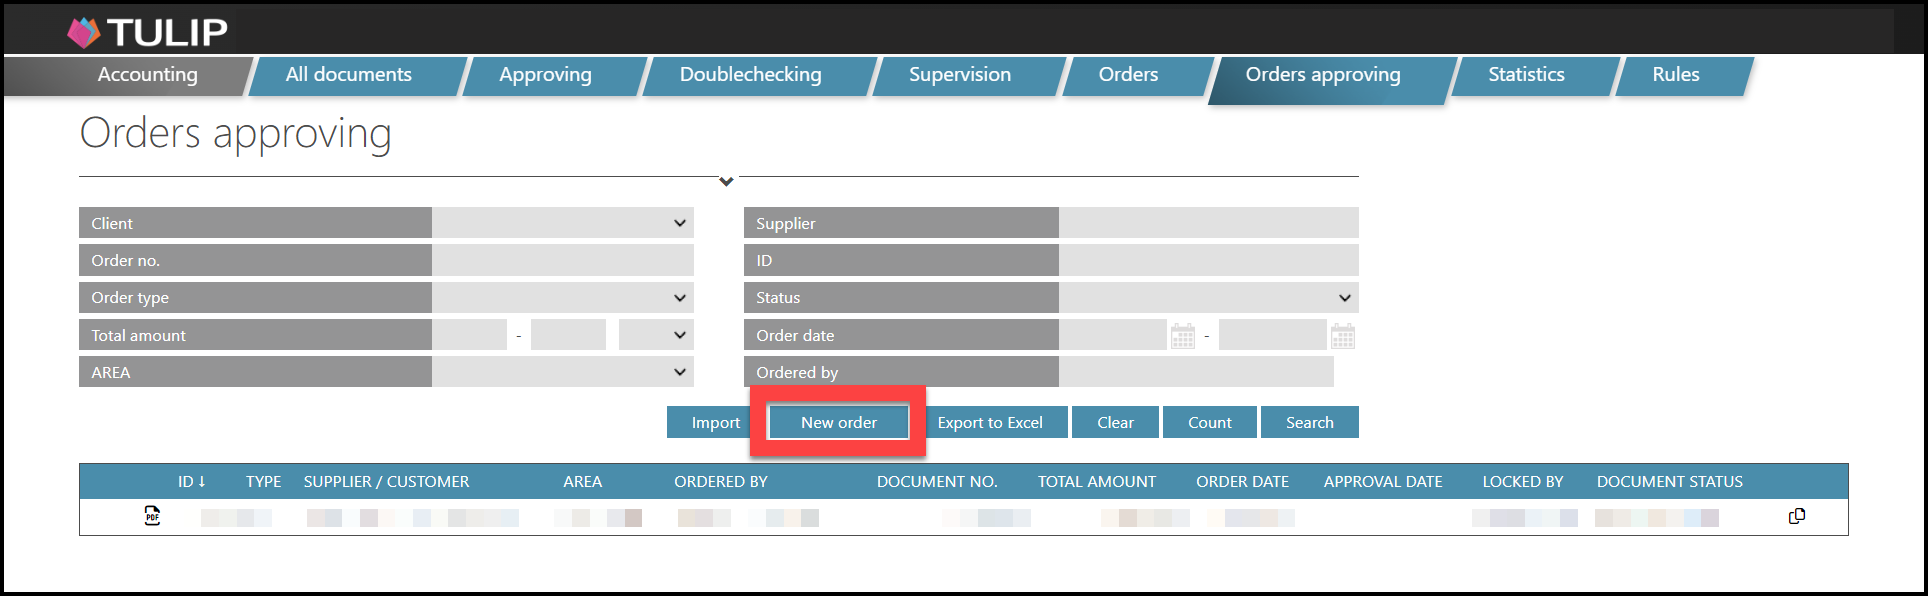
Click on the New Order button.
Step 3 – The Order form

The Order form consists of 5 parts. We will go through each one of them on the following pages:
A) Information about the Order
B) Adding individual lines – items of the Order
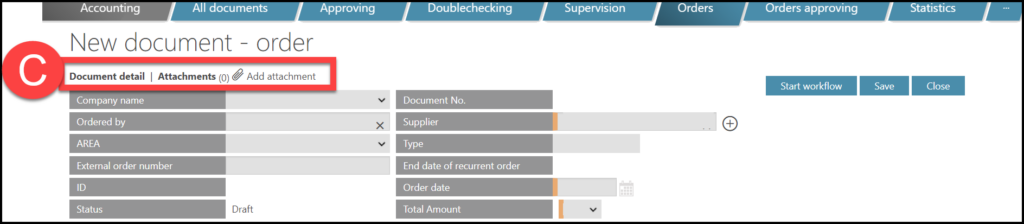
C) Icons:
- Document detail – check how does the Order look like in a preview
- Attachments – display attached documents
- Add attachment – click on the icon to add another attachment
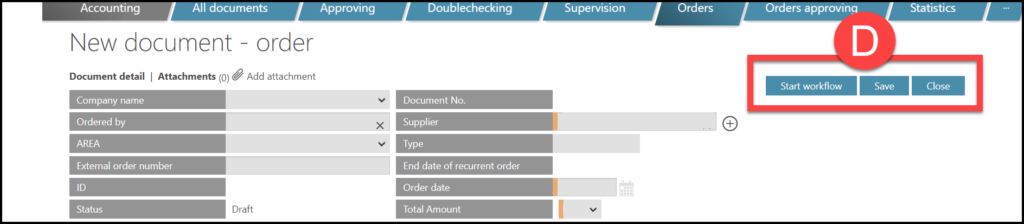
D) Buttons:
- Start workflow – based on the approval matrix, the Order is automatically sent to next step / approver.
- Save – saves the data but does not start the workflow.
- Close – does not save the data and closes the form.
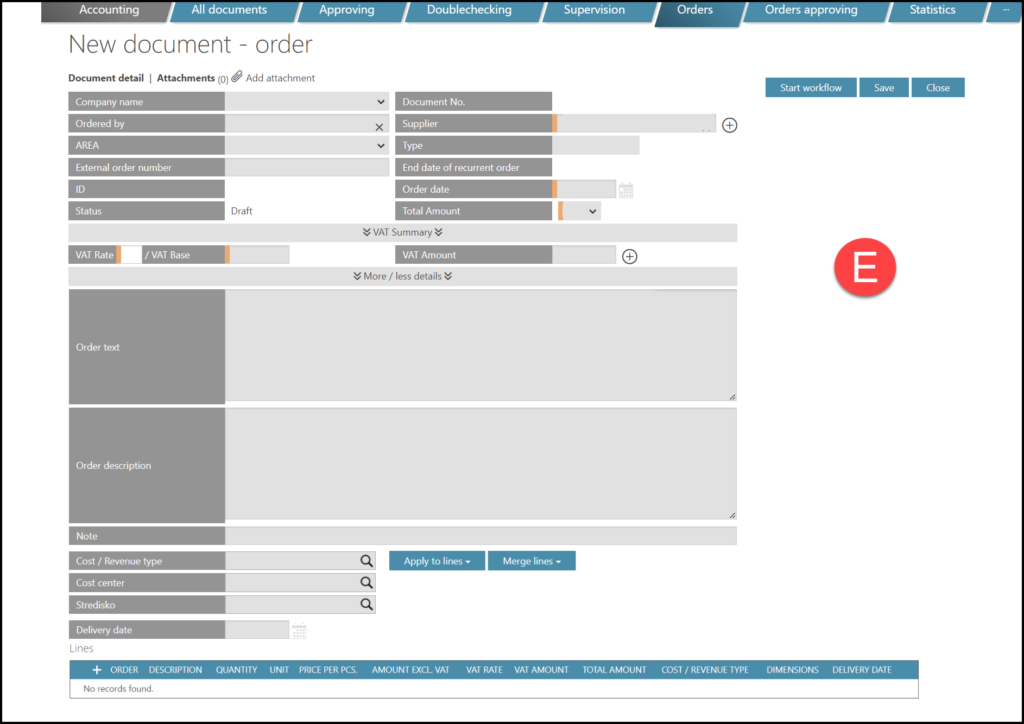
E) After you create and save the Order, some additional data displays in this space:
- An information about the Workflow History of the Order
- A space for adding Notes
- (a Document ID is assigned to the Order in that moment, too)
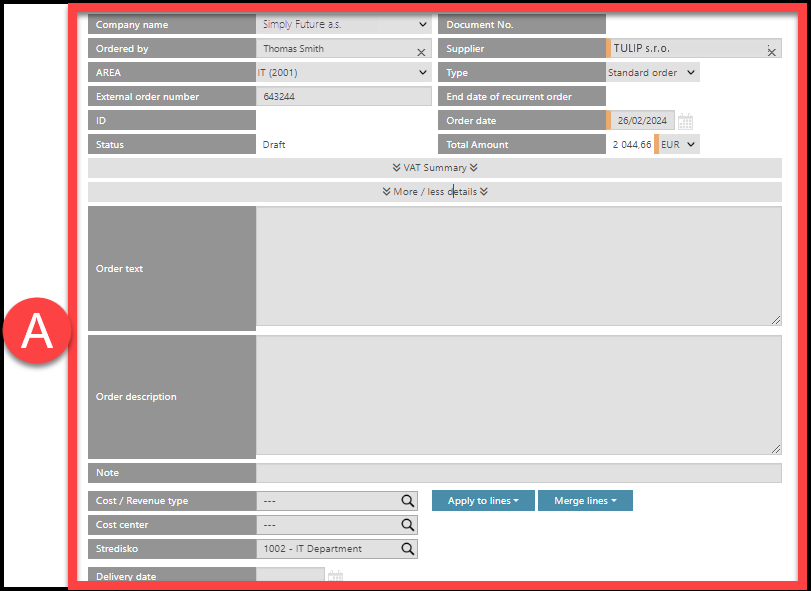
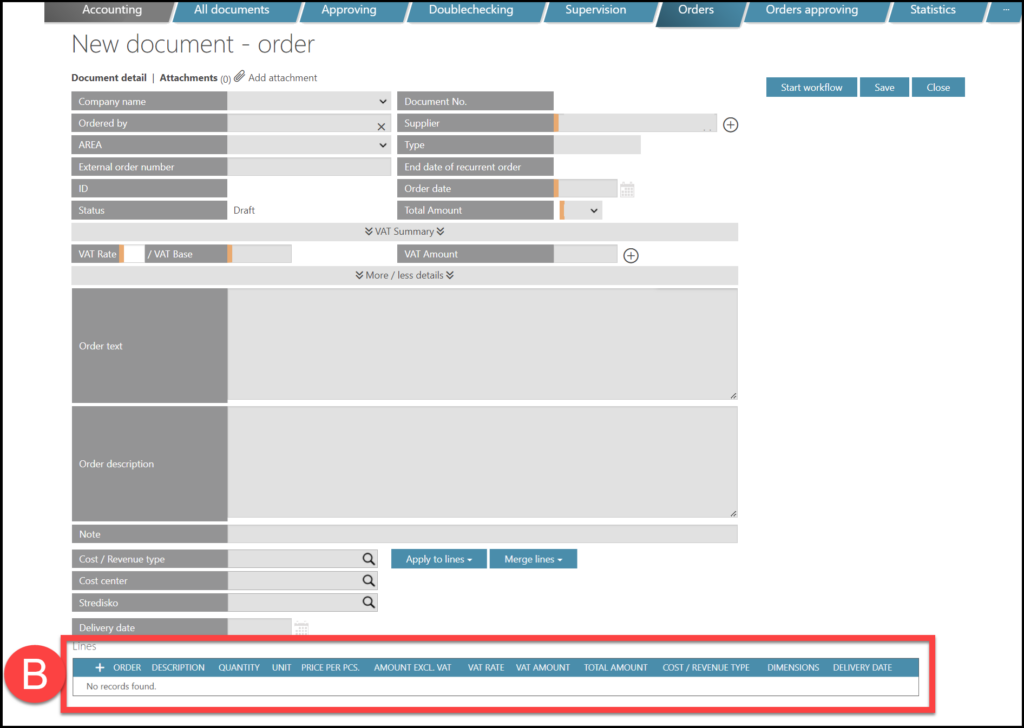
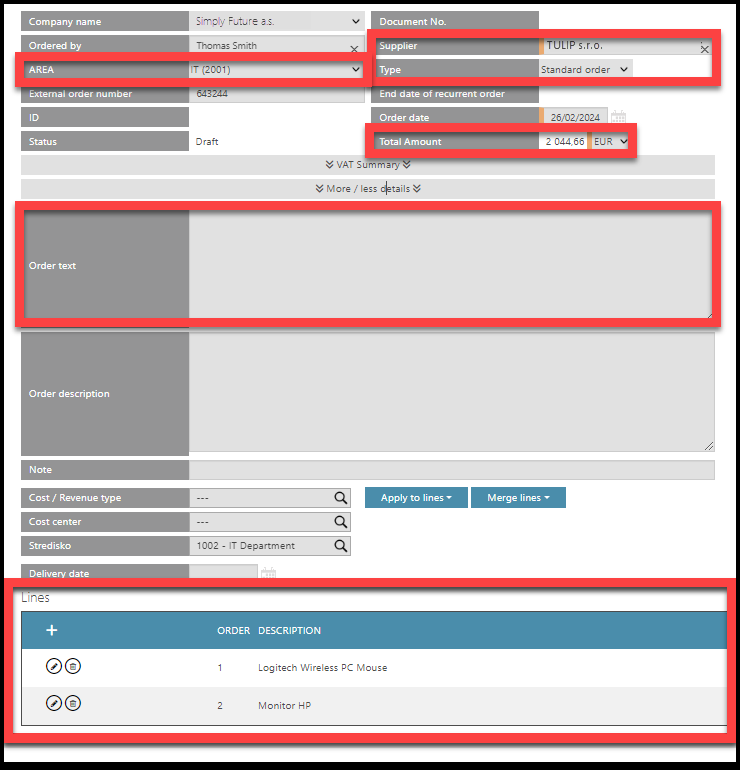
A) Information about the Order
You must fill in the data with an orange stripe. Some data may be pre-filled.
Description of all parameters:
- Company name – usually just one Company selected by default.
- Ordered by – The name of the user who is logged in while creating an Order. To create an Order in the name of another person is possible but it is necessary to have a special setting enabled for your company.
- AREA – Categories that assign workflow and approvers.
- External Order number – clients can use their own identification numbers.
- ID – The identification number of the Order assigned by TULIP and is unique to the whole TULIP platform. No two Orders have the same ID number.
- Status – The status of new Orders is “Draft”.
- Document no. – A number automatically generated by TULIP. It consists of a prefix (the year) and a 4-digit number (based on the time of creating an Order in ascending Order). It is assigned and displayed after saving.
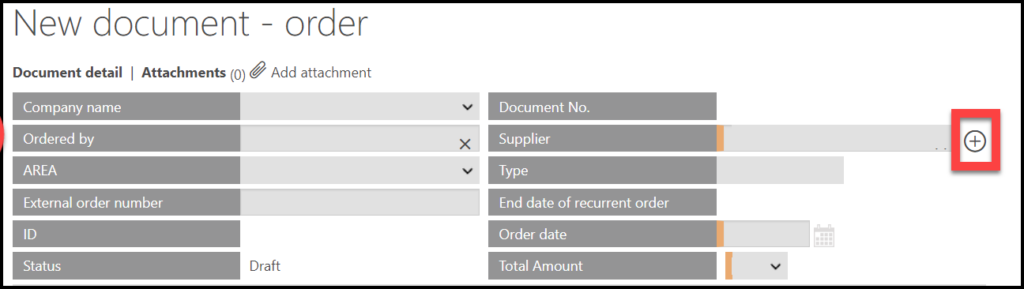
- Supplier – Start typing a supplier´s name & choose from existing ones.
- The “+” icon: If the Supplier does not exist, it is necessary to add a new supplier into the system. Only users with a Supervision access role that allows them to process those Orders (Orders without suppliers are in “Supervision” status) can add new. Click on the “+” icon next to the Supplier field to create a new Supplier.
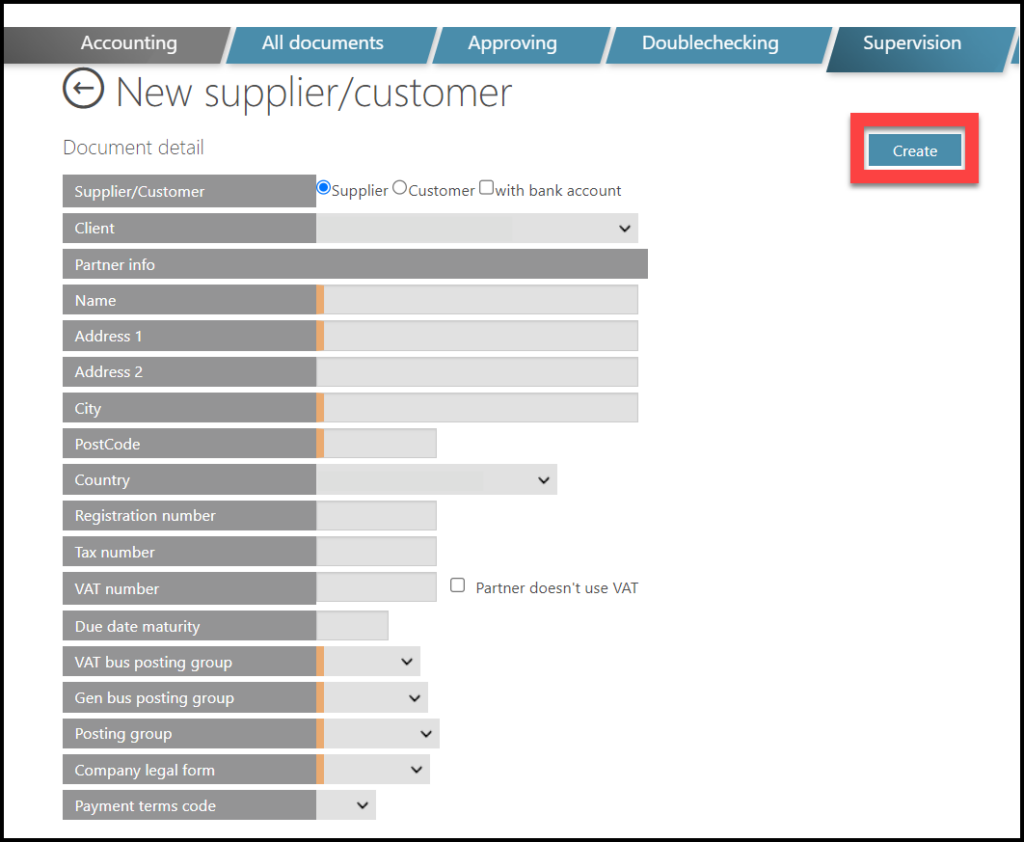
- When you add a new supplier, a new window opens. You must fill in the data with an orange stripe. Then, click on the Create button on the right to save data.
- Type – Default setting is “Standard”, which stands for not recurring.
- Use Recurring / Recurrent type if the goal is to pair the same Order repeatedly. It does not monitor the balance/amount, but the duration date. For example, it is active for one year (e.g. for the duration of a contract) and then it is closed.
- End date of recurrent Order – if you leave the field blank, no date will be noted.
- Order date – Always editable. Default setting can be the current date.
- Total amount – Automatically filled in after filling in the lines below. A default currency is set up in the company settings. To enable local & other currencies, they must be listed in the approval matrix – the reason is that the approval of Orders in other currencies is checked based on this data.
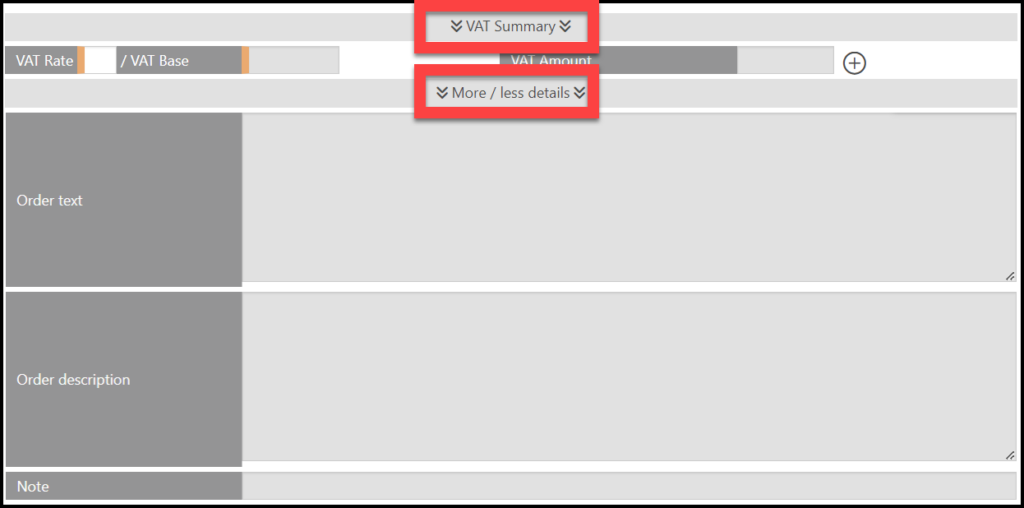
- VAT summary – Those fields are automatically counted and filled in based on the amount in lines. Please add lines (individual items of the Order) to have those fields automatically filled in. Do not edit this data if not necessary. To add amounts manually, click on the “+” icon.
- VAT Rate – the percentage of VAT
- VAT Base – displays the amount without VAT
- VAT Amount – the amount of VAT (counting the VAT Rate + VAT Base)
- Display / hide this section by clicking on the “v” icon.
- More/less details – Those fields are not mandatory; you can leave them blank.
- Order text – Description displayed above all the Order lines.
- Order description – Description below all the Order lines.
- Note – A note only seen by TULIP approvers. The note does not display in the PDF version of the Order.
- Display / hide this section by clicking on the “v” icon.
- Cost/revenue type, Cost center, Department / Dimensions – Those fields are not mandatory. Only some clients use them (mainly used in Invoicing module). To merge multiple lines into one in the Order/Invoice, follow this:
- You must add lines (individual items of the Order / Invoice) first.
- Then, fill in Cost/Revenue type, Cost center and Dimension.
- Click Apply to lines and select from the options.
- Delivery date – optional

B) Individual lines (add Ordered items)
In this section, you will insert information about the items.
Click on the “+” icon.

A new pop-up window displays. Edit the information about the Ordered item. You must fill in the data with an orange stripe.
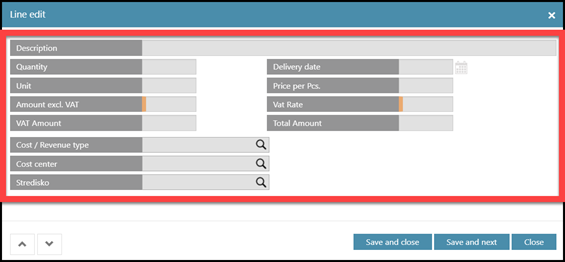
- Description – The description of an individual line.
- Quantity – The number of ordered items in that line.
- Unit (pcs, kg, …) – It can be either a blank editable field or a list of specific choices. To add a list of choices, TULIP administrators must do the setup.
- Amount excl. VAT – the full amount for all items in the line (without VAT)
- VAT Amount – the full amount of VAT for all items in the line
- Cost/Revenue type, Cost center, Dimension – those fields are not mandatory in general. They can be customized based on client´s needs and in that case, they may be necessary in some approval steps.
- Delivery date – this field is not mandatory in general. It can be customized based on client´s needs and in that case, it may be necessary.
- Price per pc – the full price with VAT for a single item
- VAT Rate – the percentage of VAT
- Total amount – the full amount for all items in the line (with VAT)
Select the next step for the ordered item:
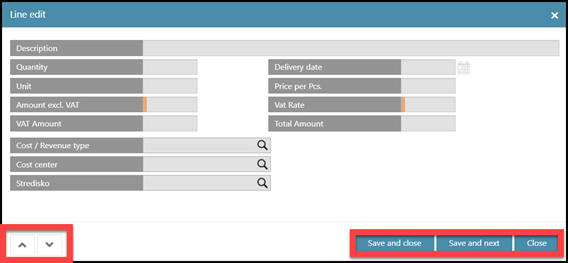
- Save and close – saves the data and closes the pop-up window.
- Save and next – saves the data and displays a new pop-up window (another item that you can add into the order) that you can fill in.
- Close – does not save the data, closes the pop-up window.
- Arrows on the left – not used during creation of lines – use them to move up & down the Order list quickly. Please be aware clicking on arrows does not save any changes, it just allows you to quickly display item details.
C) Optional buttons (top of the page)
Here you can display the PDF of the order (click on Document detail) or display or add another attachment (click on Add attachment).
D) Next step
After you checked the correctness of the data and completed the item list, click on one of these buttons to select next action:
- Start workflow – based on the approval matrix, the whole Order is sent to next step/approver. It is not possible to edit it afterwards.
- Save – The Order creator can edit the Order later. The workflow is not yet started. Approvers see Orders in Draft status but cannot approve them yet.
- Close – A warning will display – Confirm it to discard changes that you made. This button does not save the changes and makes you leave the Order detail.
E) Additional information
This data will display: Notes from previous approvers (the client cannot see this) and The Document History (all changes are noted in this list). Also, the Document ID is now automatically assigned to the Order.
Copy an existing Order
It is possible to copy an existing Order with a pre-filled data to speed up the process of creating an Order that is very similar to an already created one. You can find the desired Order by selecting some filters.
Step 1 – Tile
Go to Orders tile.
Step 2 – Filter
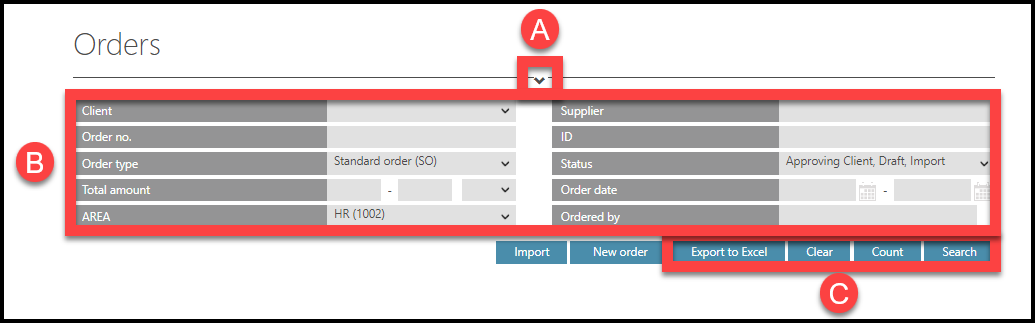
Select filters:
- Display or hide filters by clicking on the “v” icon on the top of the screen.
- Filters
- Buttons used for filters:
- Export to Excel – downloads a full sheet of displayed Orders. Downloads the sheet with most recently applied filters. To make sure which data are downloaded, click the button Search first to apply selected filters).
- Clear – clear filters.
- Count – displays the number of orders that are filtered.
- Search – apply filters.
Filters:
- Client – Users see Orders of one or multiple companies based on their access rights.
- Order no. / Document no. – A number assigned during the creation of Order. It consists of a year and a 4-digit number (ascending from 0001 to 9999) automatically assigned by TULIP. Multiple companies can have Orders with the same Order no.
- Order type:
- “Standard Order” type for most Orders
- “Recurrent Order” is a type usually used in repeating Orders. This type allows you to automatically duplicate an Order that should otherwise be created on a regular basis (for example every month). It can also be automatically paired with Invoices.
- Total amount – You can select range “from”, “to” and the Order currency.
- AREA – Categories that assign workflow and approvers.
- Supplier – Start typing letters from the supplier´s name and choose from the offer.
- ID – The identification number of the Order assigned by TULIP and is unique to the whole TULIP platform. No two Orders have the same ID number.
- Status:
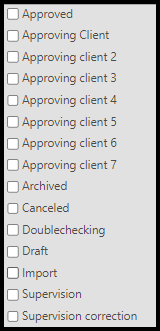
- Approved – all approval steps are finished successfully.
- Approving client (1 to 7 levels) – waiting for the client’s approval. The number of levels of approval is set up individually for each client. TULIP can show names of approvers in brackets (in Orders detail) to help identifying users better, for example: “Approving client 3 (John Smith)”.
- Archived – the Order is paired with an Invoice in Order´s full amount.
- Canceled – the Order was canceled at some approval level.
- Draft – the Order is being created. No workflow is started yet.
- Import – the Order returned for correction (from some approval step).
- Supervision – waiting for the creation of a new partner (supplier). If a supplier does not exist in the system yet, it is necessary to create a new one. Only users with a Supervision access role can create new suppliers.
- Supervision correction – an error occurred when creating a new partner. It must be corrected and then approved again.
- Order date – The date of creation. Click on the calendar & select range “from” & “to”.
- Ordered by – The user who created the order. Start typing letters from the user´s name and choose from the offer.
To apply selected filters, click Search button.

Step 3 – Copy
Go to a line of an already existing Order. Click on the copy icon on the right.
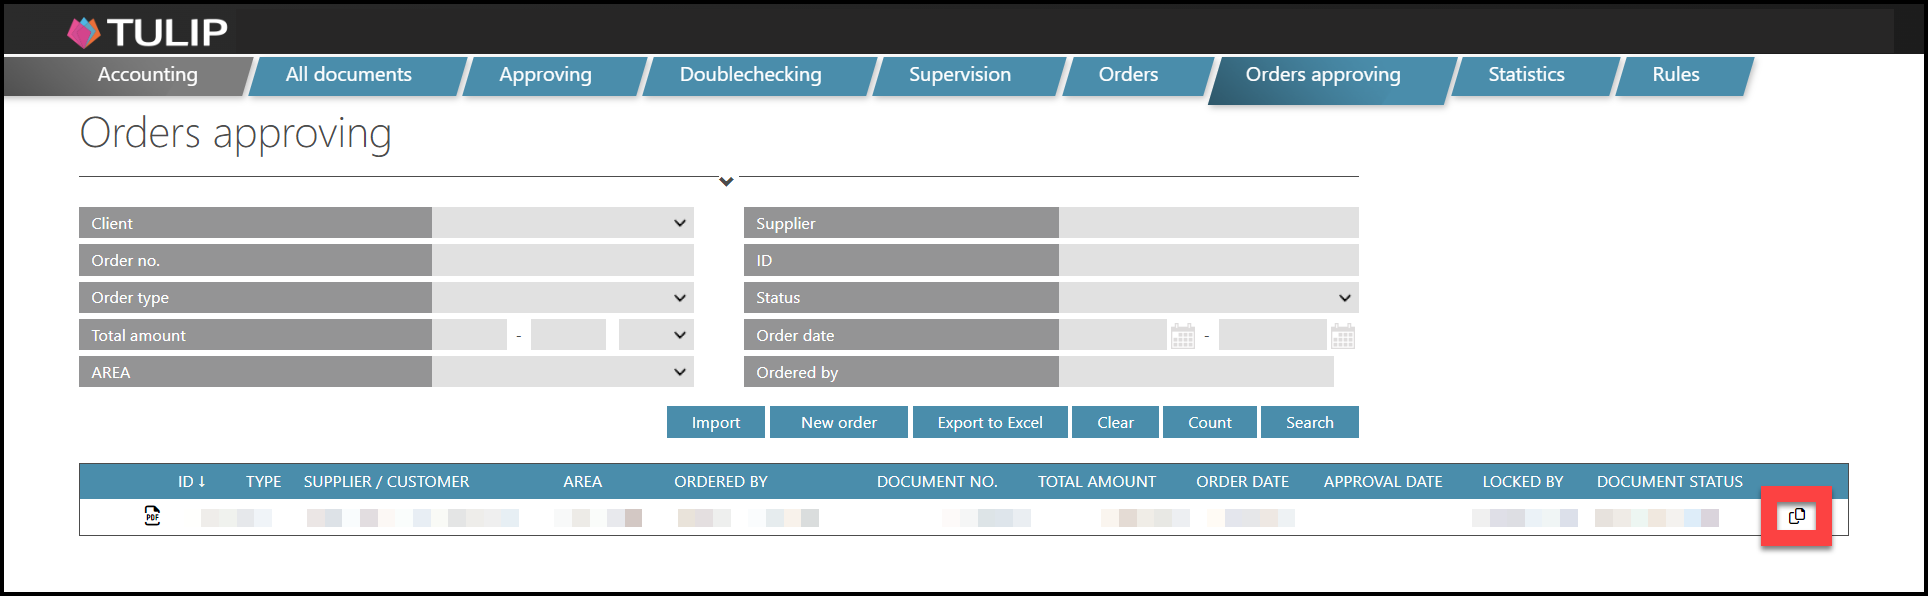
It opens a pre-filled, editable form instead of a blank form. All pre-filled data can be edited.
Following data are copied:
Partner, AREA, Order type, Order Text, Customer, Amounts, all individual lines.
Please be aware that some other fields can be automatically pre-filled too (for example Company, Ordered by, Status, Order date etc.).
Step 4 – The Order form
Now continue based on the information on how to fill in the Order form.