
Introduction
In TULIP you can report small costs (paid in cash / by card) of an employee and receive their payments back. Here you can find information on creating a request, approving it and also describes report related to expense claims.
Here is how the process works:
- Employees create requests with details of expenses.
- Managers approve/decline requests of employees.
- Accountants then process the request.
Please note a TULIP setup you see always depends on custom requirements and access settings of TULIP for your company. Not all companies use this Expense claims functionality.
Manuals
Employee: Create a new request
Employees create their own requests. The request for expense claim of an employee can be created also by their team leader. After the approval of manager and accountant, the employee receives a confirmation in his/her e-mail.
Step 1 – Tile
Go to Expense claims tile.
Step 2 – Create new request
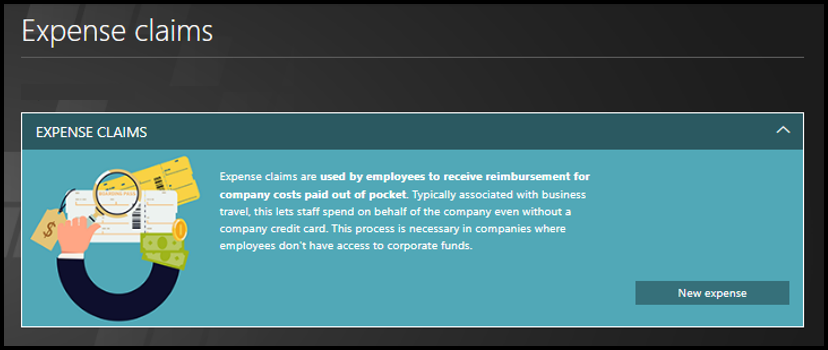
Select New expense.
Step 3 – Expense claims details
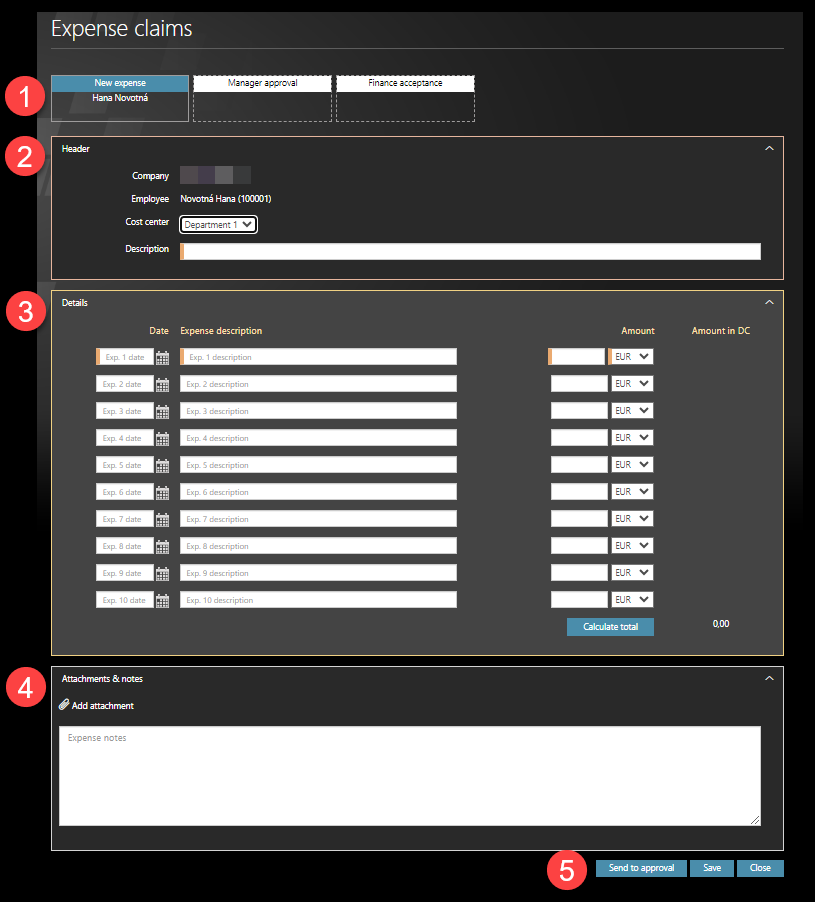
Fill in the form and then click Send to approval.
- Workflow/request status records – see the current status of a request and the following steps in the workflow.
- Employee – Creates the request – the default name is the name of the logged user.
- Manager – Approves/declines the request.
- Finance department – Approves/declines the request.
- some users can also see the Logs button – it displays all deleted and saved changes in the form, displays the entire workflow process, comments, and the history of form statuses.
- Header – who created the request, cost center name, description of the request.
- Details – date, description of the expense claim, amount, amount in DC (domestic currency). If you want to count the total amount before sending the request for approval, click “Calculate total“.
- Attachments & notes – a free space for attaching screenshots of bills & adding further comments.
- Buttons
- Send to approval – Freeze the form and move it to the next step – the Manager´s approval.
- Save – Save the current form and return to it later. You can find it in My Tasks tile.
- Close – Do not save changes, leave the form.
Step 4 – If the request was rejected

The manager or accounting department can reject the request in case the request is not correct. They must enter a comment that states a reason for rejection that you can display.
In this case, the request is sent back to you – you can find it in My Tasks tile and you also receive an e-mail notification. Please correct the request if required and Send to approval again.
Manager: Approve expense claims
Managers and Accountants receive a new task into their My Tasks tile and an e-mail notification to approve/decline requests of employees.
Step 1 – Tile

Go to My Tasks tile.
Step 2 – Select a request

Select an expense claim to see the details.
Step 3 – Approve or decline
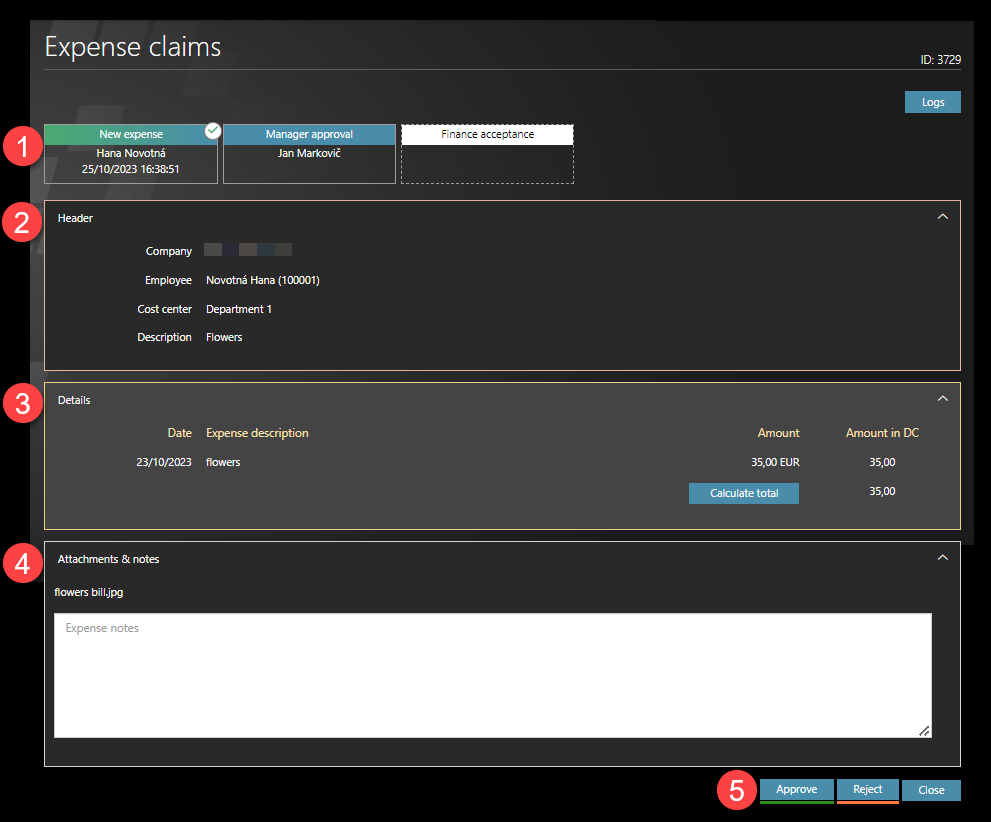
Check the request and then click Approve or Reject.
- Workflow/request status records – see the current status of a request and the following steps in the workflow.
- Employee – Creates the request.
- Manager – Approves/declines the request.
- Finance department – Approves/declines the request.
- Logs button – displays all deleted and saved changes in the form, displays the entire workflow process, comments, and history of form statuses.
- Header – who created the request, cost center name, description of the request.
- Details – date, description of the expense claim, amount, amount in DC (domestic currency).
- Attachments & notes – a space for attaching screenshots of bills & adding further comments.
- Buttons
- Approve – Managers accept the form and move it to the next step – to the Finance department.
- Reject – In case the request is not correct, Managers/Finance department can reject the request. You must enter a comment that states a reason for rejection that the employee is able to display. The request is sent directly to the employee into his My Tasks tile and he also receives an e-mail notification.
- Close – Does not save any changes, does not send the form to the next step.
Report
Employees can display their own requests.
Managers and Accountants can display the requests of subordinates/all employees.
Step 1 – Tile

Go to Reports tile.
Step 2 – Select a report
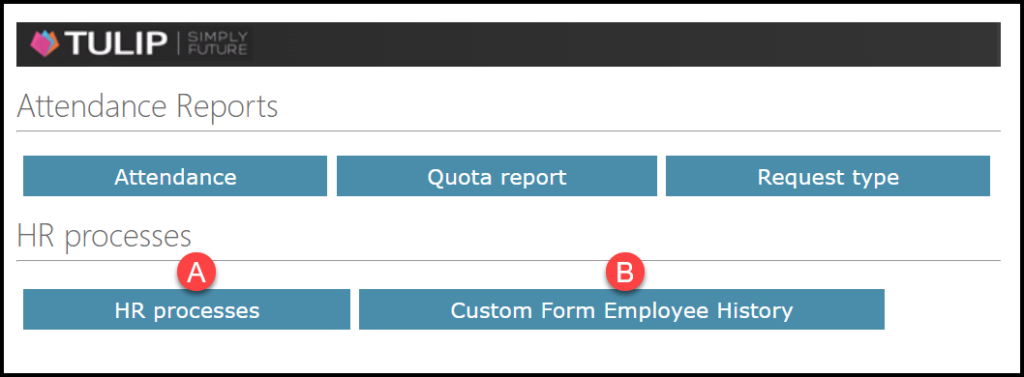
A) HR processes
- for Managers / Finance department
- this report displays multiple employees´ expense claims
B) Custom Form Employee History
- for Employees
- the report display their own expense claims
Step 3 – Report
Basics
Employees, Managers and Finance department all can see some basic report functionalities:
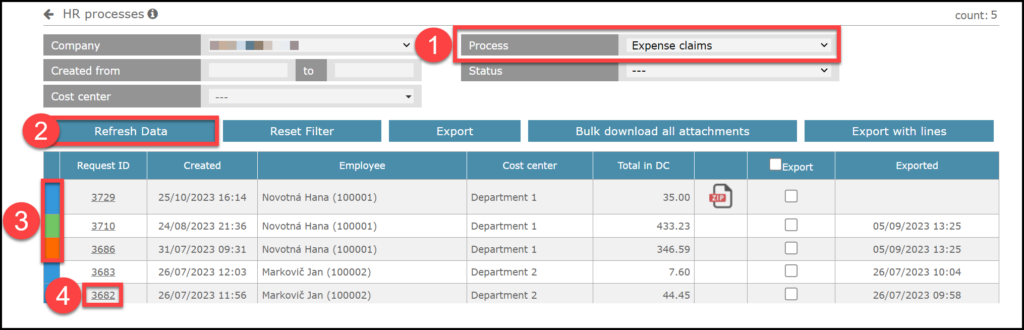
- SELECT PROCESS – EXPENSE CLAIMS
- Refresh data – Select filters and then click this button to use selected filters.
- Status – completed / witing for approval / declined.
- Request ID – click on the ID number to display the request.
Export
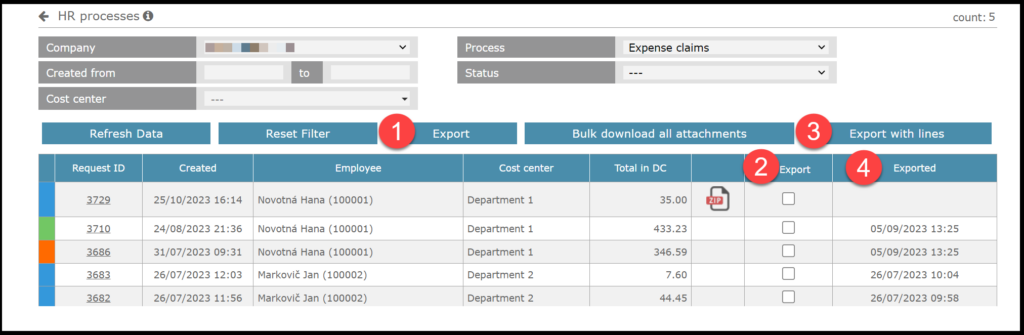
Managers and Finance department can use the feature to EXPORT the data.
- Export button – Export all currently filtered, displayed data from this report without individuaô amounts or details of requests.
- Export column – Select (number 2) checkboxes and then click (number 3) Export with lines.
- Export with lines – Export the individual amounts and details of expense claims.
- Exported – After you export the file, a timestamp will display in this column.
Attachments
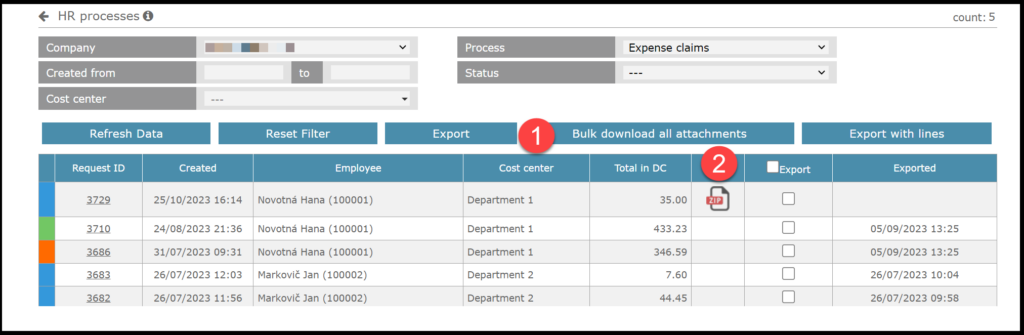
Managers and Finance department can use the feature to download attachments of the requests.
- Bulk download all attachments – download all currently filtered attachments from the report.
- ZIP file – Click on the individual ZIP icon in a row to download individual attachments.